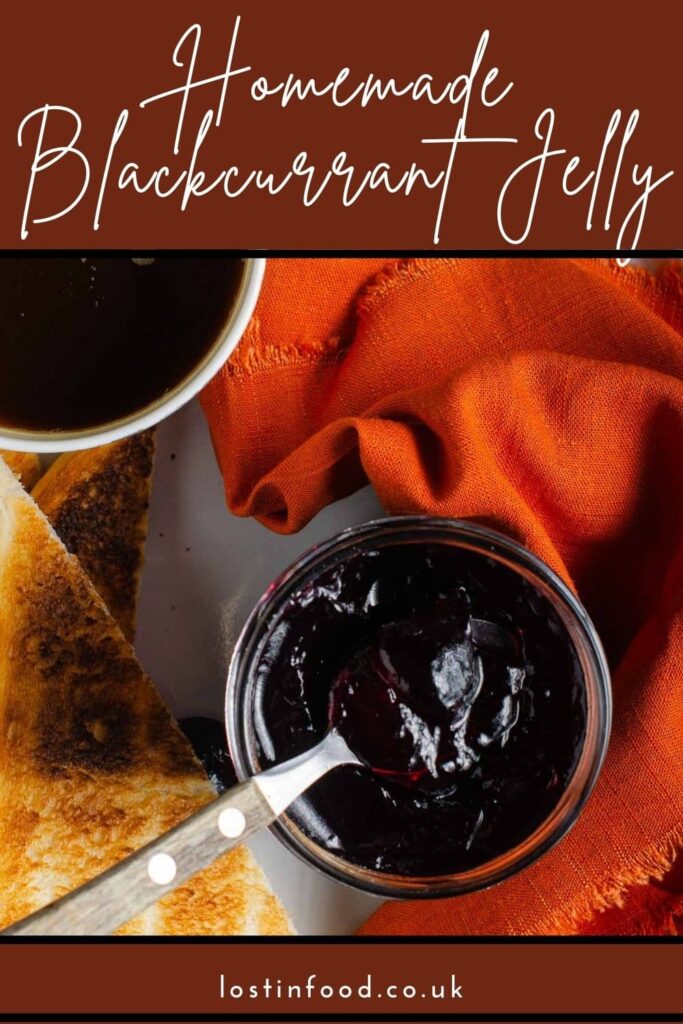

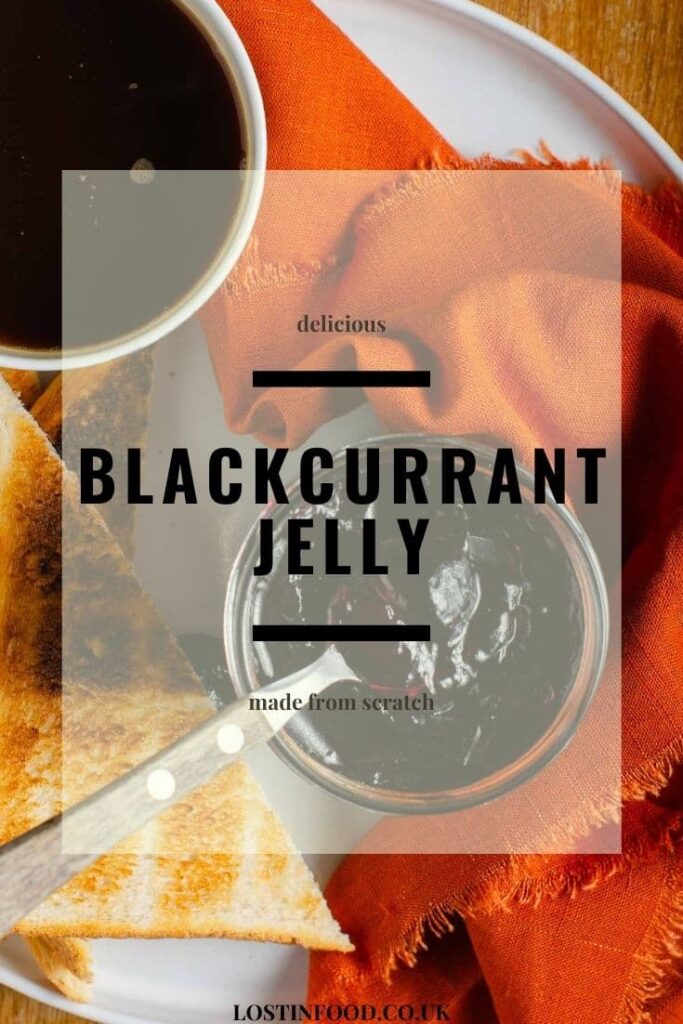
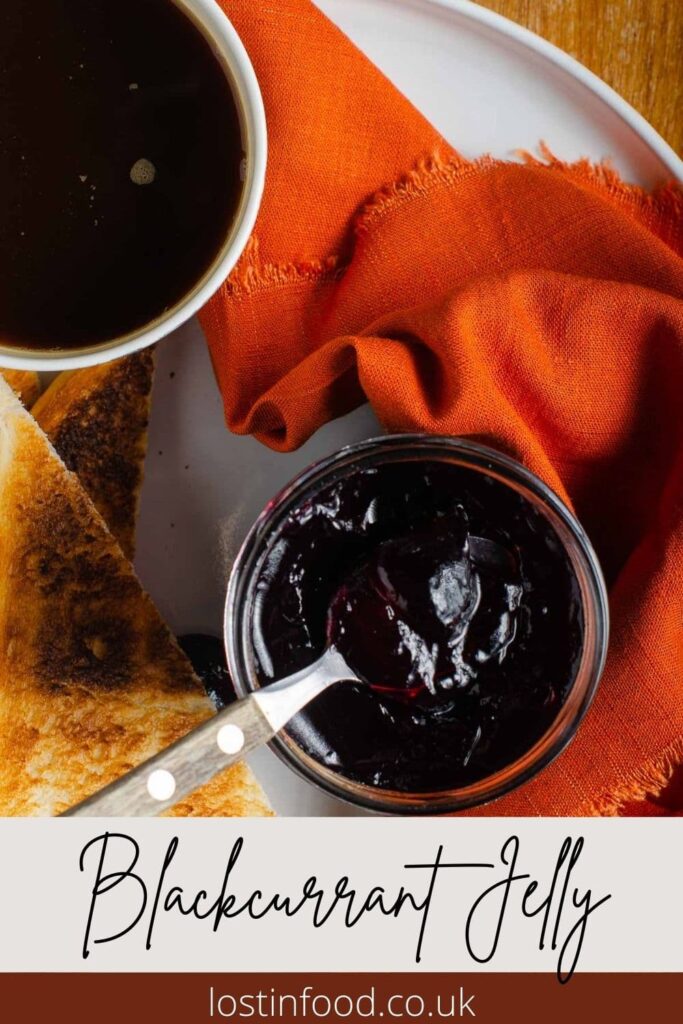
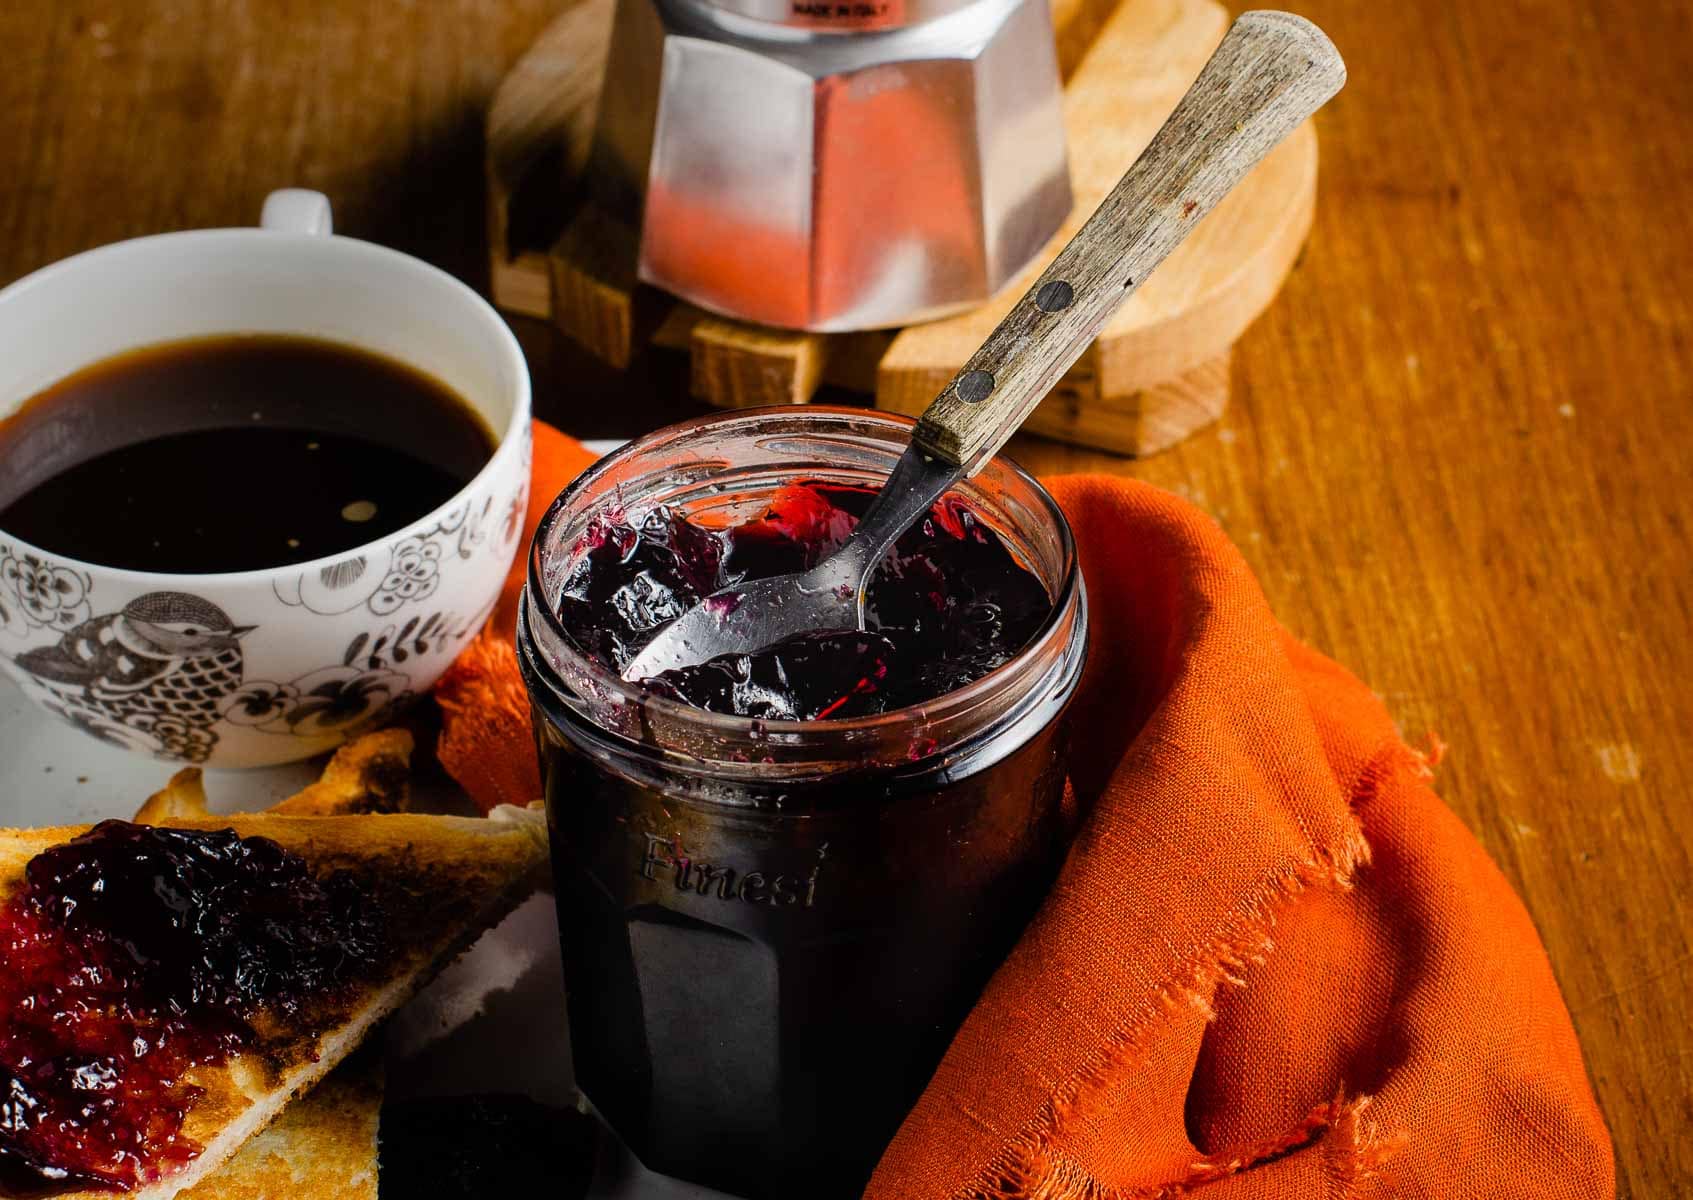
Homemade blackcurrant jelly is one of the tastiest jellies you can make. Nothing beats homemade jellies and this one is top of the taste list every Summer!
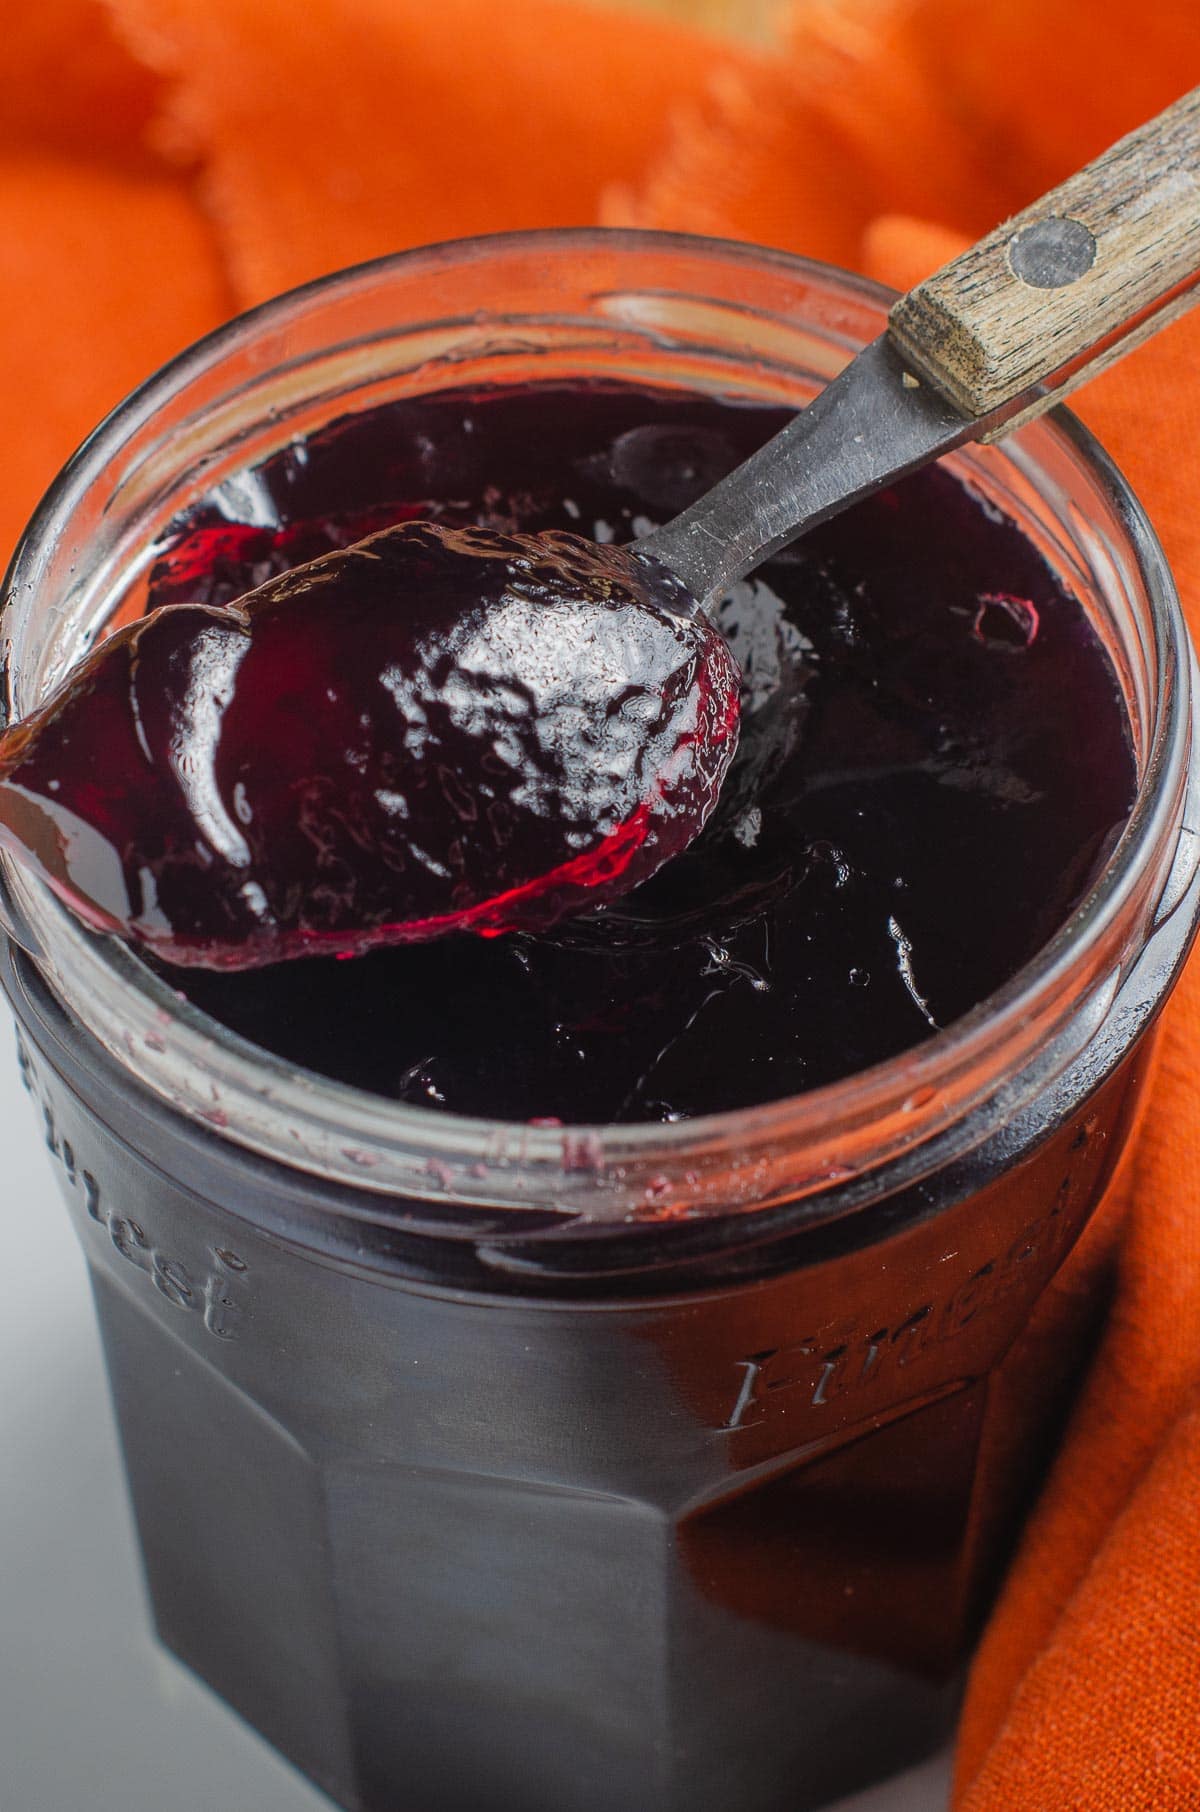
Homemade blackcurrant jelly is one of my favourite jellies to enjoy, I just love the flavour of blackcurrant and it works really well in either a jelly or a jam. Hand me a jar of either and I'm perfectly happy!
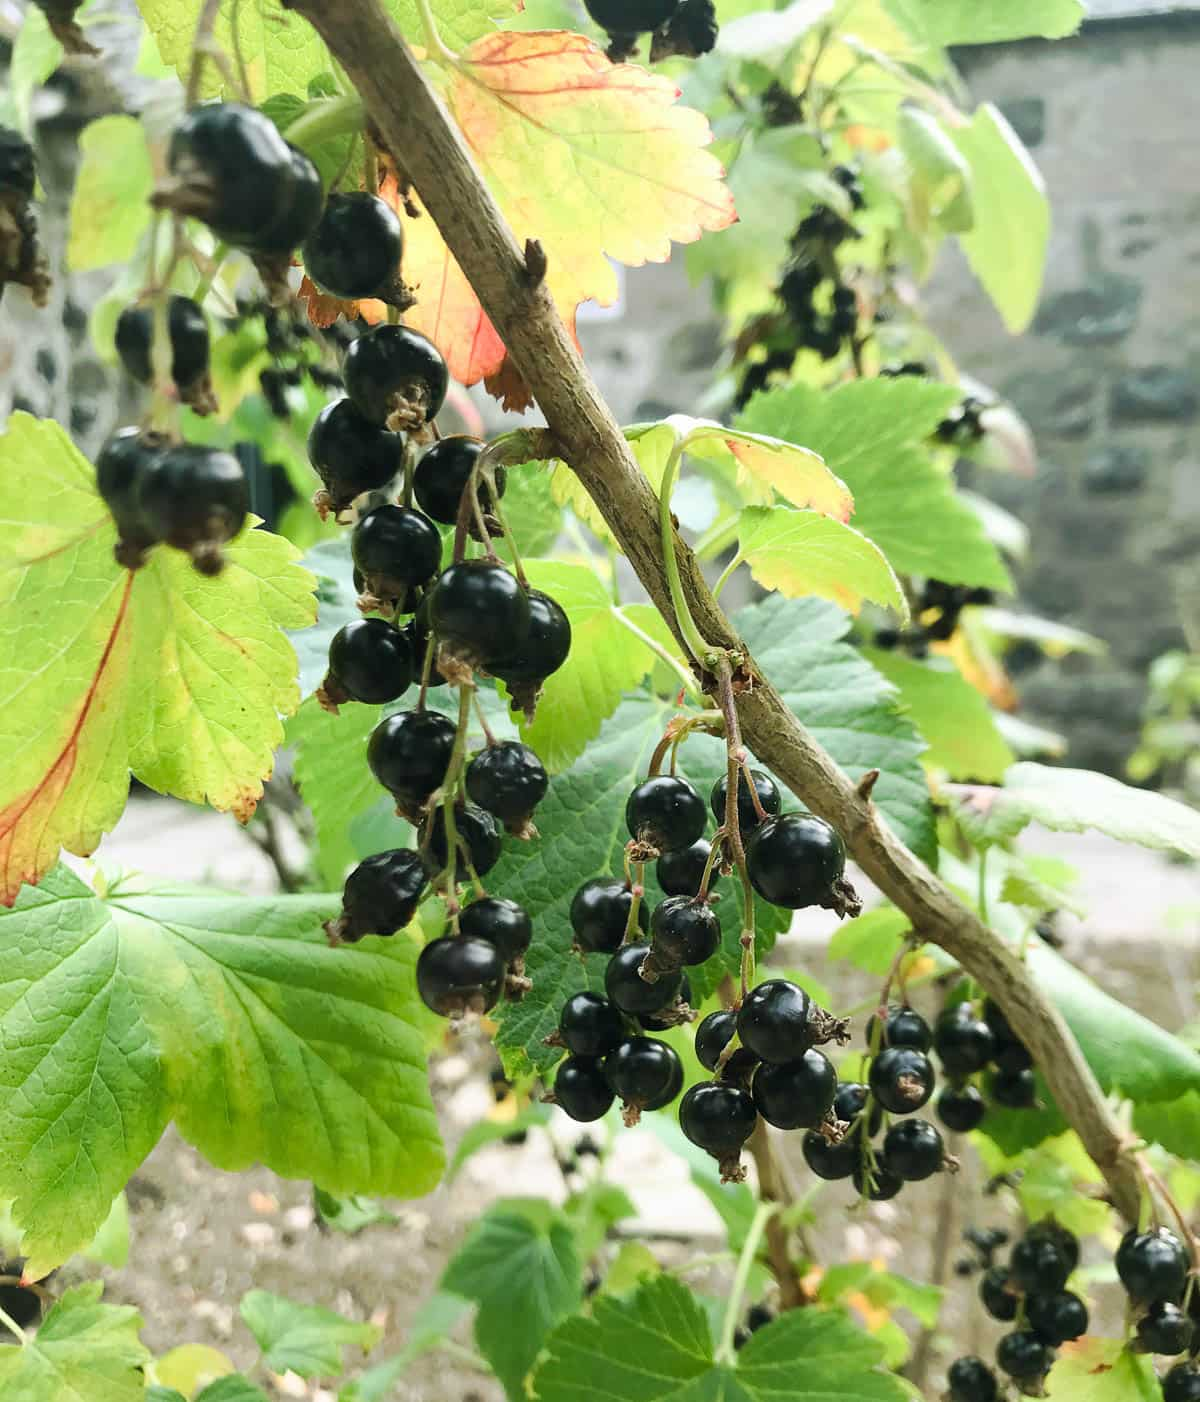
Blackcurrant bushes grow to quite a large size, you need room to grow them. I don't have enough space in my own garden to grow a couple of bushes, but if I did I would have at least two!
Instead I have to buy the berries to make homemade blackcurrant jelly.

This easy blackcurrant jelly recipe takes a little longer to prepare than jam as you have to strain the fruit juice. However, I can assure you that this extra effort is more than worth it.
Setting up the equipment to make jelly:
Key to the success of any jam or jelly making is time. This is not a job to start when you've other things to do.
Any experienced jam maker will tell you that once you start you give yourself time to just concentrate on the jelly! Take your eye off the ball and it won't end well!
Get all your equipment looked out and set up before you start. Ensure you have everything to hand and jam jars with tight sealing lids, ready to sterilise!
Easy blackcurrant jelly recipe steps:
- When the jelly reaches a temperature of 104.5C/220F test the set of the jelly and if it wrinkles, decant the jelly into jars.
- When testing the set take the pan off the heat to stop the jam from overcooking. If you think the jelly is a little loose then return the pan to the heat, bring it back to a rolling boil for 10 minutes and test again.
- Cover the top of the seedless blackcurrant jam with a wax disc and seal with a tight fitting lid.
How to prepare the blackcurrant juice?
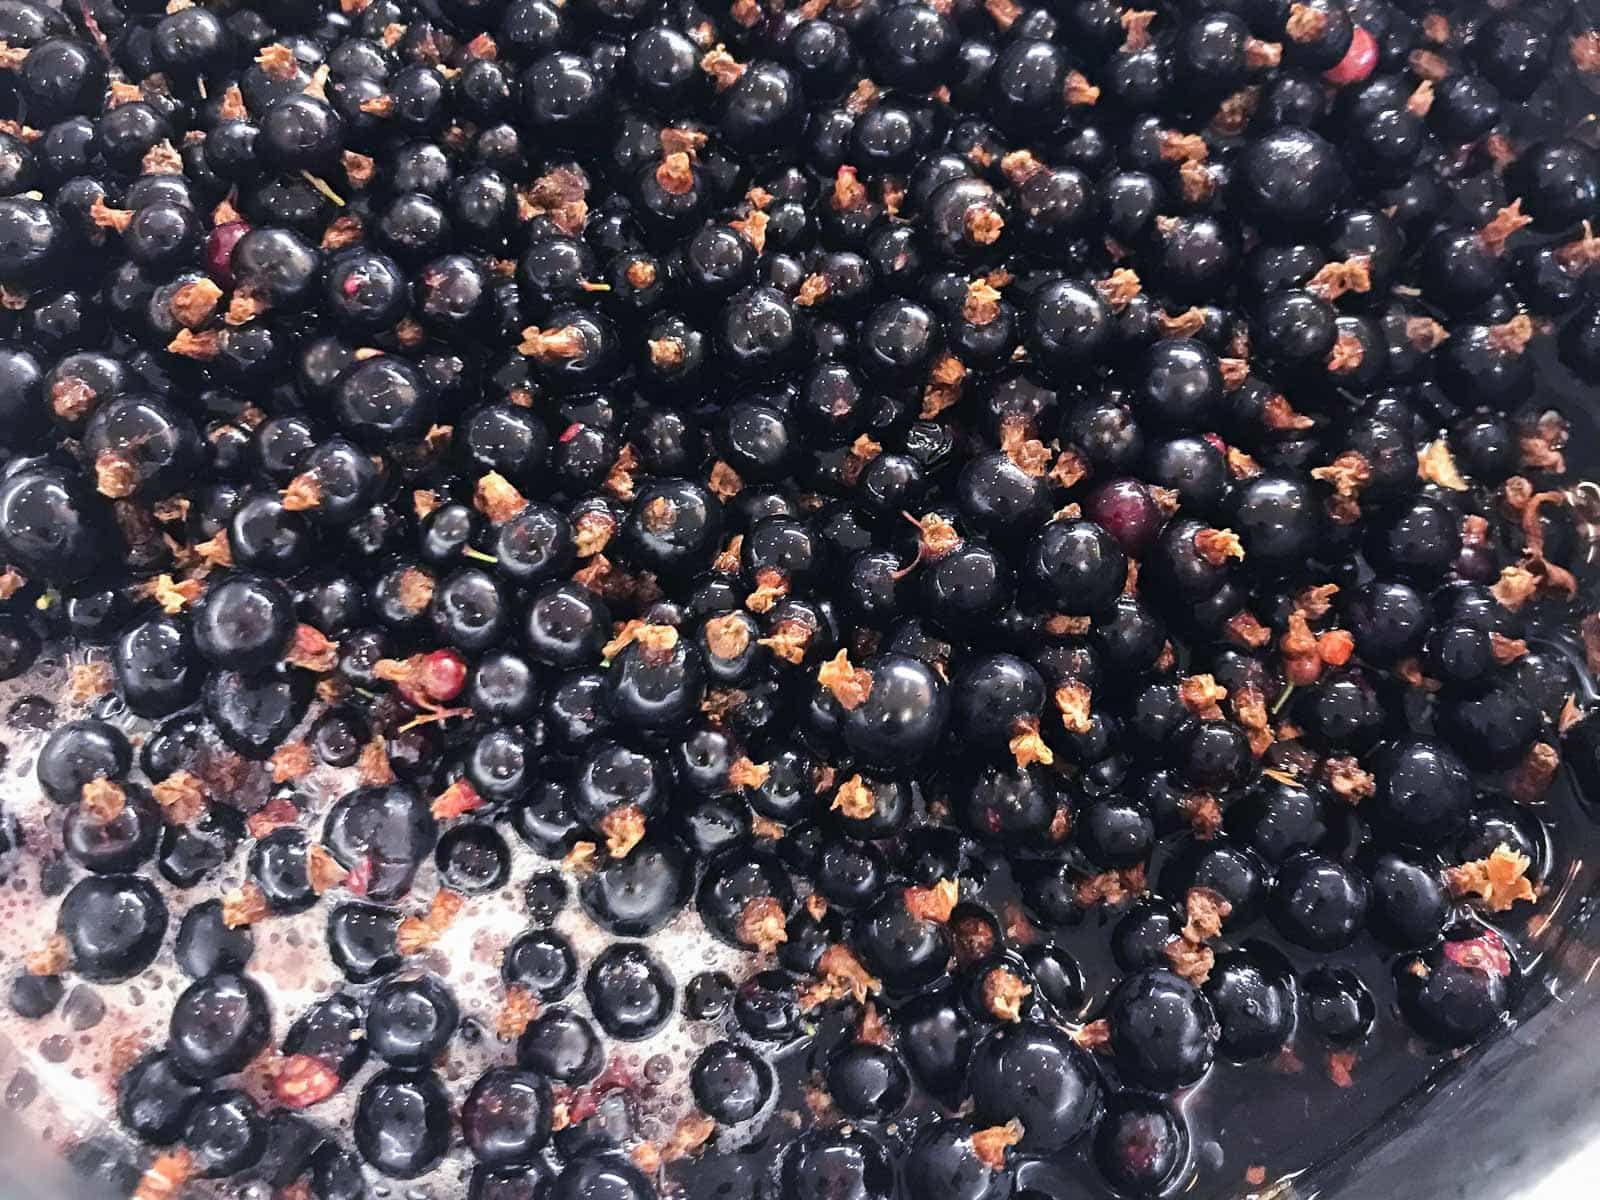
Homemade blackcurrant jelly is easy to make, and the blackcurrants are easy to prepare. Place the blackcurrants in a sieve and run them under some cold water to give them a gentle clean.
Next place the blackcurrants into a large saucepan or jam pot and add the water cover the berries with water and bring to the boil. This recipe uses 2.5kg of berries to 1ltr of water. Once boiling, reduce the heat and simmer the berries for 20-25 minutes.
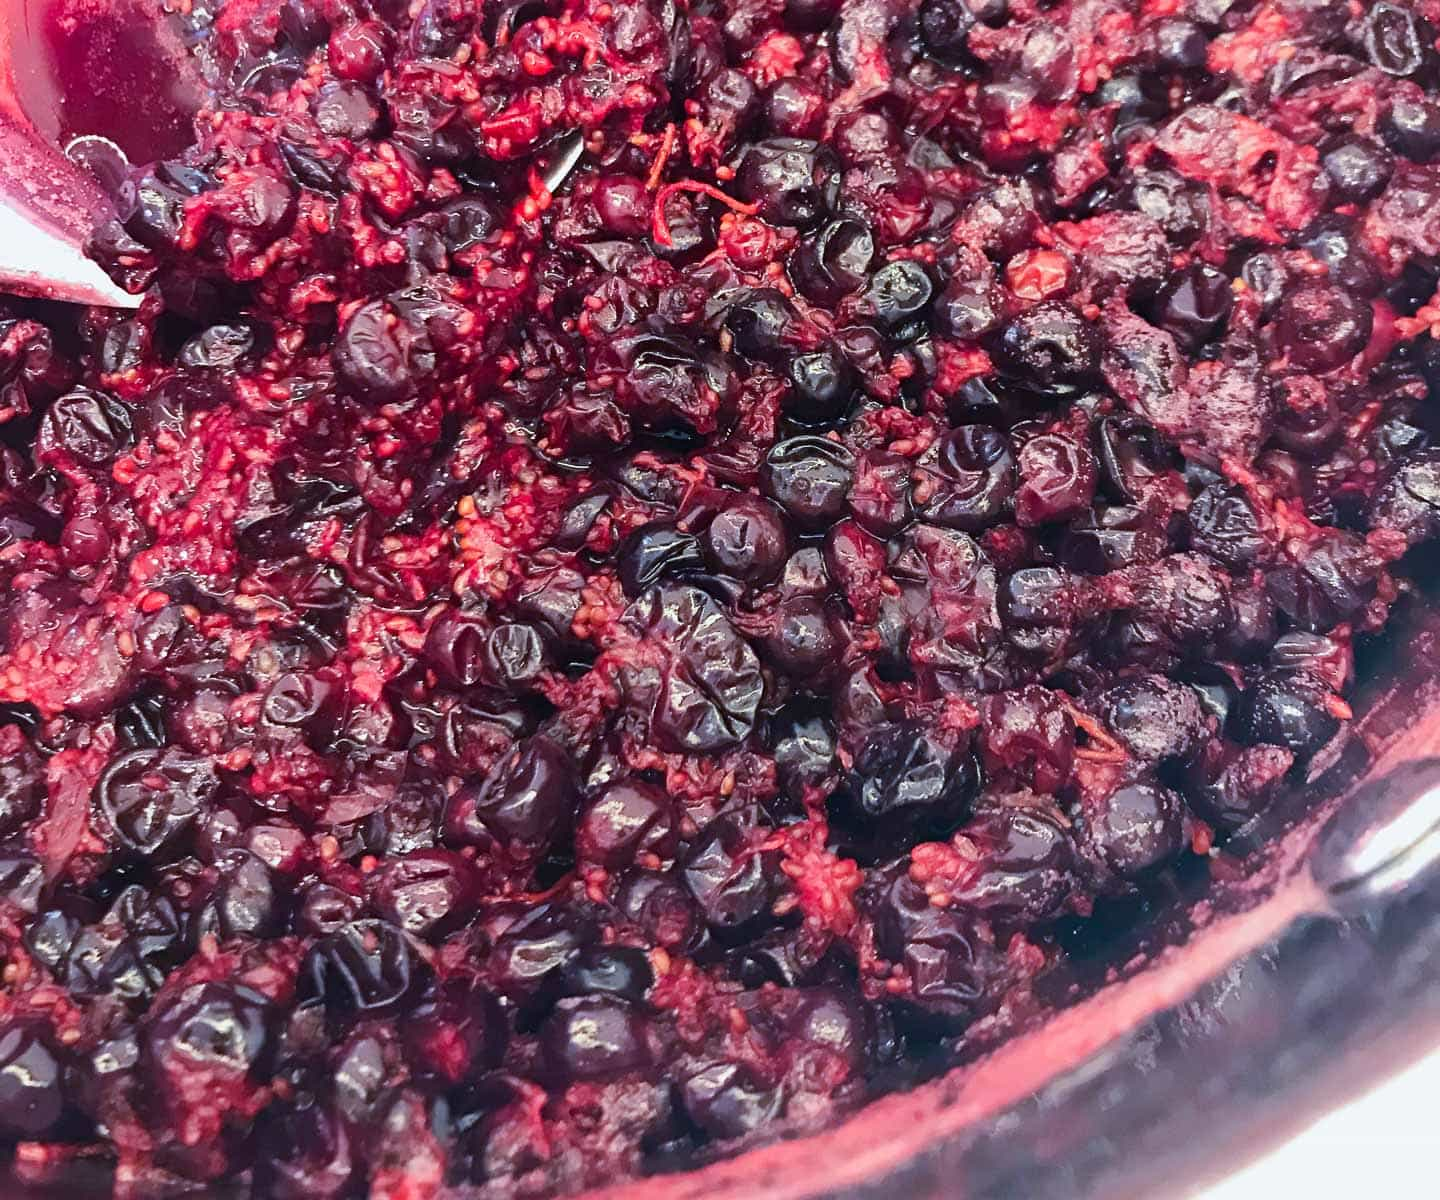
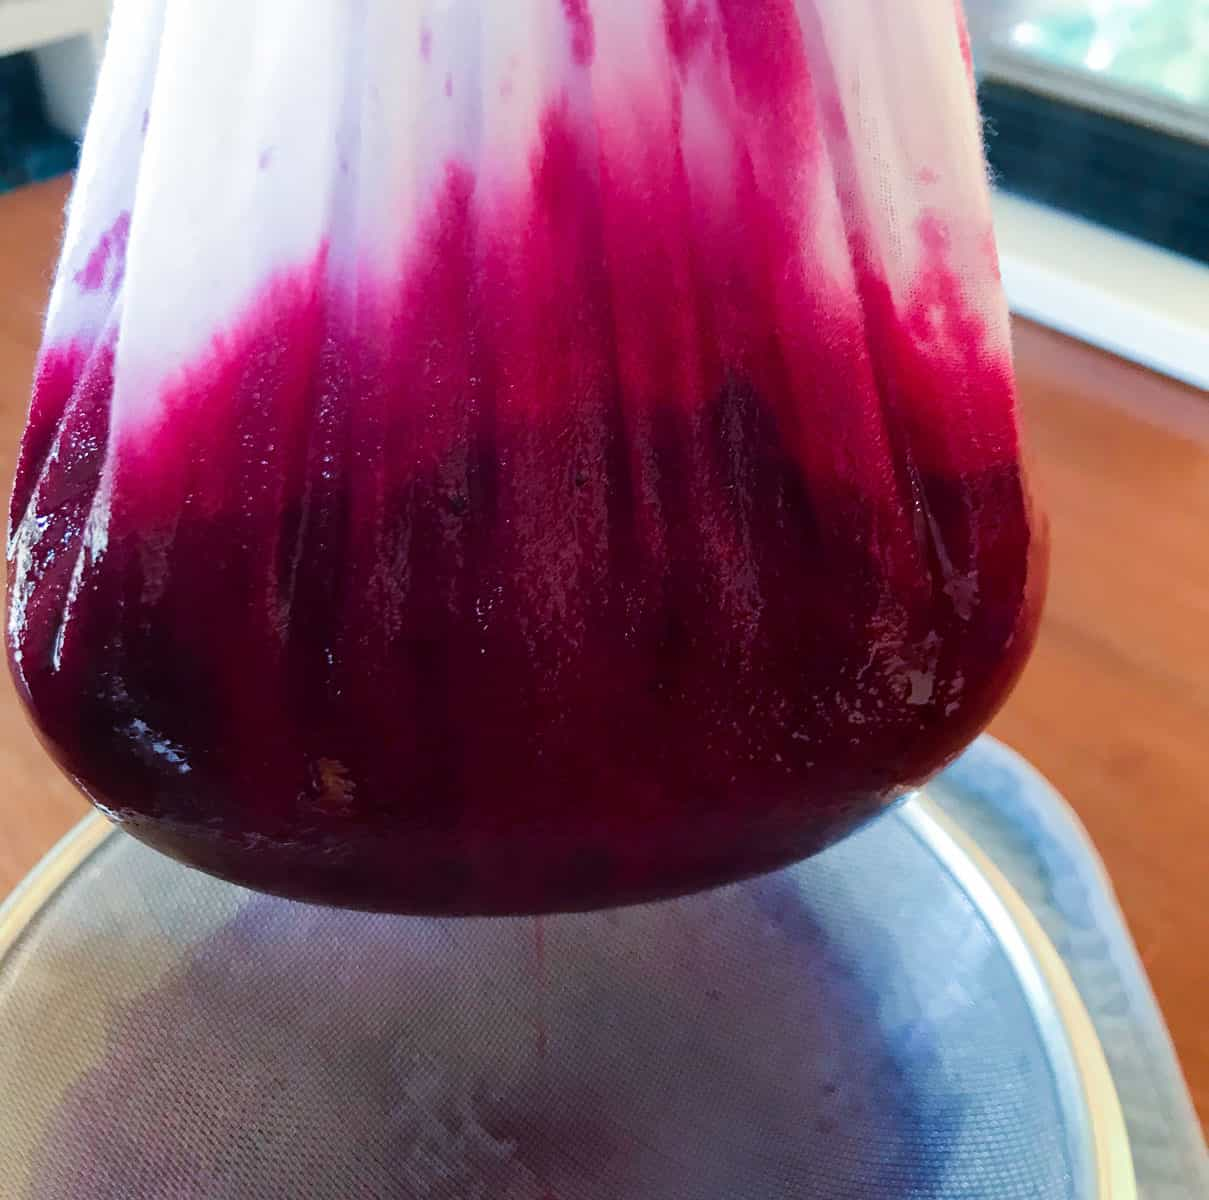
Once softened remove the blackcurrants from the heat and spoon the berries and their liquid into the jelly bag, catching the strained liquid in a clean bowl set below the bag.
Jam sugar:
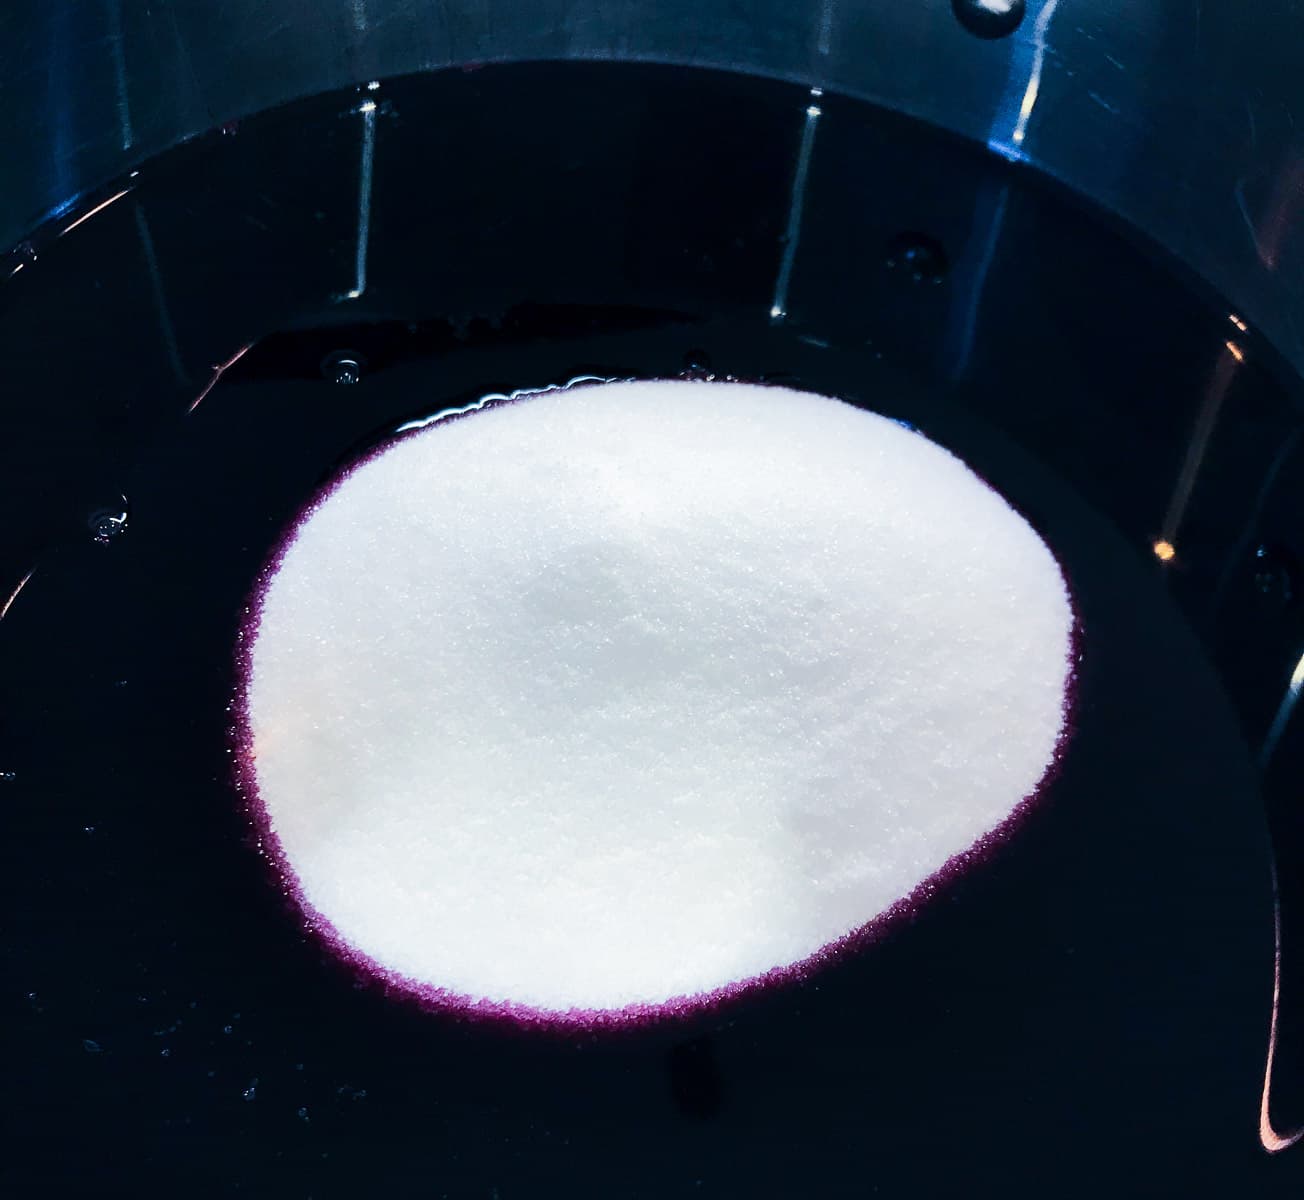
Sugar is used to preserve the fruit, it is what allows you to keep and store jam. Traditionally jam making uses equal amounts of sugar to fruit, or in the case of a jelly a pint of fruit juice to a pound of sugar. The amount of sugar used determines the set of the jam. I have always used granulated sugar when making jellies and jams. Granulated sugar is cheaper and melts quickly.
Some fruits like apples, blackberries and blackcurrants are naturally high in pectin, meaning that the jam will set easily. (However, if making something like Scottish raspberry jam, you will need to add in pectin and this is done by adding a little lemon juice to the raspberries and the sugar.)
You can buy jam sugar which has added pectin, however in my experience it can result in too firm a set. For this reason I prefer to use granulated sugar and if necessary add a little lemon juice. It is also a lot cheaper.
How to achieve a clear jelly?
Top tip when straining blackcurrant juice:
When straining the blackberries DO NOT push down on the fruit as this will result in a cloudy jelly. Simply allow the weight of the fruit to drain the juice through the jelly bag.
Top tip when boiling jelly:
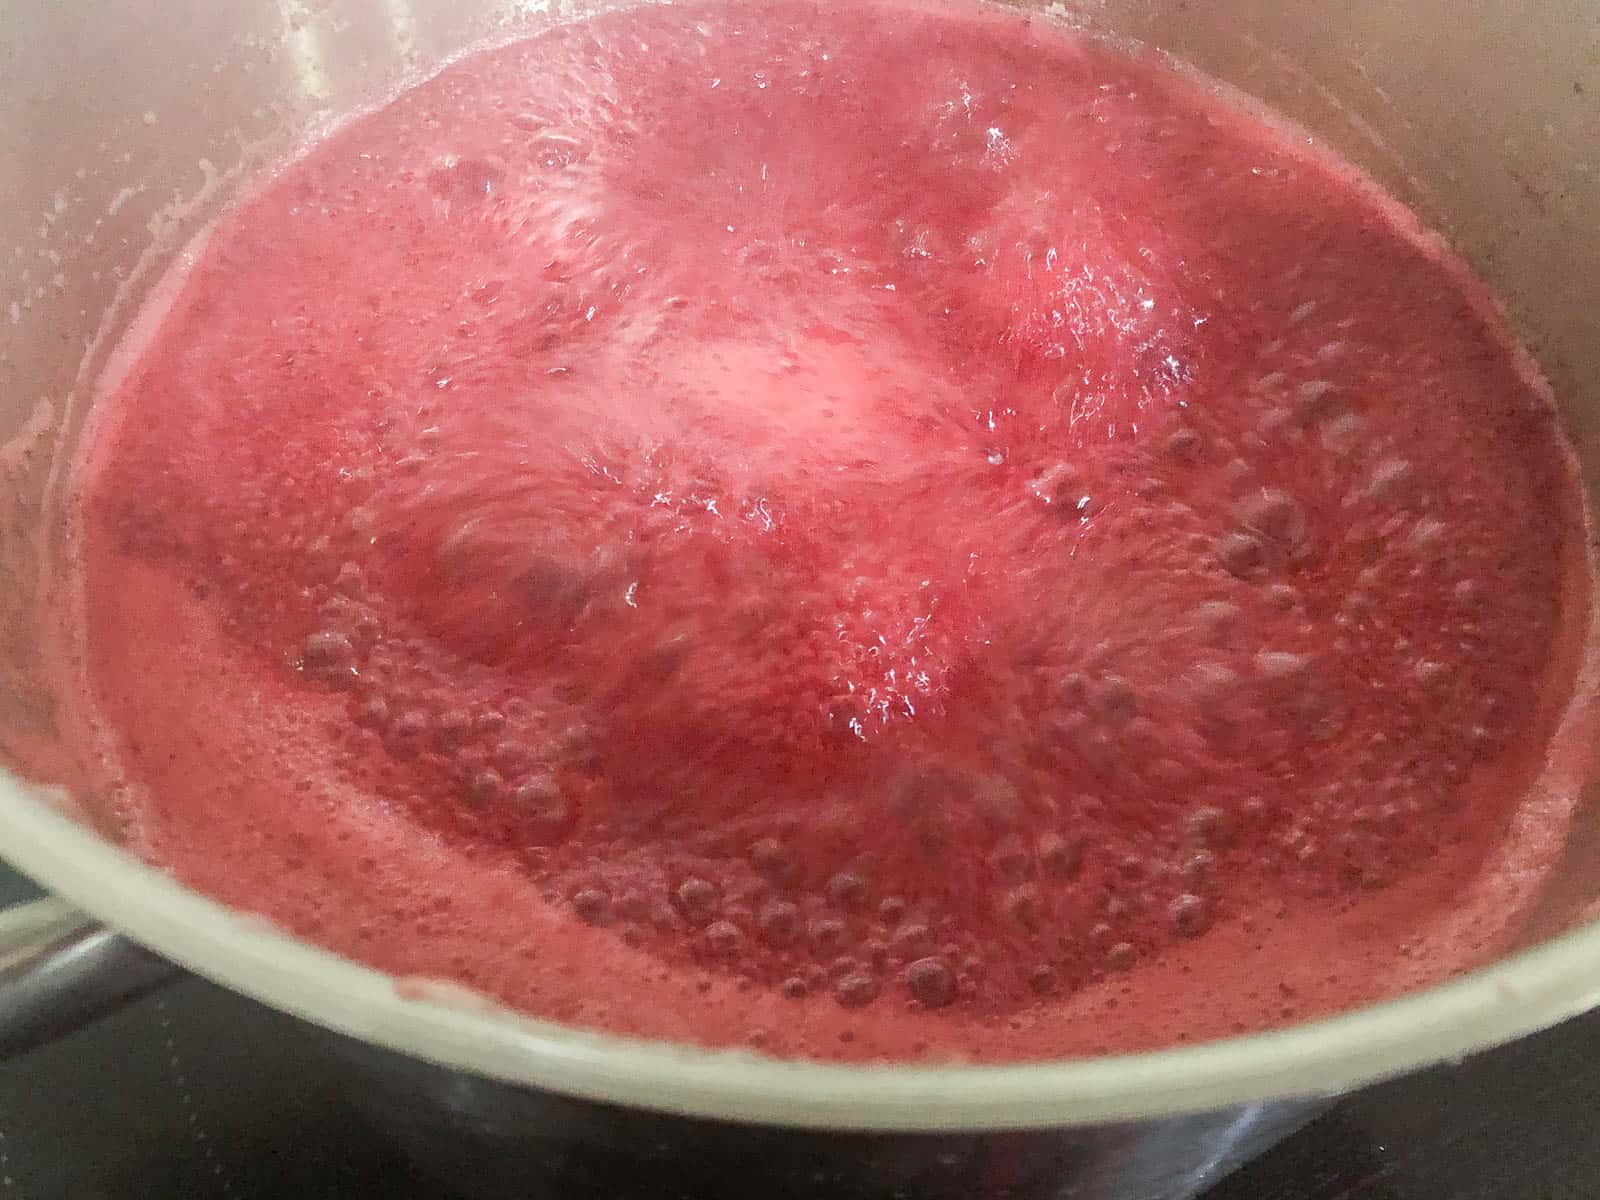
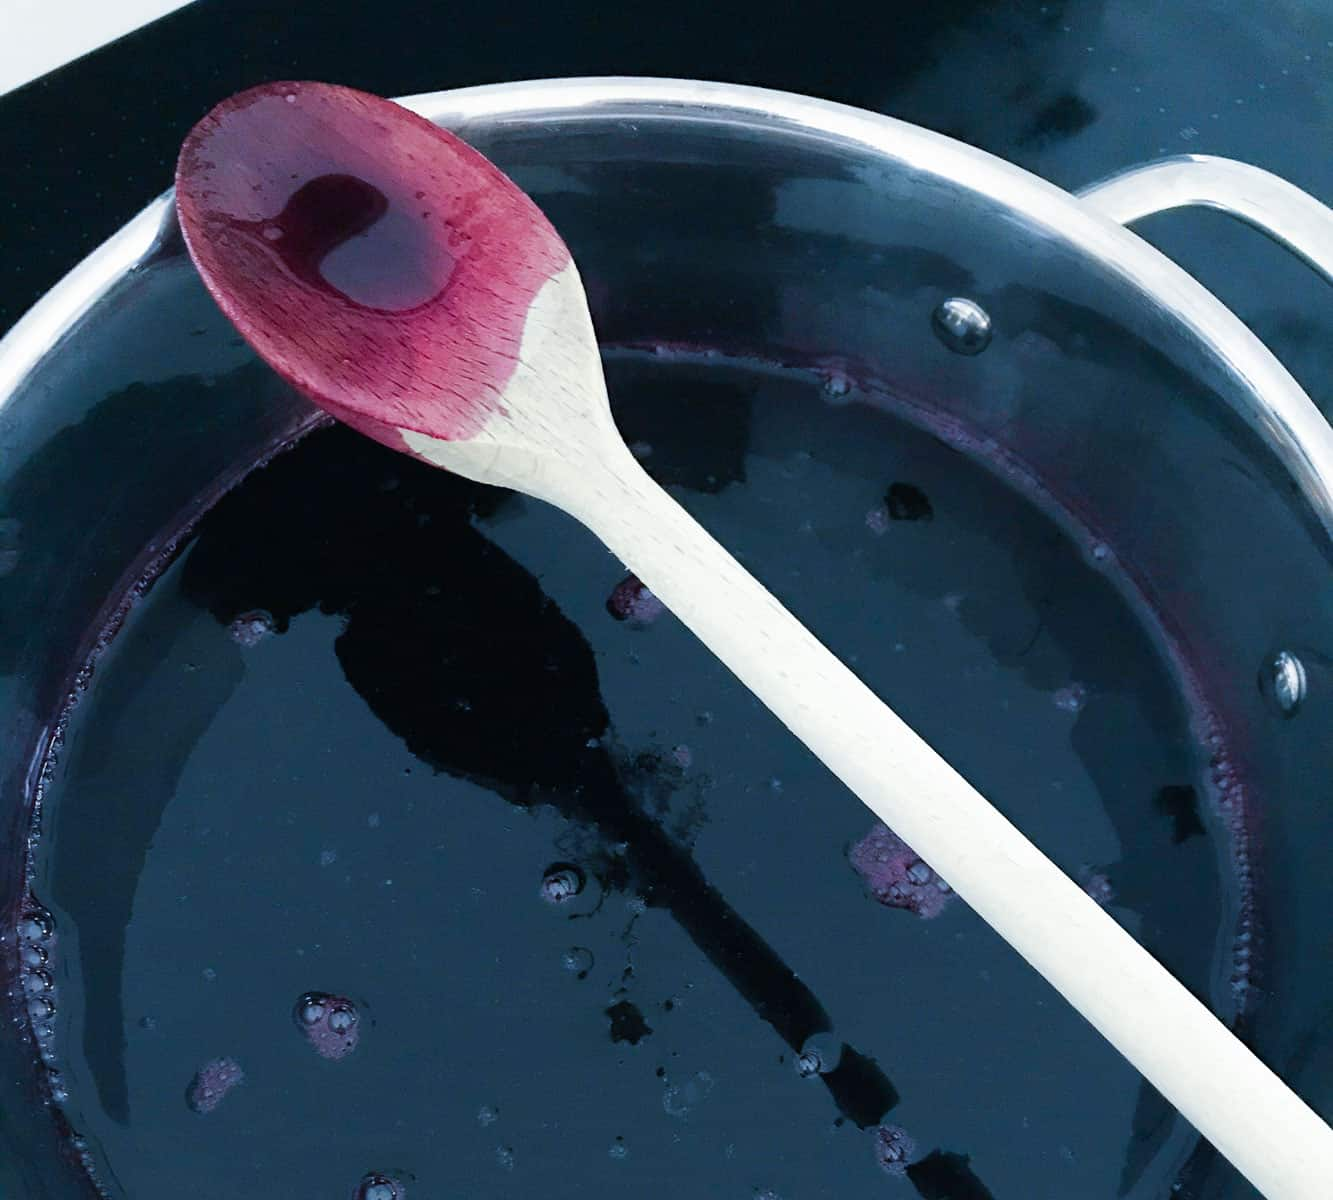
Next when making the seedless blackcurrant jam you are required to boil it. Some scum will rise to the top when doing this, so use a long handled spoon to skim off any scum. Whilst it will do not harm if eaten, it makes a very cloudy jelly.
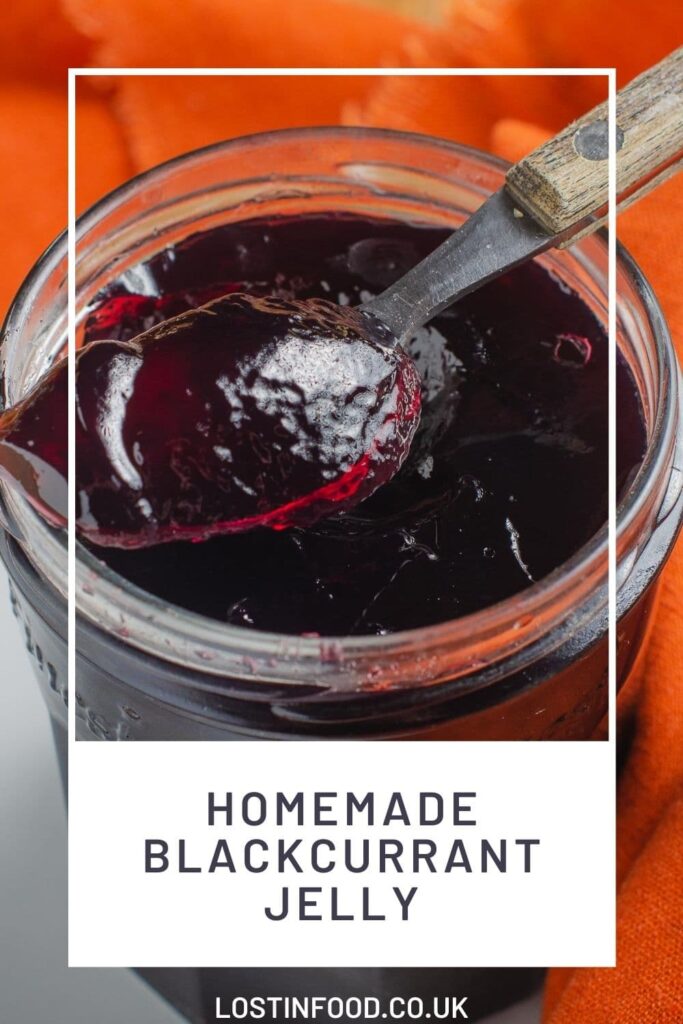
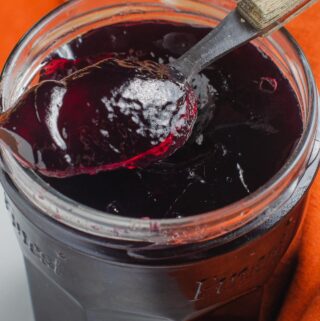
Testing the set of jam or jelly?
Knowing when jam and jelly is ready to take off the heat and testing the set of jam is the trickiest part of the whole process. One that you get better at as you become more experienced.
I always use a jam thermometer. It really is the only way to check your jelly or jam has reached the required setting temperature. The setting point for jam is 104.5C/220F.
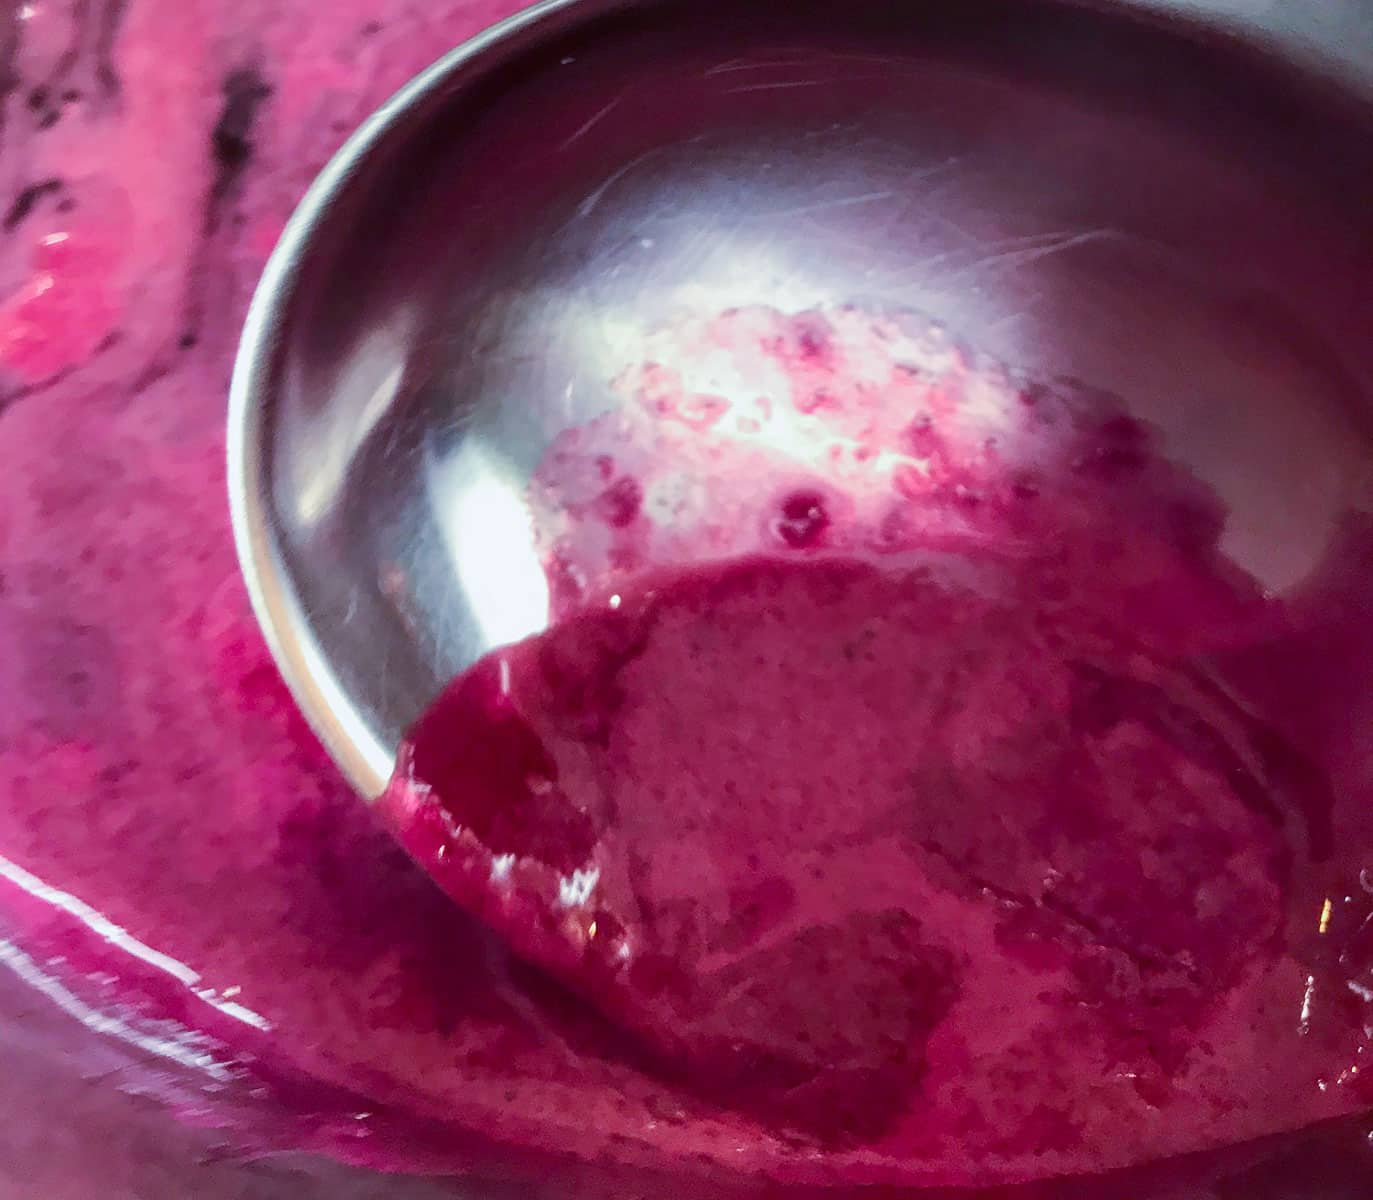
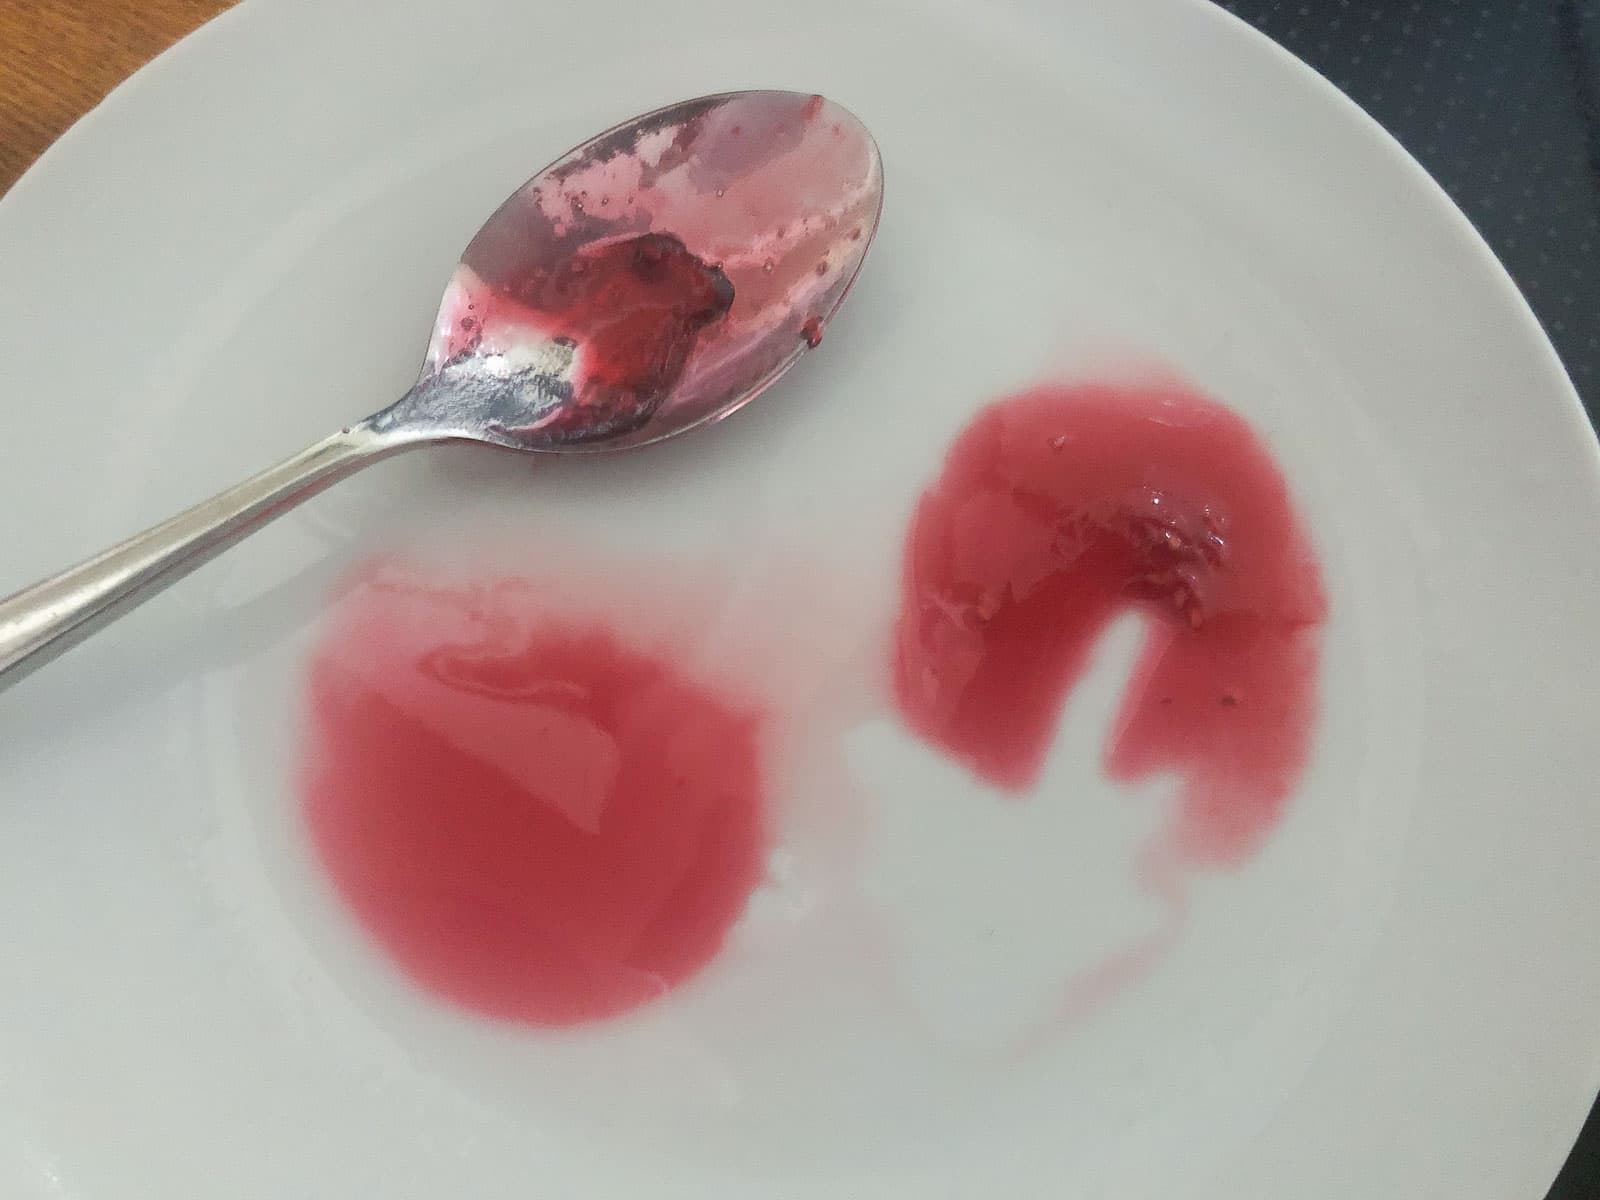
I like to use the wrinkle test. Place a plate in the freezer before you started making jam or jelly, take it out when you think the jam or jelly is almost ready.
Spoon some jam/jelly onto the cold plate, pop it back in the freezer for a minute or two, then take it back out and push the jam with your finger to see if it wrinkles. If it does then it's ready. For a firm set the wrinkle will hold in place. For a softer set the jam/jelly will just wrinkle.
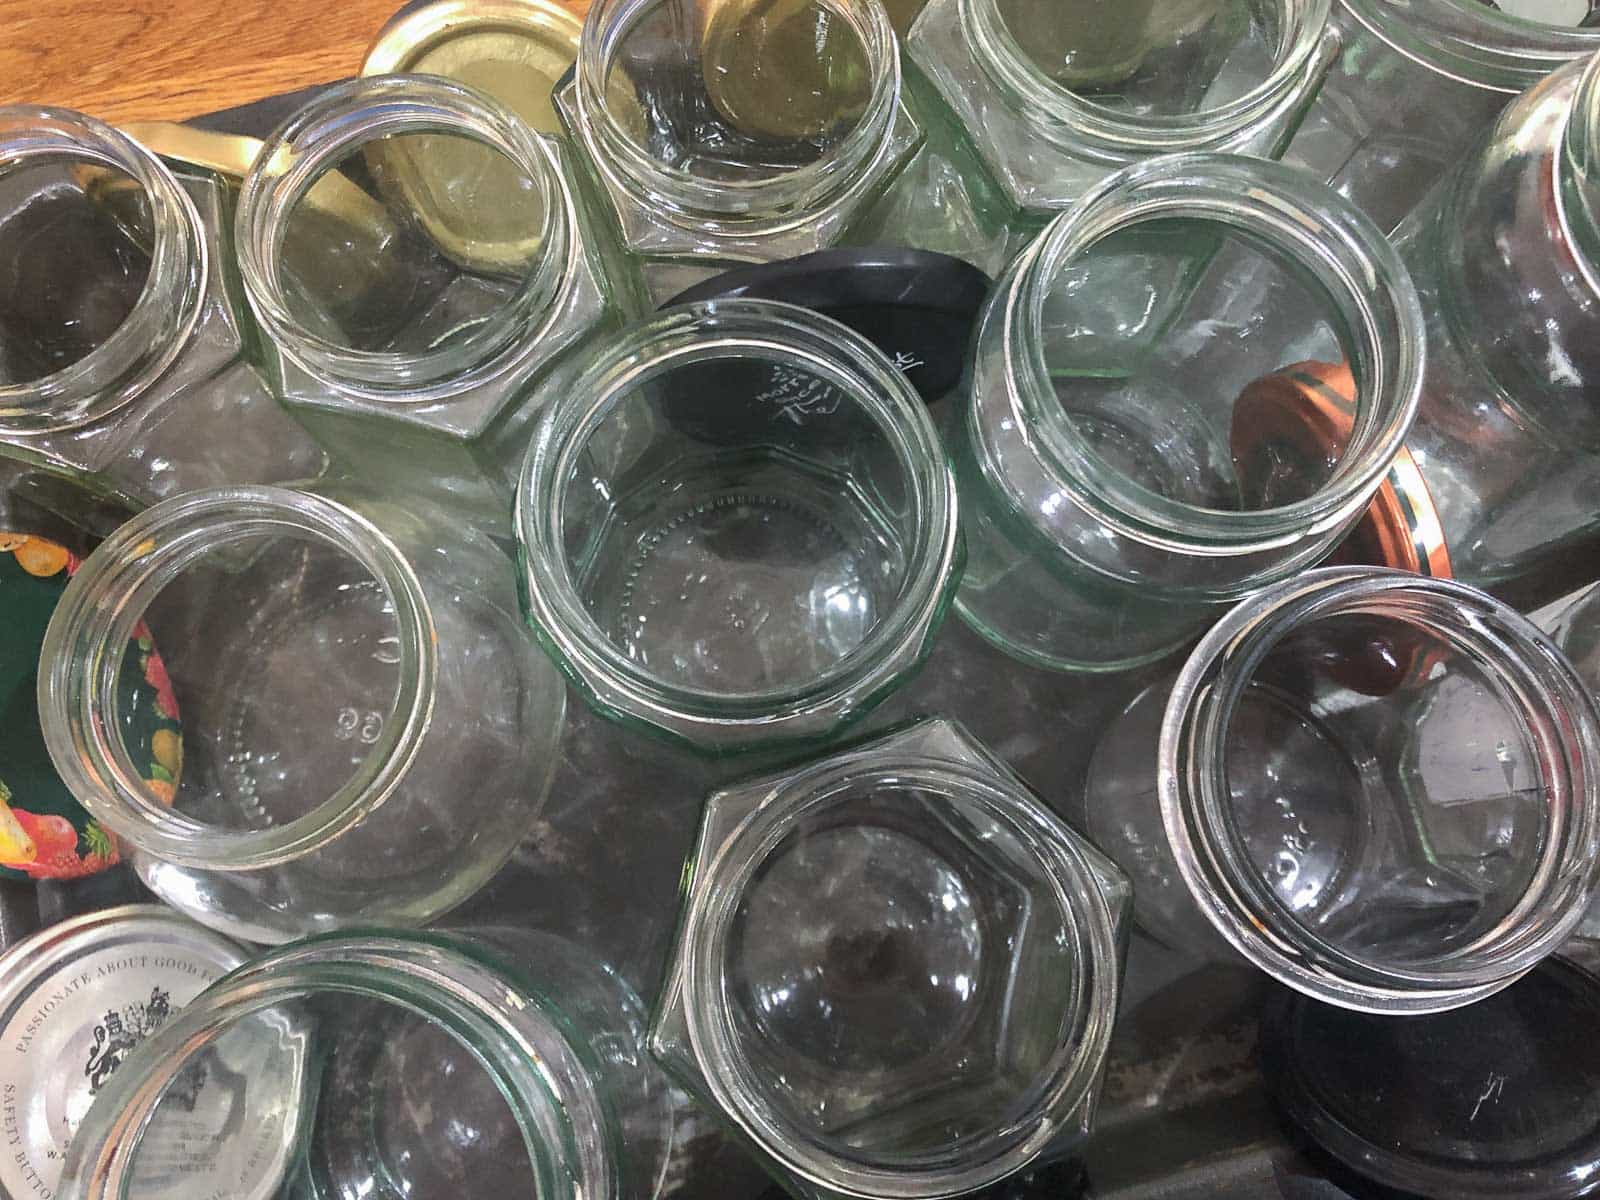
How to sterilise jars?
It is essential that before jarring or bottling any food for storage, that you sterilise the glass jar or bottle first. There are many methods for doing this, all of them relatively straight-forward:
- Firstly, you can wash the glass and lids in hot soapy water, rinse them (do not towel dry) and place on a tray in the oven at 160C for 15 minutes, removing when you are ready to fill. This is my preferred method.
- You can put them through a dishwasher cycle, removing them from the dishwasher as soon as the cycle has finished and filling them with jam immediately afterwards. I use this method if my dishwasher happens to be going on.
- You can boil the jars and lids in a large pan for 10-15 minutes. [I'm never keen on this method as it involves boiling water and leads to a risk of scalding.]
- Finally, you can wash and rinse the glass jars, placing them into the microwave wet and then cooking them on high for 60 seconds. However, the lids would have to be boiled in a pan of water separately for 10-15 minutes as metal cannot go in the microwave. [I have never used this method as it involves 2 separate processes which I think is a bit of a faff!]
Filling the jam jars:
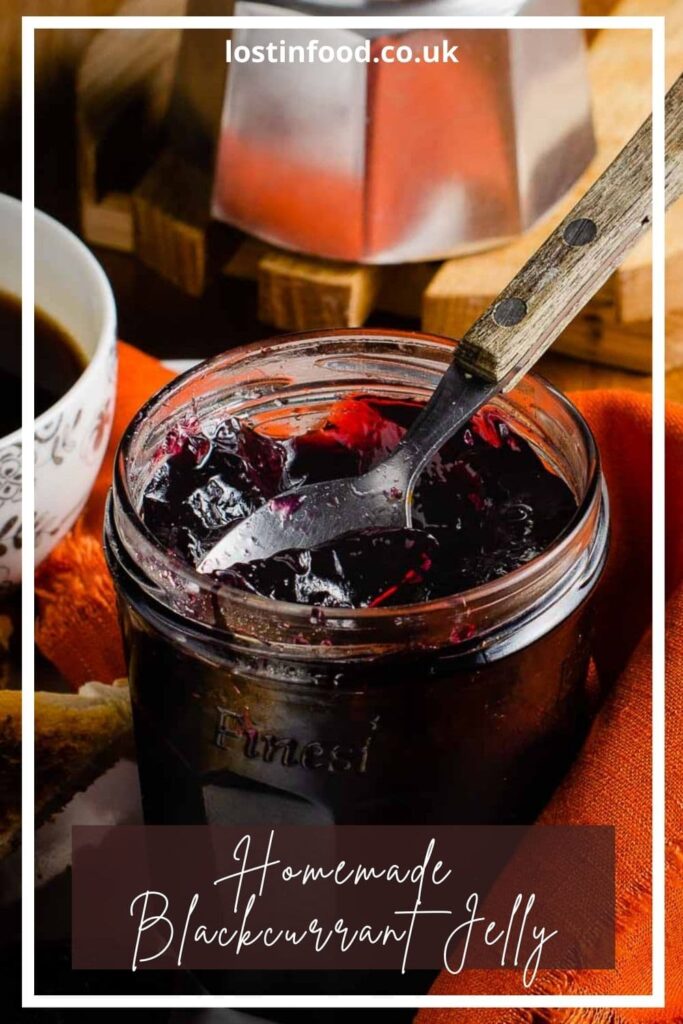
Finally take real care when decanting the molten jelly liquid into jars. You do not want to burn yourself, nor spill this liquid. I like to keep my jars in a metal baking tray with sides, that way if I do spill a little it doesn't run everywhere.
I also recommend using a jam funnel. The funnel is placed on top of the empty jam jar. It has a wide lip which then funnels the hot liquid down into the jar.
Place a wax jam disc over the top of the jam/jelly, this keeps the jam fresh and keeps air from spoiling it. Seal with a tight fitting lid and set aside to cool before labeling.
How long can I store blackcurrant jelly?
Sealed and stored in a cool, dry cupboard this jelly will store for 1 year.
Once a jar of blackcurrant jelly has been opened it should be stored in the refrigerator and used within a month or two.
Freezing the blackcurrant juice
If you don't have time to strain the blackcurrants and then make the jelly, then separate out the two processes. The blackcurrant juice can be easily stored in the freezer, ready to make the jelly at a later date.
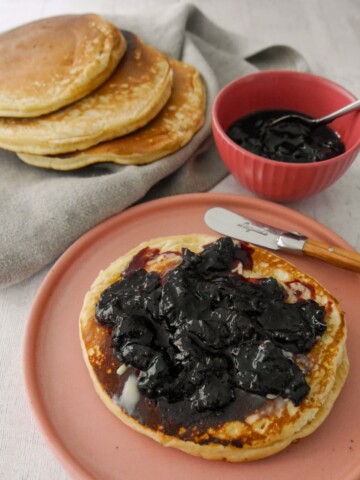
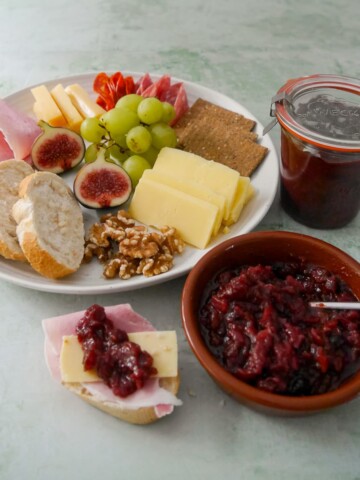
Other uses for fruit based jelly
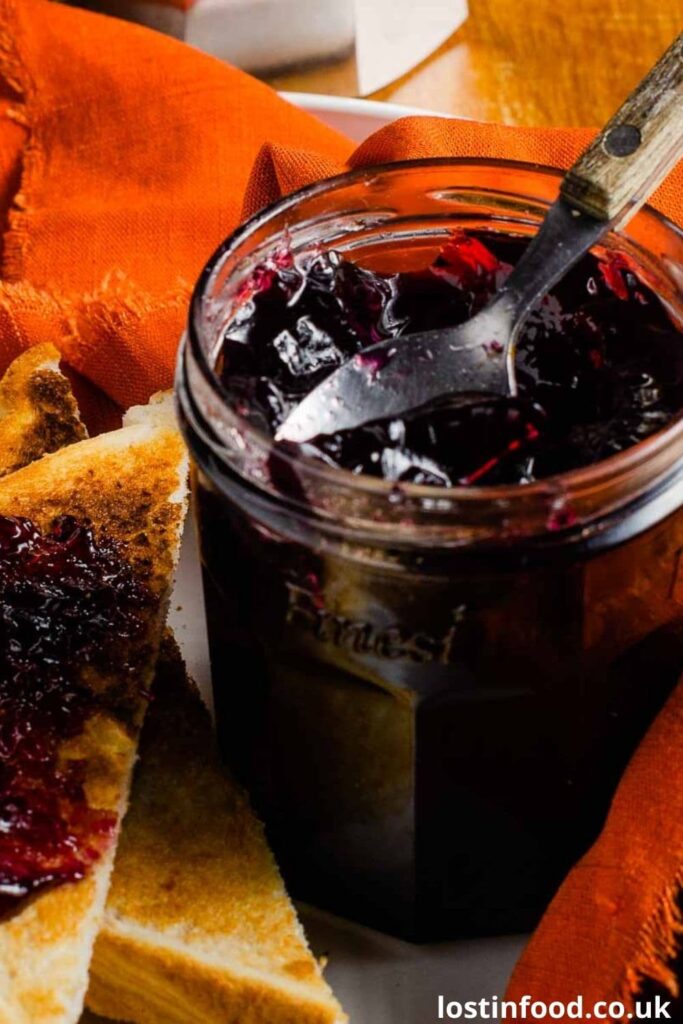
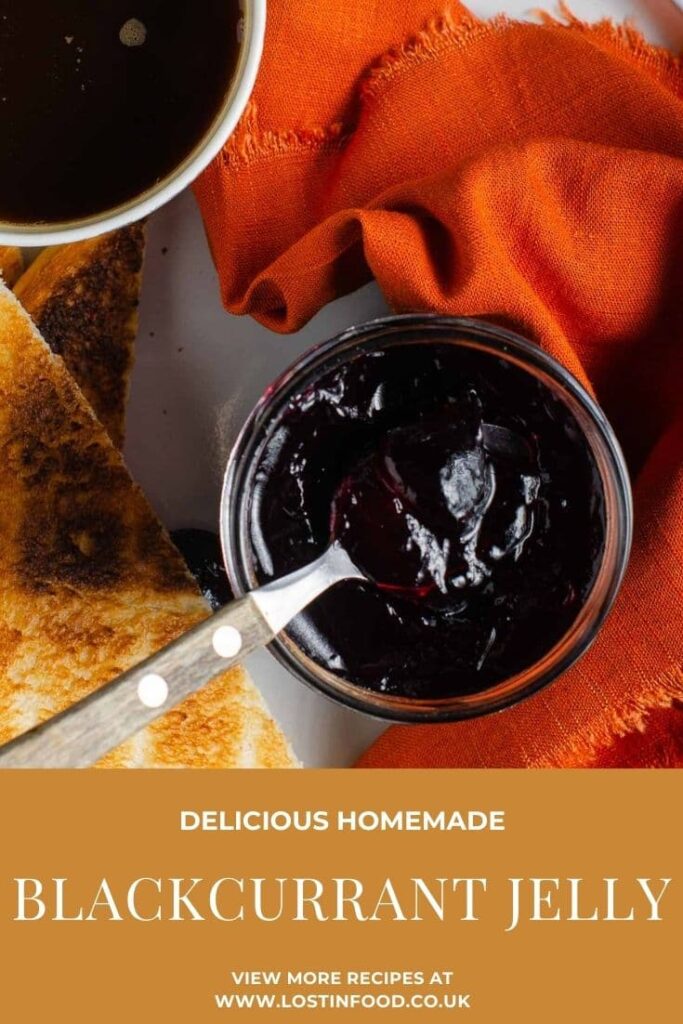
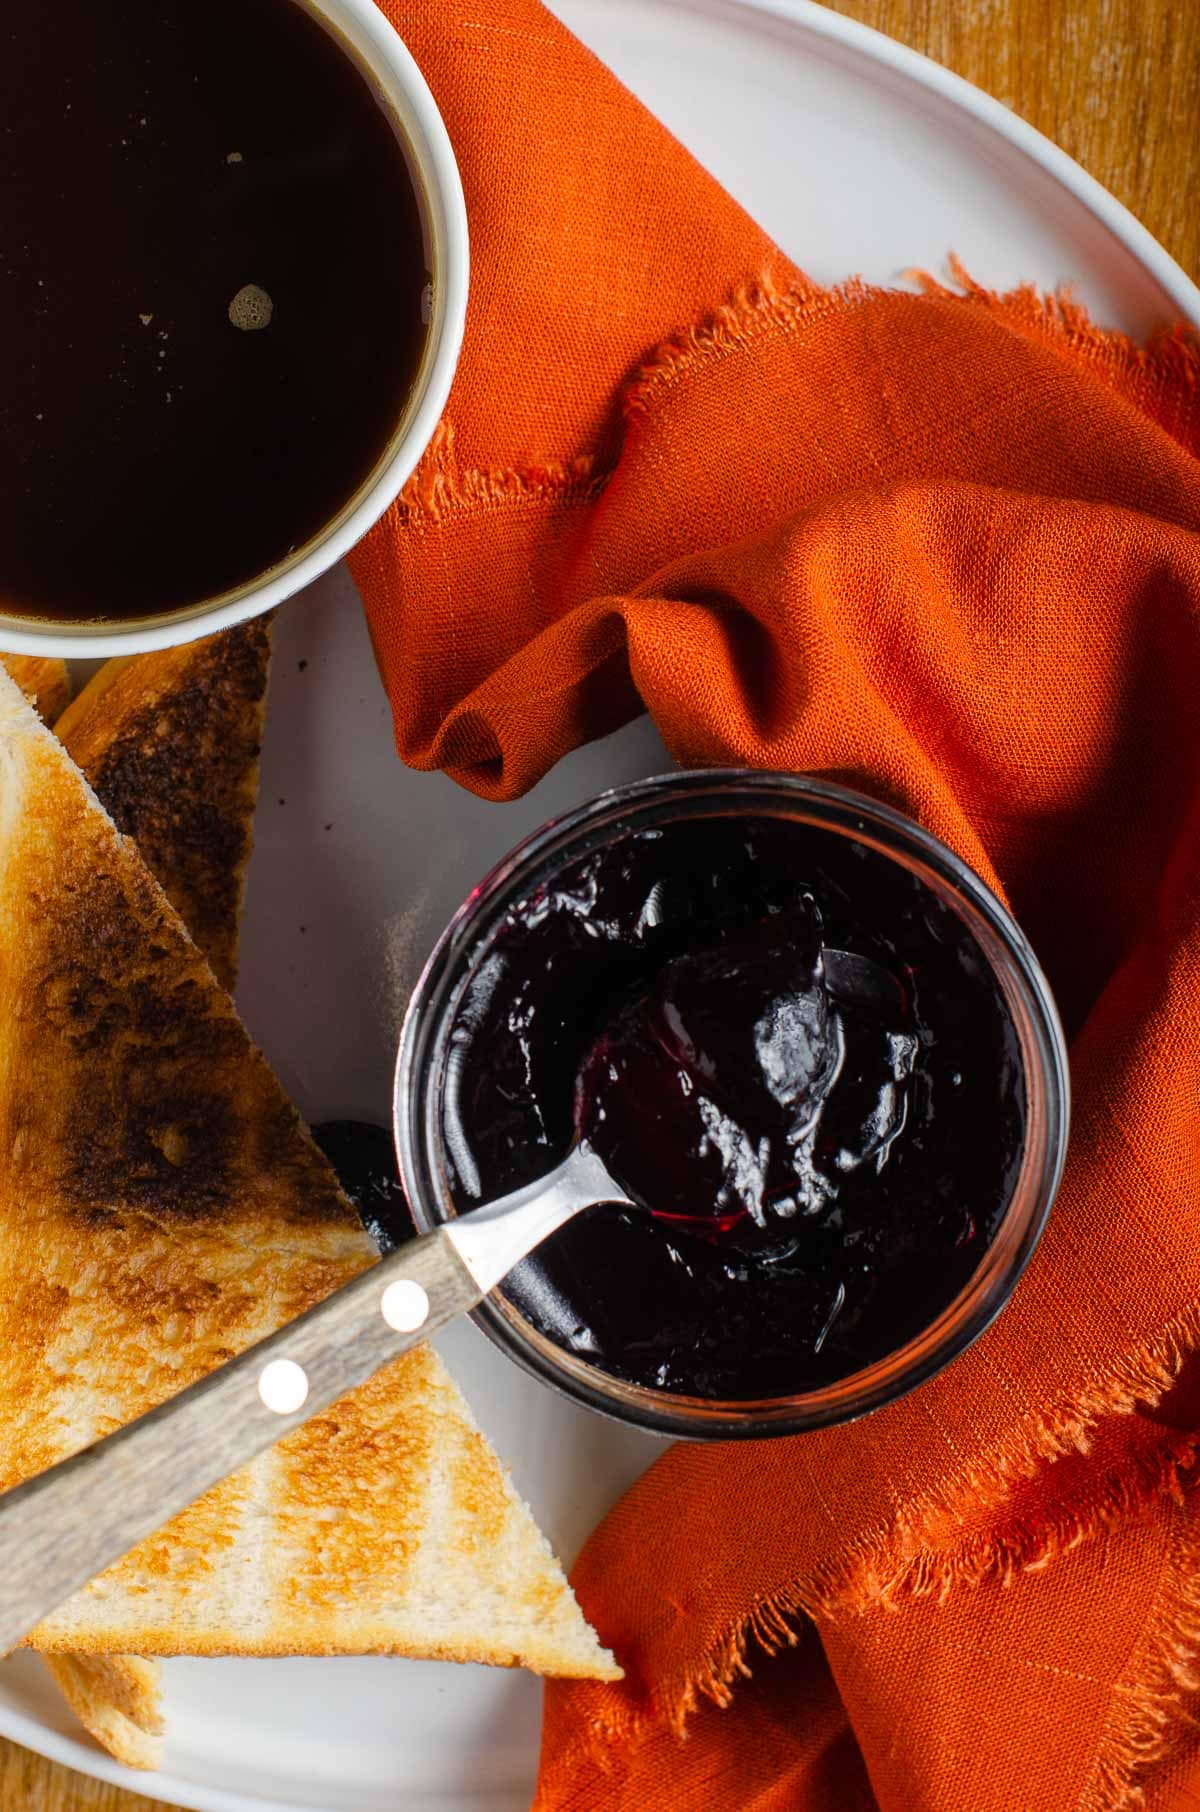
As well as enjoying seedless blackcurrant jam on some warm toast or freshly baked scones, I like to use jelly to flavour savoury cooking.
Add a spoon of blackcurrant jelly jam to any beef based sauce or gravy and you will elevate it.
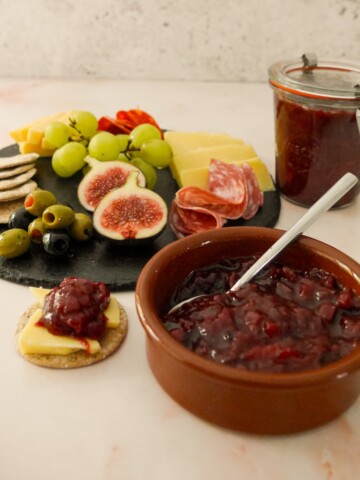
Blackberry jelly also works with goats cheese, so add some to a cheeseboard for something extra special.
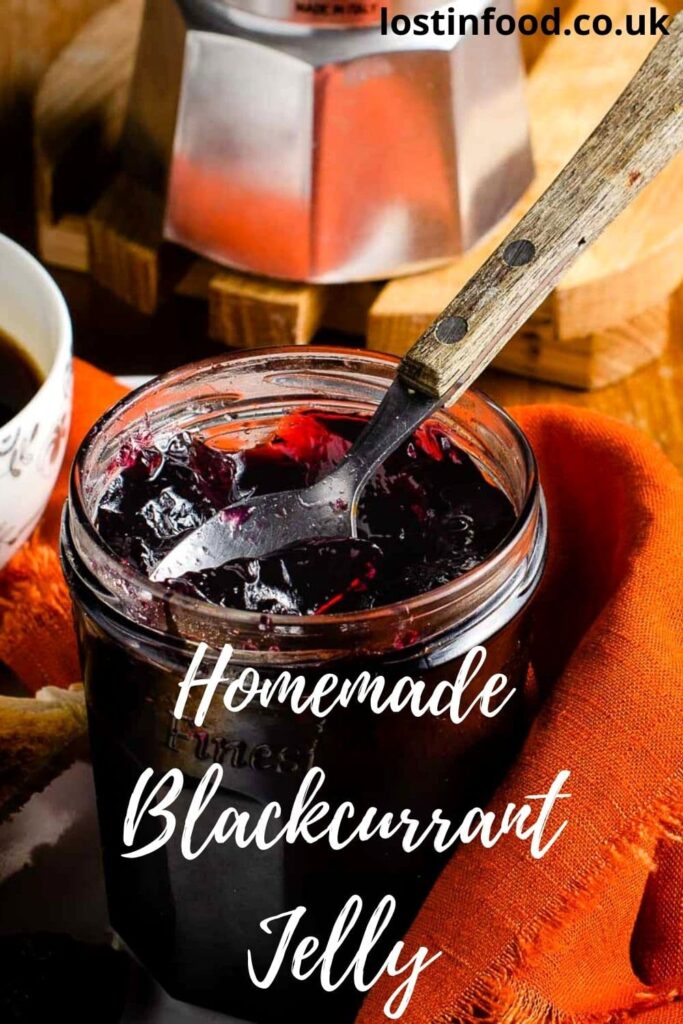
Pin the recipe

Additional recipe suggestions
We love making our own homemade jams and jellies. For some other great recipes try my:
- Apple Jelly
- Rhubarb & Ginger Jam
- Blackberry (Bramble) Jelly
- Scottish Strawberry Jam
- Scottish Raspberry Jam
If you like this then try the jelly with one of my scone recipes:
For another great fruit preserve try my Mulled Pears, great on a cheeseboard or with cold cuts.
Homemade Blackcurrant Jelly
Equipment
- Large jam pan or stock pot
- Jelly bag
- Stand to drain fruit
- Sterlised jars
- Thermometer
- Jam funnel (optional)
- Wax paper discs (for setting on top of jelly)
Ingredients
To make blackcurrant juice
- 2.5 kg blackcurrants
- 1 ltr water
To make blackcurrant jelly
- 1.2 ltr blackcurrant juice
- 900 g granulated sugar
Instructions
Set up equipment
- Before you start get your equipment ready and set up. You will need a jam pan or a large stock pot both to cook your blackberries and later to make your jelly.
- To make jelly you will require a jelly bag and a stand to hold the bag to allow you to drain the fruit. Set up your jelly bag and stand over the bowl that you are using to collect the strained liquid. (My Dad made my stand for me however, these are readily available online or from hardware stores).
- Alternatively you can set a fine sieve, lined with a double layer of muslin cloth, over a large bowl and strain the fruit through that!
Sterilise jars
- Sterilise your jars and lids (ensure lid is separate to jar). My preferred method is to put them through a cycle in my dishwasher, unloading them while still hot onto an ovenproof tray. Place them in an oven at 170C/150CFan until needed.
- Place a saucer in the freezer for testing the jelly later.
To make the blackcurrant juice
- Wash the blackcurrants and place in a large saucepan and add water, which should come just below the top of the fruit.
- Bring to the boil and then reduce to a simmer and cook the fruit until it is soft, this will take around 20 minutes.
- Take the pan off the heat and gently spoon the mixture into the jelly bag. Do not be tempted to press the fruit down into the bag, nor squeeze the bag, as this will give you a cloudy jelly. Leave the liquid to drain from the bag until it has finished dripping into the bowl below, then discard the fruit. This should take around 4 hours but can be left overnight. [Note: if making a mixed jelly repeat this process with the second fruit.)
Make the blackcurrant jelly
- Once drained pour the juice into a large, heavy based saucepan or stockpot. For every 600ml (1 pint) of fruit liquid you will need to add 450g (1lb) of granulated sugar to the pan. I use ordinary unrefined granulated sugar as jam sugar tends to be more expensive. [Jam sugar contains added pectin which I have never needed to use. See further note on sugar in the recipe post.]
- Put the pan on the heat and slowly bring to the boil, allow the sugar to melt into the juice. Once at boiling point adjust heat to obtain a good rolling boil. This is really important as a rolling boil is required to get the jelly to the right temperature for setting. Try not to stir the liquid as stirring will only reduce the temperature. As you are heating the liquid skim off an scum that may appear, whilst doing you no harm it doesn't look good once set. You want to achieve a nice clear jelly.
Testing the set of the jelly
- Here comes the difficult bit, knowing when to take the jelly off the heat. There are a number of tests, if using a jam thermometer the setting point for jelly is around 104.5C/220F. Use a jam thermometer to let you know when the jelly is ready.
- When ready to test the jelly take the pan off the heat until you test the set. This will stop the jelly from cooking too much while you test.
- It is then worth doing the wrinkle test. If you placed a plate in the freezer before you started making jelly, take it out when you think the jelly is almost ready. Spoon some jelly onto the cold plate, pop it back in the freezer for a minute or two, then take it back out and push the jelly with my finger to see if it wrinkles. If it does then the jelly is ready.
- If you want a really firm set the wrinkle will stay in place after you have removed your finger. [This is the most difficult part of the process and it is something that becomes easier over time as your begin to know what to look for. That said, I have potted jelly into jars only to return it to the pan the following day for a further boil as it was just too soft a set!]
- If you think the jelly is a little runny and loose, return the pan to the heat and get it back on a rolling boil for another 10 minutes and test again.
- Pot the jelly while it is still hot into the sterilised jars. Take care as the liquid is very hot, use a jam funnel over the top of the jars to get the jelly cleanly into the jars and avoid spillage. Next place a wax disc on top as it prevents the jelly drying out and also stops any mould from forming. Seal with a screw on lid and set aside to cool. Once cool label the jelly and store in a cool, dry place. The jelly should keep for at least year stored like this.
Notes
• Please note that the nutrition information provided above is approximate and meant as a guideline only •

Eb Gargano | Easy Peasy Foodie says
YUM! I love blackcurrant jelly - such a fab flavour!
Lesley says
Thank you Eb, its easily my favourite jam.
Cat says
Such a delicious jam with such easy to follow instructions.
Lesley says
Thank you Cat, it's such an easy thing to make, once you know the process.
Carrie Carvalho says
I love blackcurrant jelly - when I was little we always had it on toast at my grandma’s house! I’ve never made my own jelly or jam before but I will have to try this one - lovely detailed instructions too.
Lesley says
Thank you Carrie, my Mum always made her own jellies and jams - this one is my favourite. You should have a go at making your own, I find it very relaxing making jams and jellies.
Janice Pattie says
You are pressing all the right buttons for me. I love blackcurrants but I've never tried blackcurrant jelly, It would be perfect for people who hate seeds in their jam.
Lesley says
Thank you Janice, my Mum was never keen on seeds which is why she always made lots of jellies. I'm happy with blackcurrants in either - they make the best jam.
Jacqui Bellefontaine says
Love blackcurrant jam and jelly it has soo much flavour. It looks like Im going to have a bumper crop this year. I cant wait!
Lesley says
Me too Jacqui - it has to be my favourite, even better when you have a bumper crop growing in your own garden.