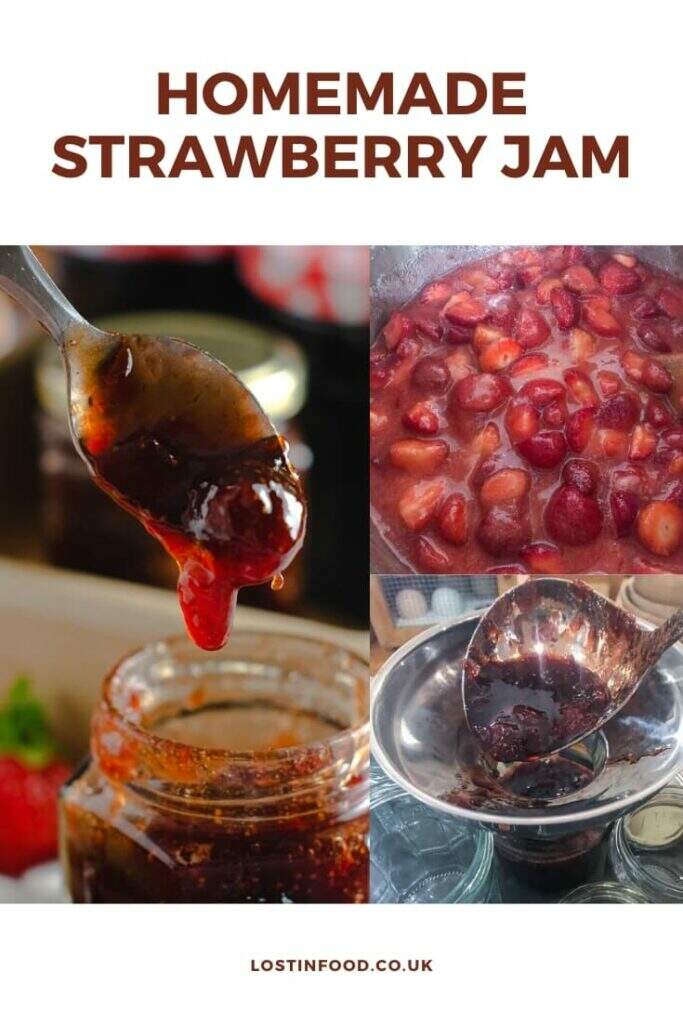
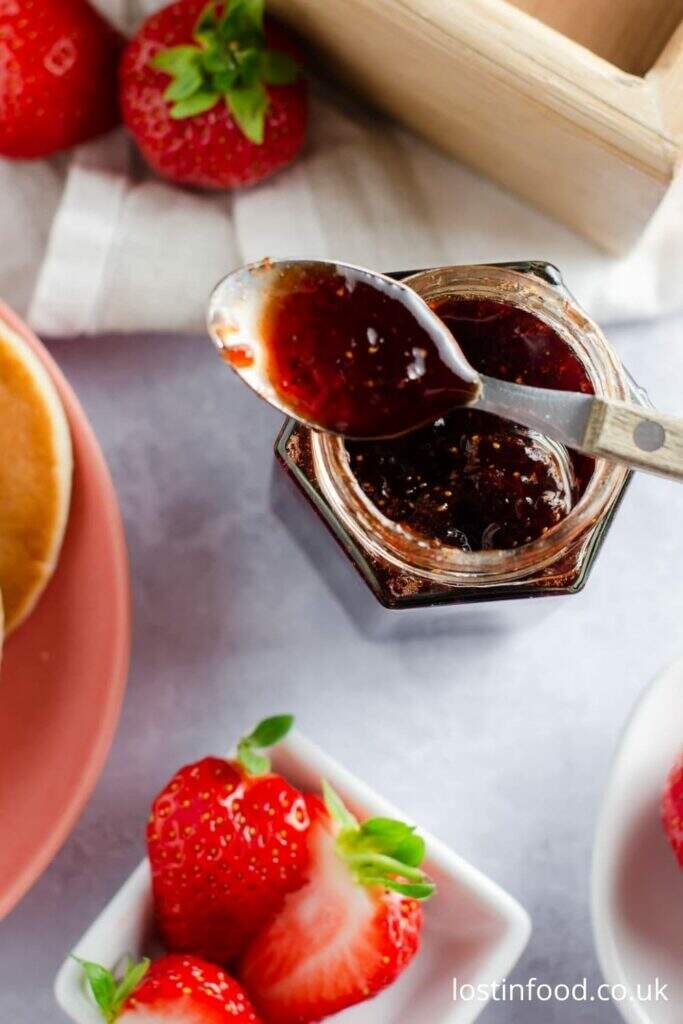
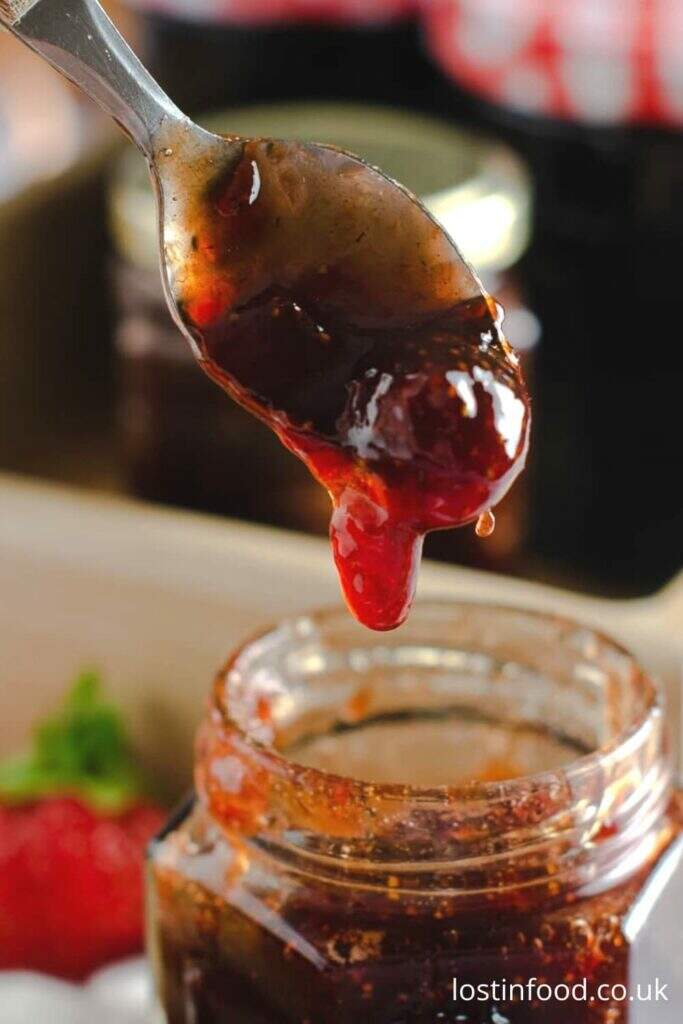
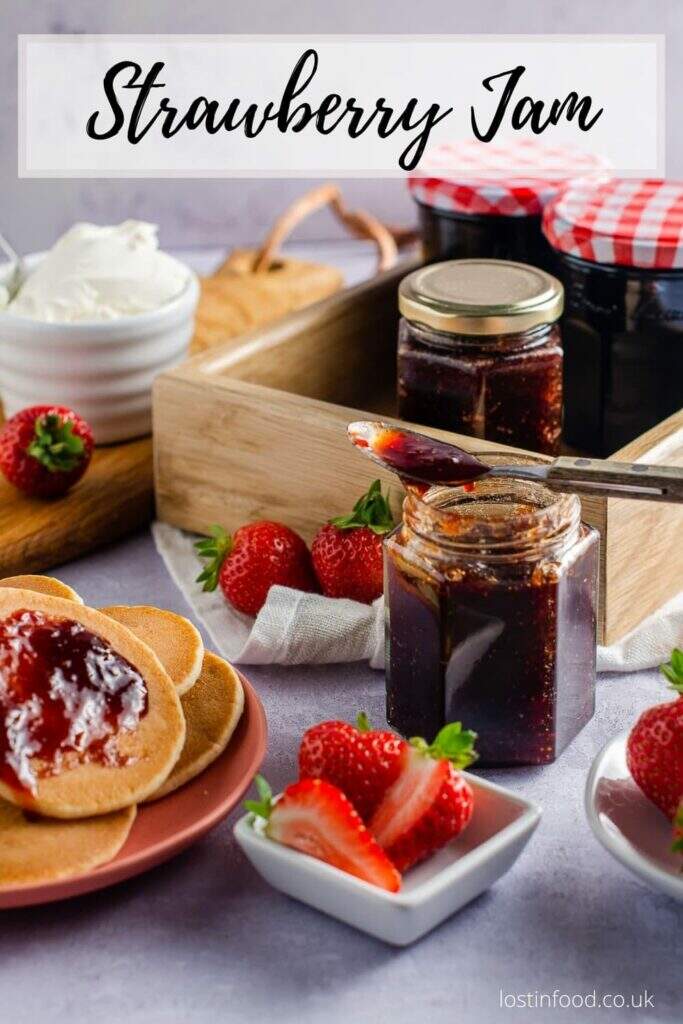
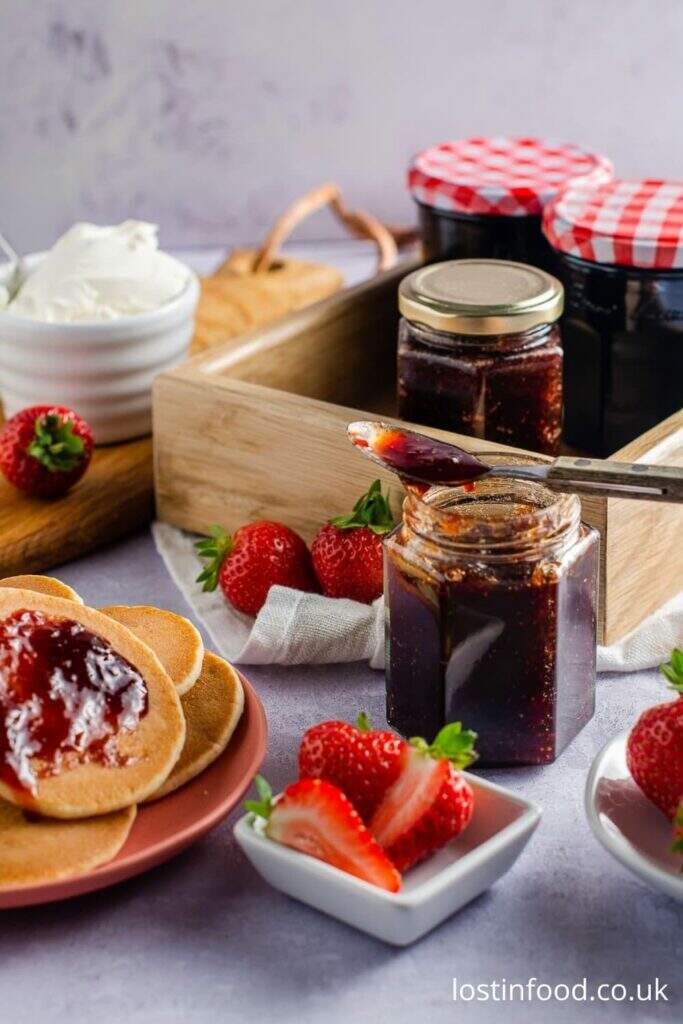
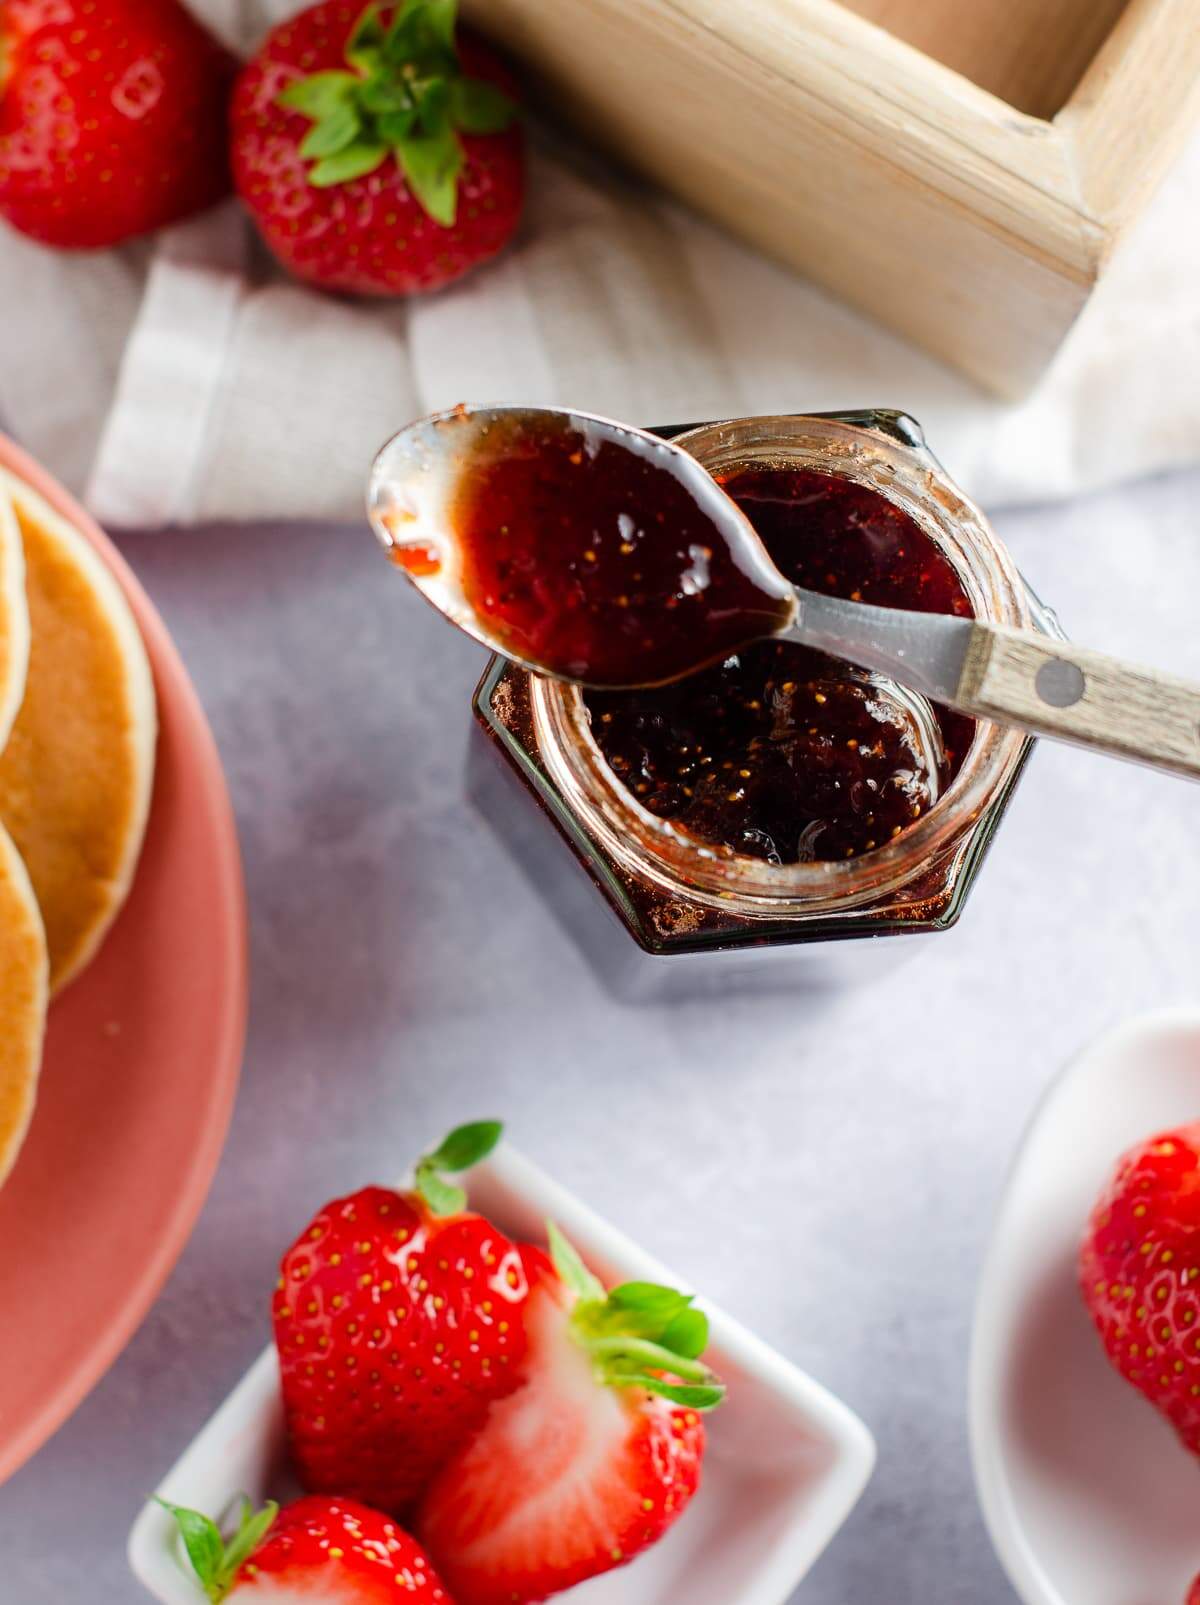
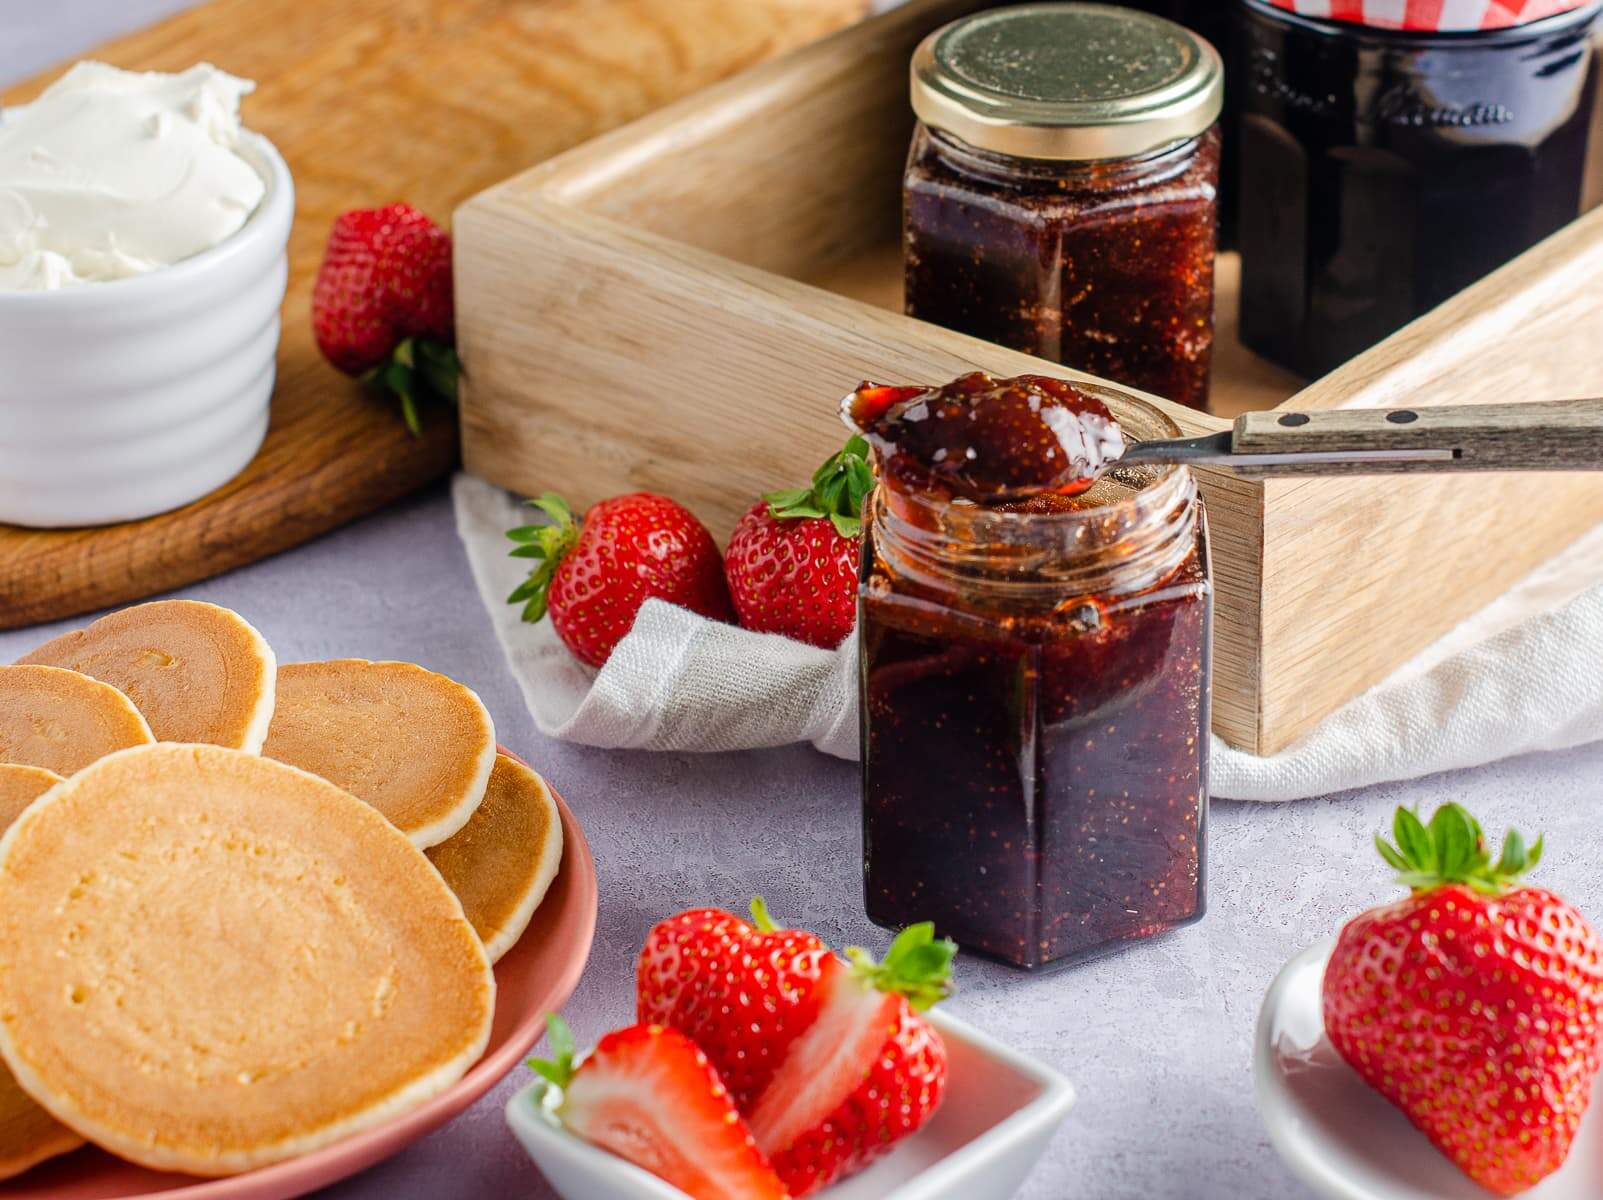
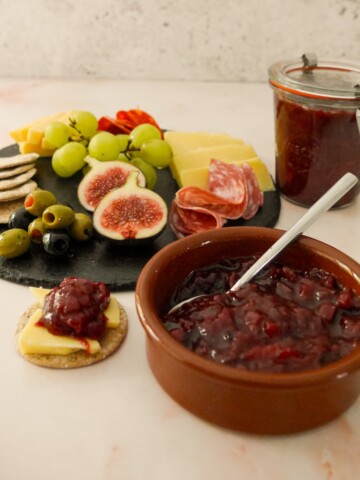
Scottish strawberry jam, made with the sweetest of strawberries grown right on our doorstep. Perfect with a scone and some clotted cream!
Scottish strawberry jam is a preserve I make every Summer. Known for their taste and sweetness, Scottish soft fruits have fantastic flavour.
We are lucky enough to have these wonderful berries available to us, right on our doorstep.

Scottish berries are much sought after by many in the food trade. Highly experienced growers, together with soil type and climate, make for very delicious produce. Of course the sweeter the berries, the sweeter the jam!
My Mum was a prolific jam maker and it's a skill she passed on to me. I grew up enjoying homemade strawberry jam, with berries picked from our own garden.
We had a huge garden, full of fruits, most of which were preserved in some form or another.
I make batches of jam all Summer and Autumn, I find it therapeutic. I enjoy making all my own jam, my Scottish strawberry jam tastes better than anything I can buy in the shops.
Once you've mastered the skill, you won't look back. Homemade jam also makes a lovely gift for family and friends.
Many people are put off making their own jam as they believe it's too difficult. However, if you follow the process it's a lot easier than you might think. Here are my top tips for getting started:
Top tips for making Scottish strawberry jam:
- Give yourself time! Set aside an hour to just focus on making jam.
- Lay out all your equipment before you start.
- Place clean jars onto a tray into the oven before you start. That way they are sterilised and come out of the warm oven when you are ready to pot up the jam.
- DO NOT walk away from the jam when it is cooking, that is when mistakes happen.
- Don't stir the jam when you have a rolling boil as this will reduce the temperature.
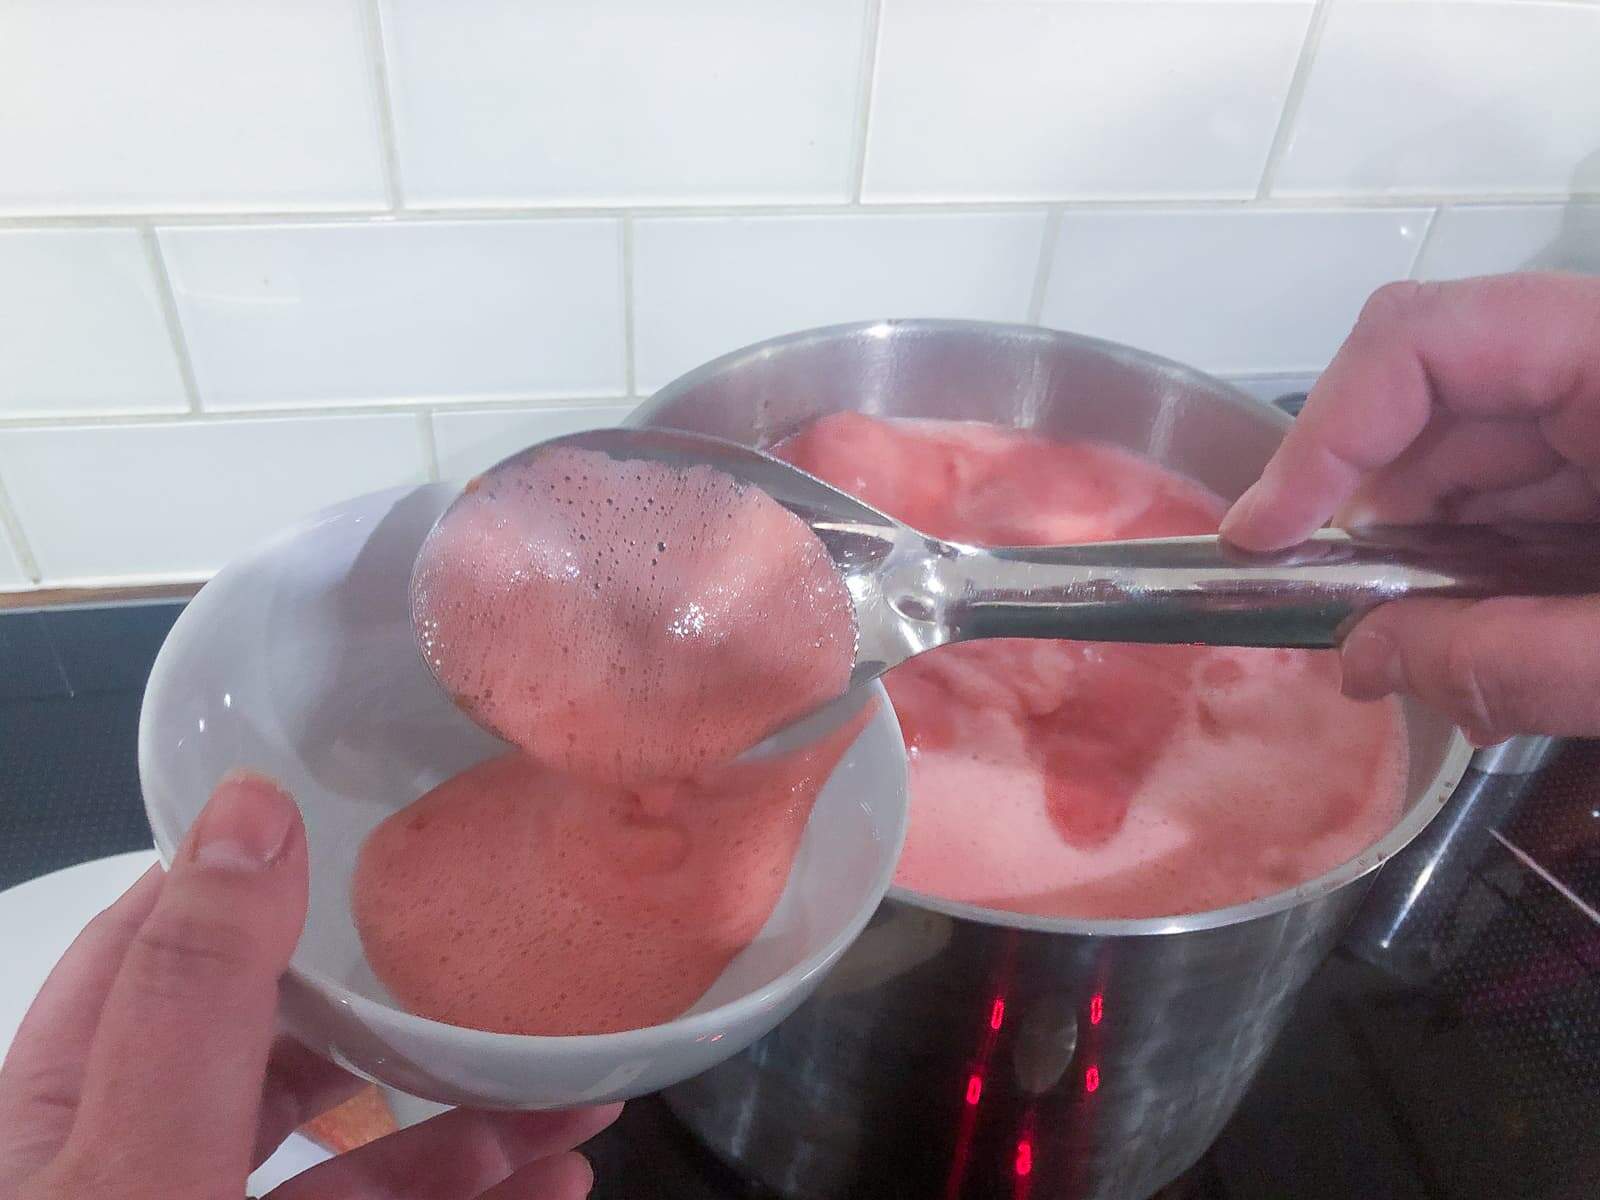
- Always skim your jam to remove any scum as whilst it won't harm you, it looks awful.
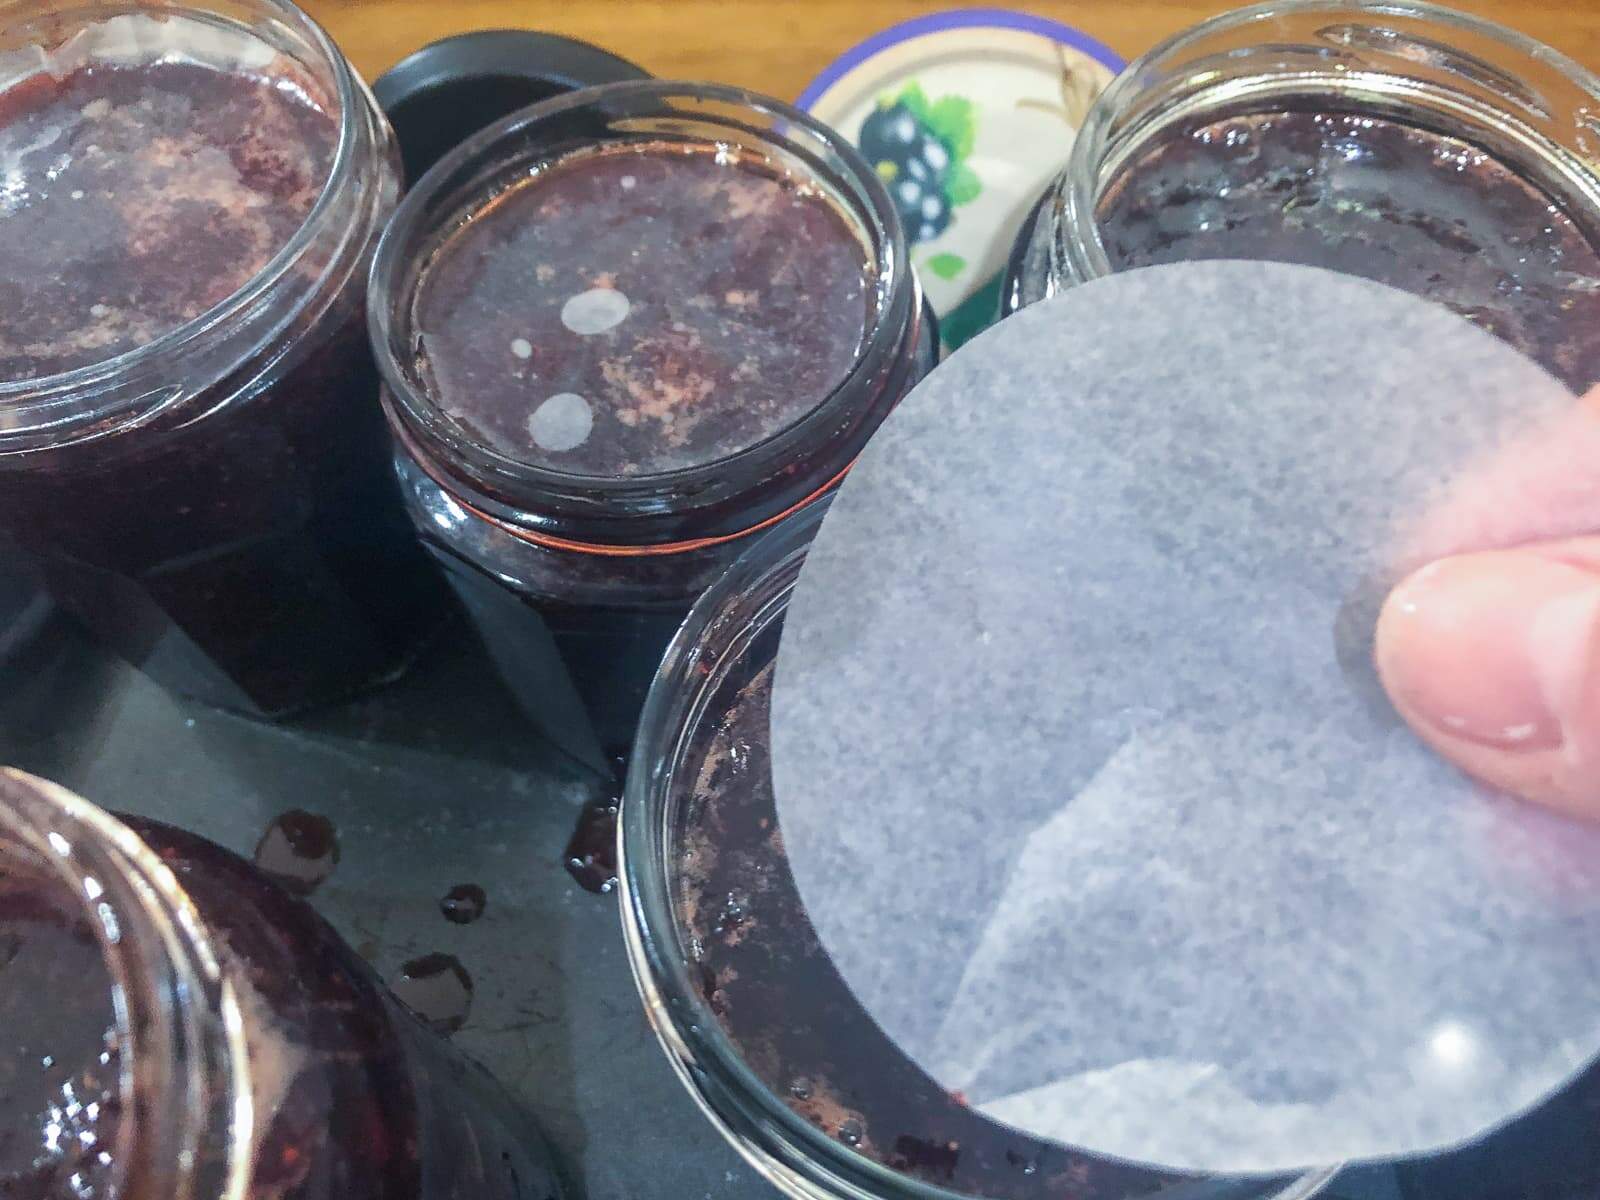
- Place a wax paper disc on top of your jam once potted up to keep it fresh.
How to make strawberry jam?
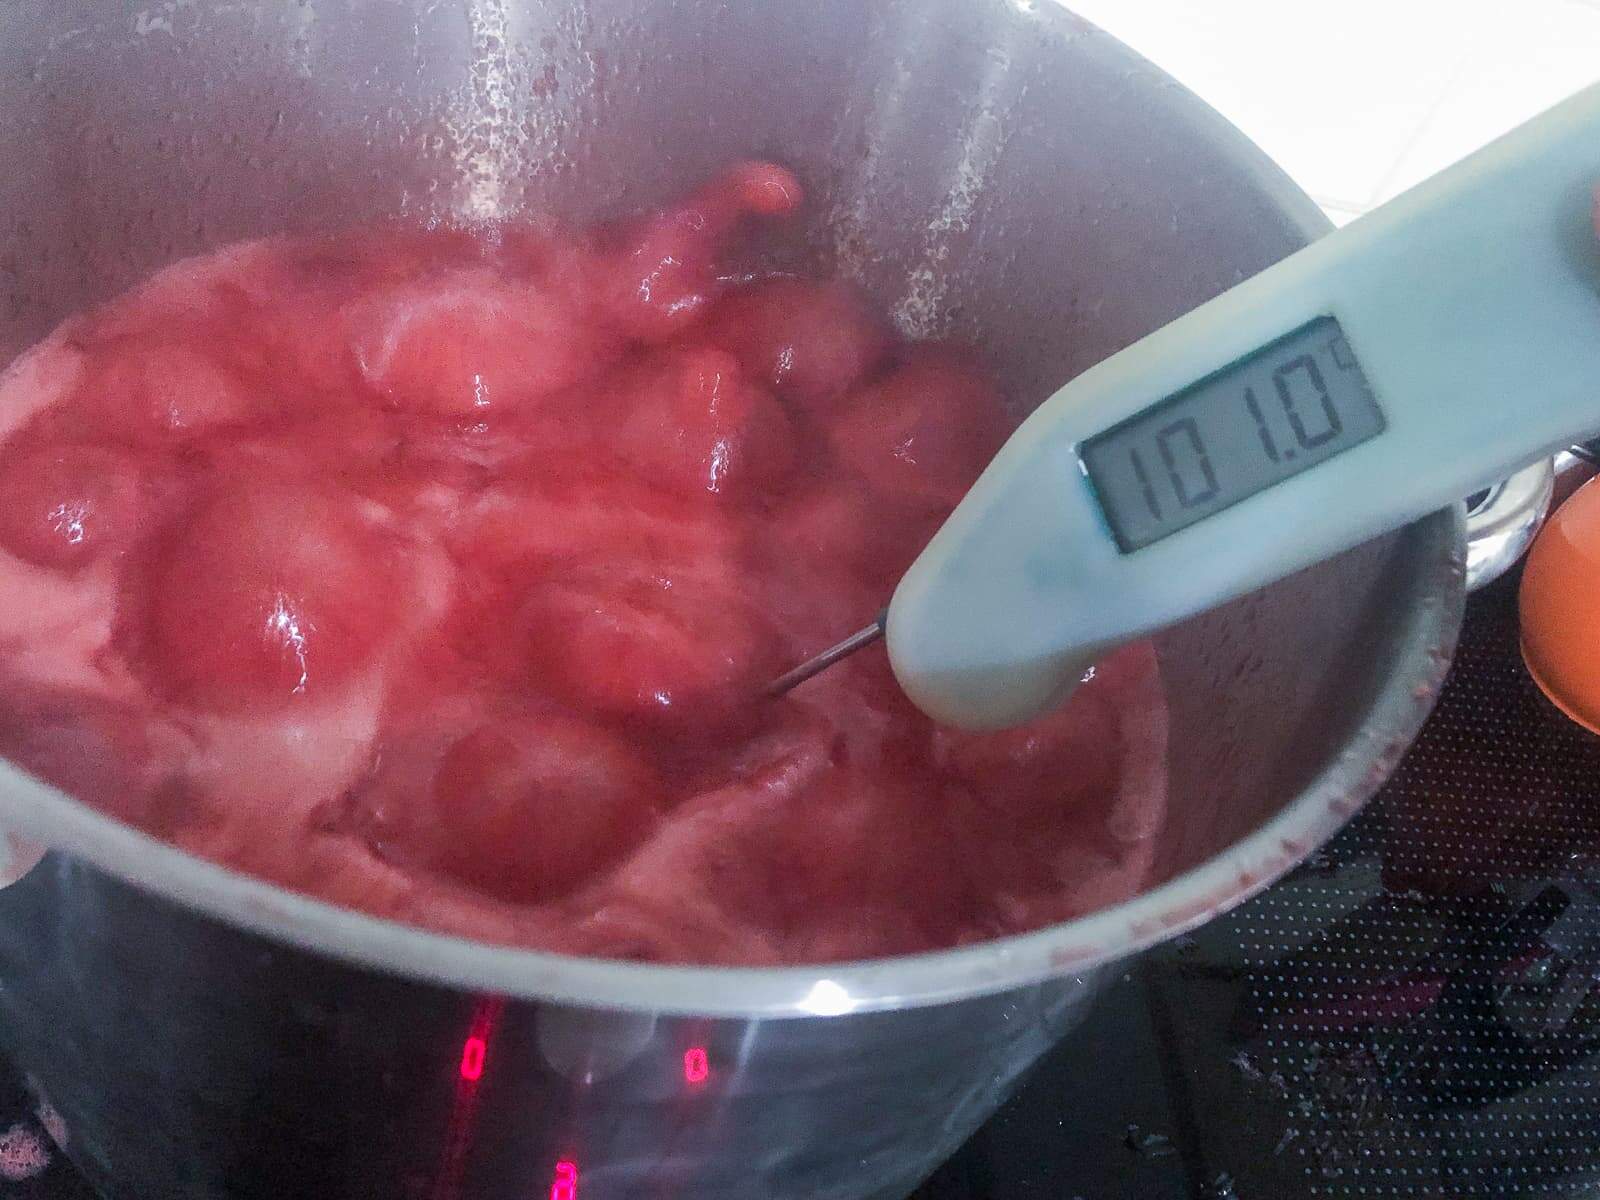
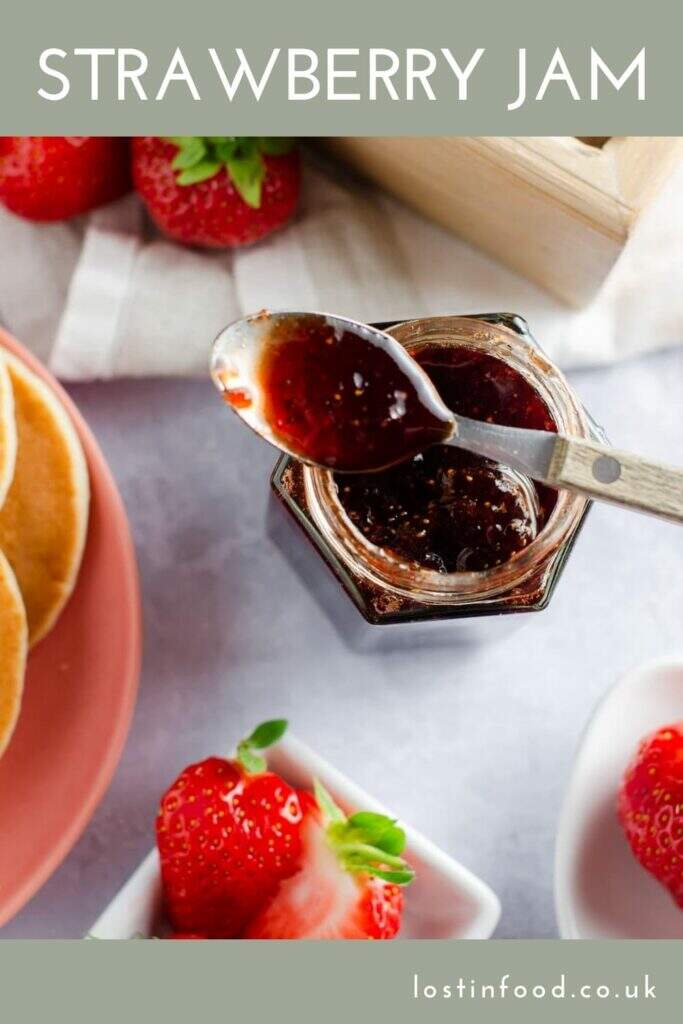
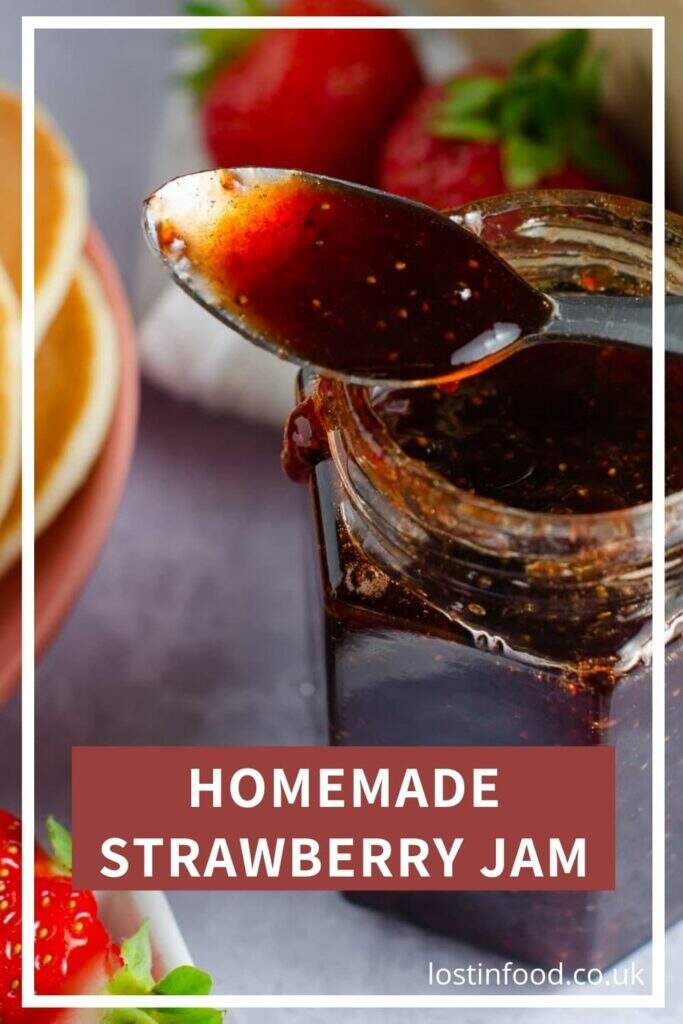
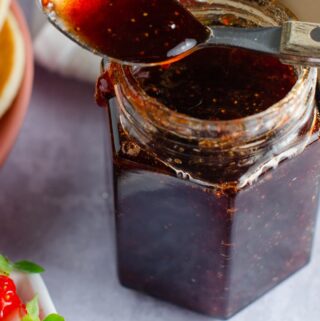
- When the jam reaches a temperature of 104.5C/220F test the set of the jam and if it wrinkles, decant the jam into jars.
- When testing the set take the pan off the heat to stop the jam from overcooking.
- If you think the jam is a little loose then return the pan to the heat, bring it back to a rolling boil for 10 minutes and test again.
Jam sugar:
Sugar is used to preserve the fruit, it is what allows you to keep and store jam. Traditionally jam making uses equal amounts of sugar to fruit, or in the case of a jelly a pint of fruit juice to a pound of sugar. The amount of sugar used determines the set of the jam. I have always used granulated sugar when making jellies and jams. Granulated sugar is cheaper and melts quickly.
Some fruits like apples, blackberries and blackcurrants are naturally high in pectin, meaning that the jam will set easily.
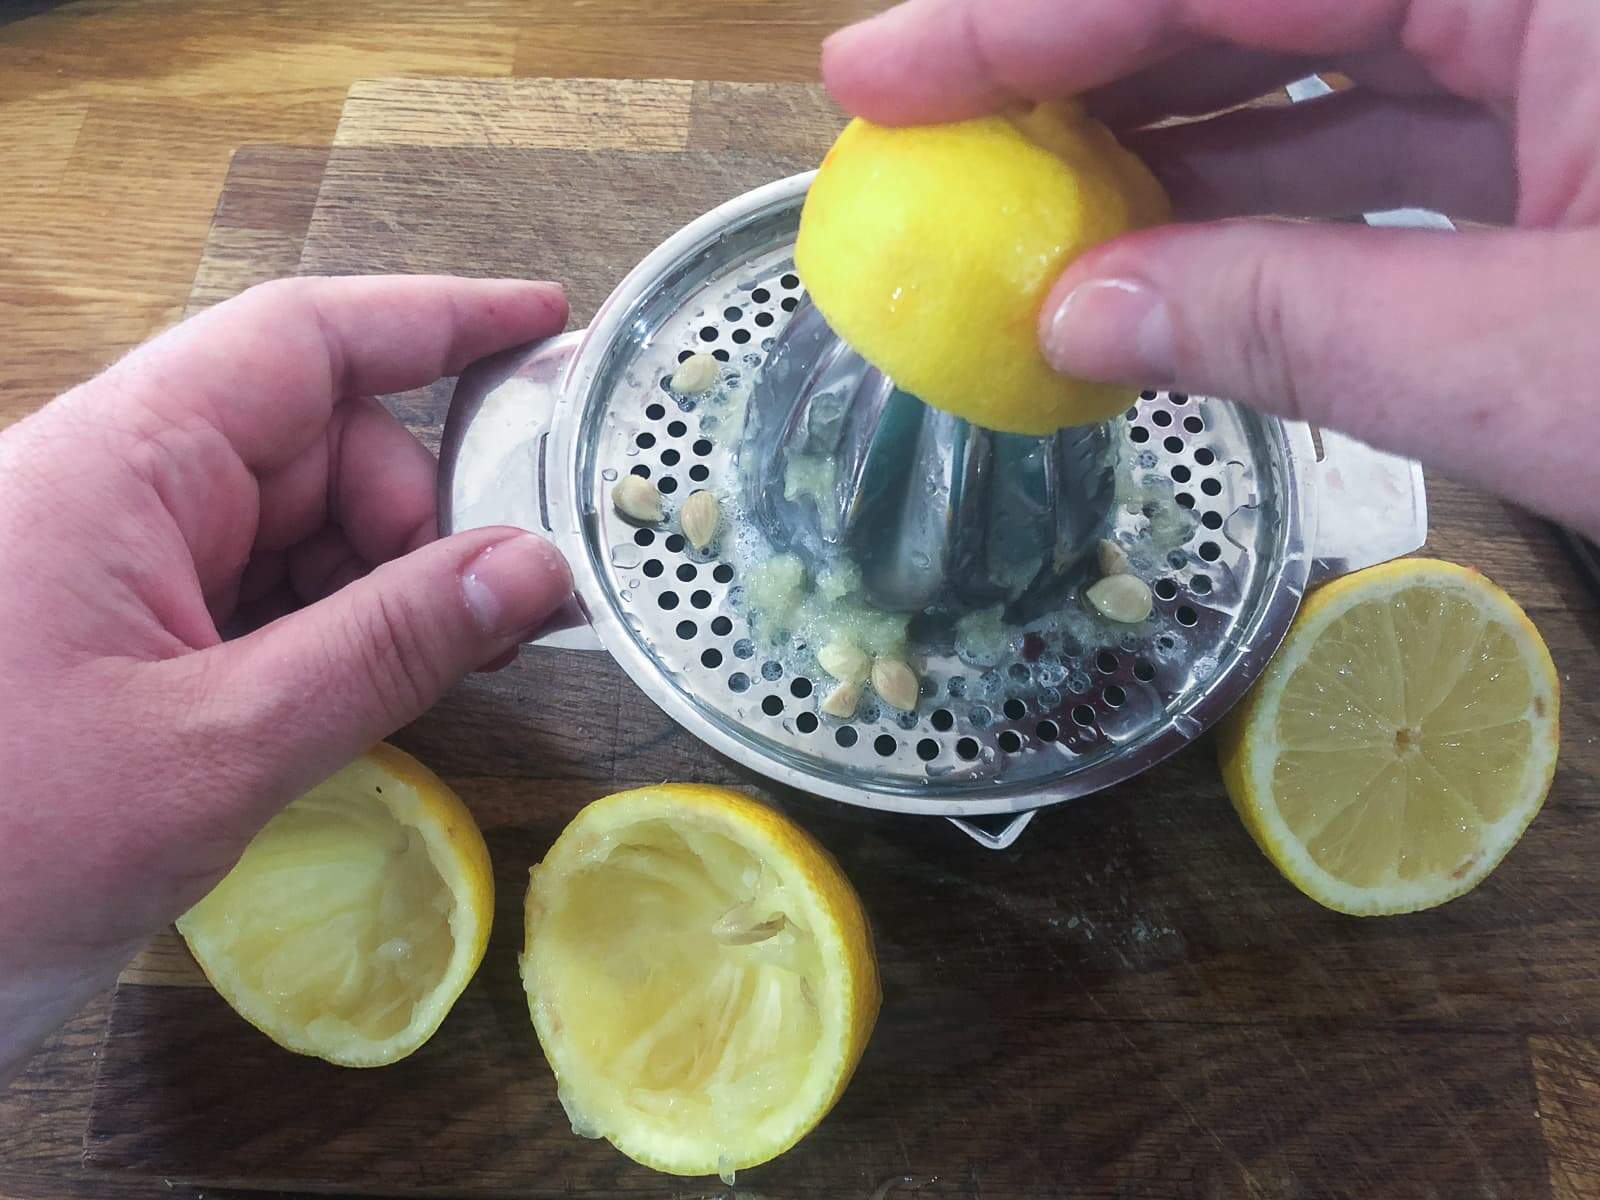
However, if making this Scottish strawberry jam, you will need to add in pectin and this is done by adding a little lemon juice to the strawberries and the sugar, as I have done in this recipe.
You can buy jam sugar which has added pectin, however in my experience it can result in too firm a set. For this reason I prefer to use granulated sugar and if necessary add a little lemon juice. It is also a lot cheaper.
Testing the set of jam or jelly?
Knowing when jam and jelly is ready to take off the heat and testing the set of jam is the trickiest part of the whole process. One that you get better at as you become more experienced.
I always use a jam thermometer. It really is the only way to check your jelly or jam has reached the required setting temperature. The setting point for jam is 104.5C/220F.
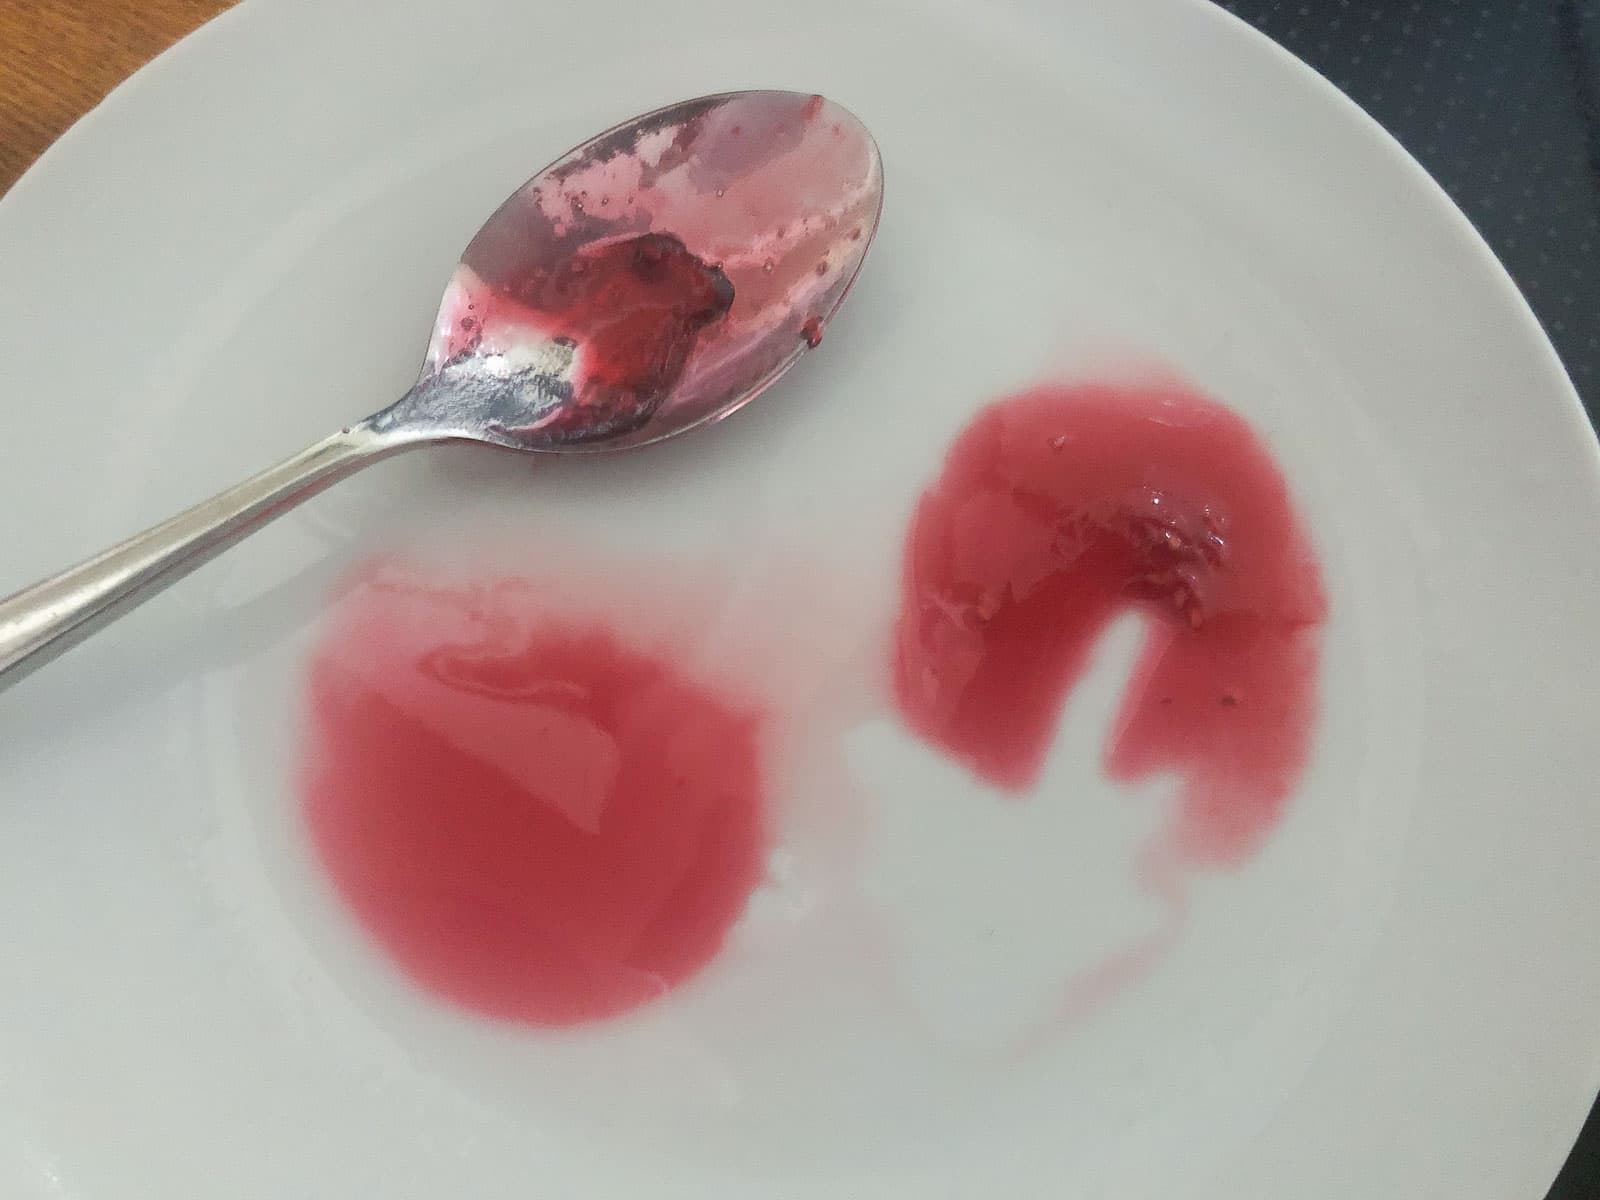
I like to use the wrinkle test. Place a plate in the freezer before you started making jam or jelly, take it out when you think the jam or jelly is almost ready.
Spoon some jam/jelly onto the cold plate, pop it back in the freezer for a minute or two, then take it back out and push the jam with your finger to see if it wrinkles. If it does then it's ready. For a firm set the wrinkle will hold in place. For a softer set the jam/jelly will just wrinkle.
How to sterilise jars?
It is essential that before jarring or bottling any food for storage, that you sterilise the glass jar or bottle first. There are many methods for doing this, all of them relatively straight-forward:
- Firstly, you can wash the glass and lids in hot soapy water, rinse them (do not towel dry) and place on a tray in the oven at 160C for 15 minutes, removing when you are ready to fill. This is my preferred method.
- You can put them through a dishwasher cycle, removing them from the dishwasher as soon as the cycle has finished and filling them with jam immediately afterwards. I use this method if my dishwasher happens to be going on.
- You can boil the jars and lids in a large pan for 10-15 minutes. [I'm never keen on this method as it involves boiling water and leads to a risk of scalding.]
- Finally, you can wash and rinse the glass jars, placing them into the microwave wet and then cooking them on high for 60 seconds. However, the lids would have to be boiled in a pan of water separately for 10-15 minutes as metal cannot go in the microwave. [I have never used this method as it involves 2 separate processes which I think is a bit of a faff!]
Filling the jam jars:
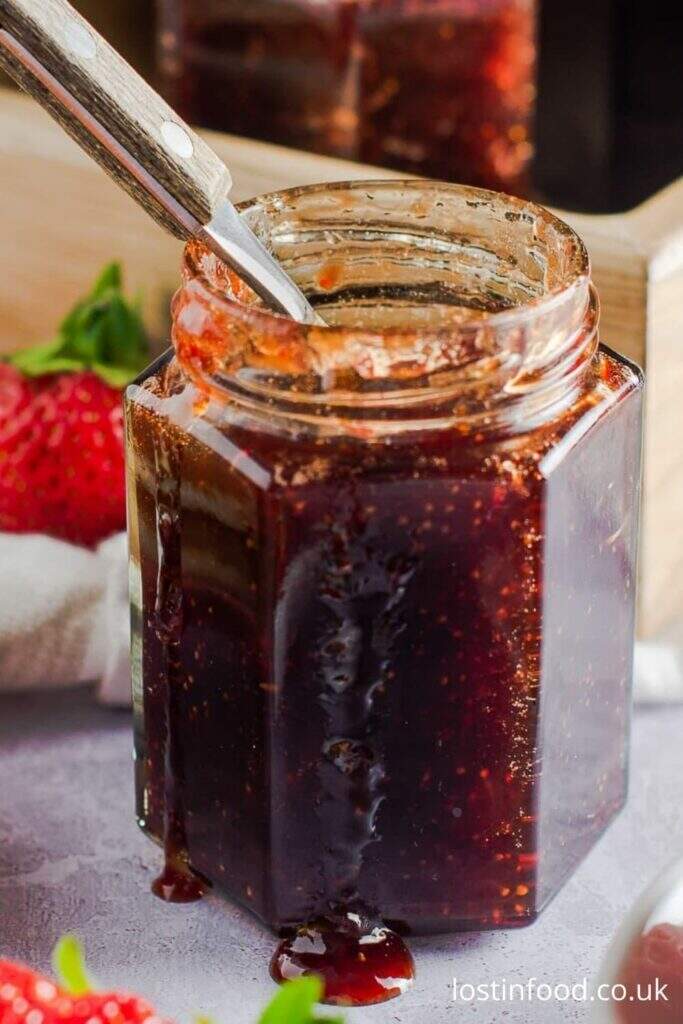
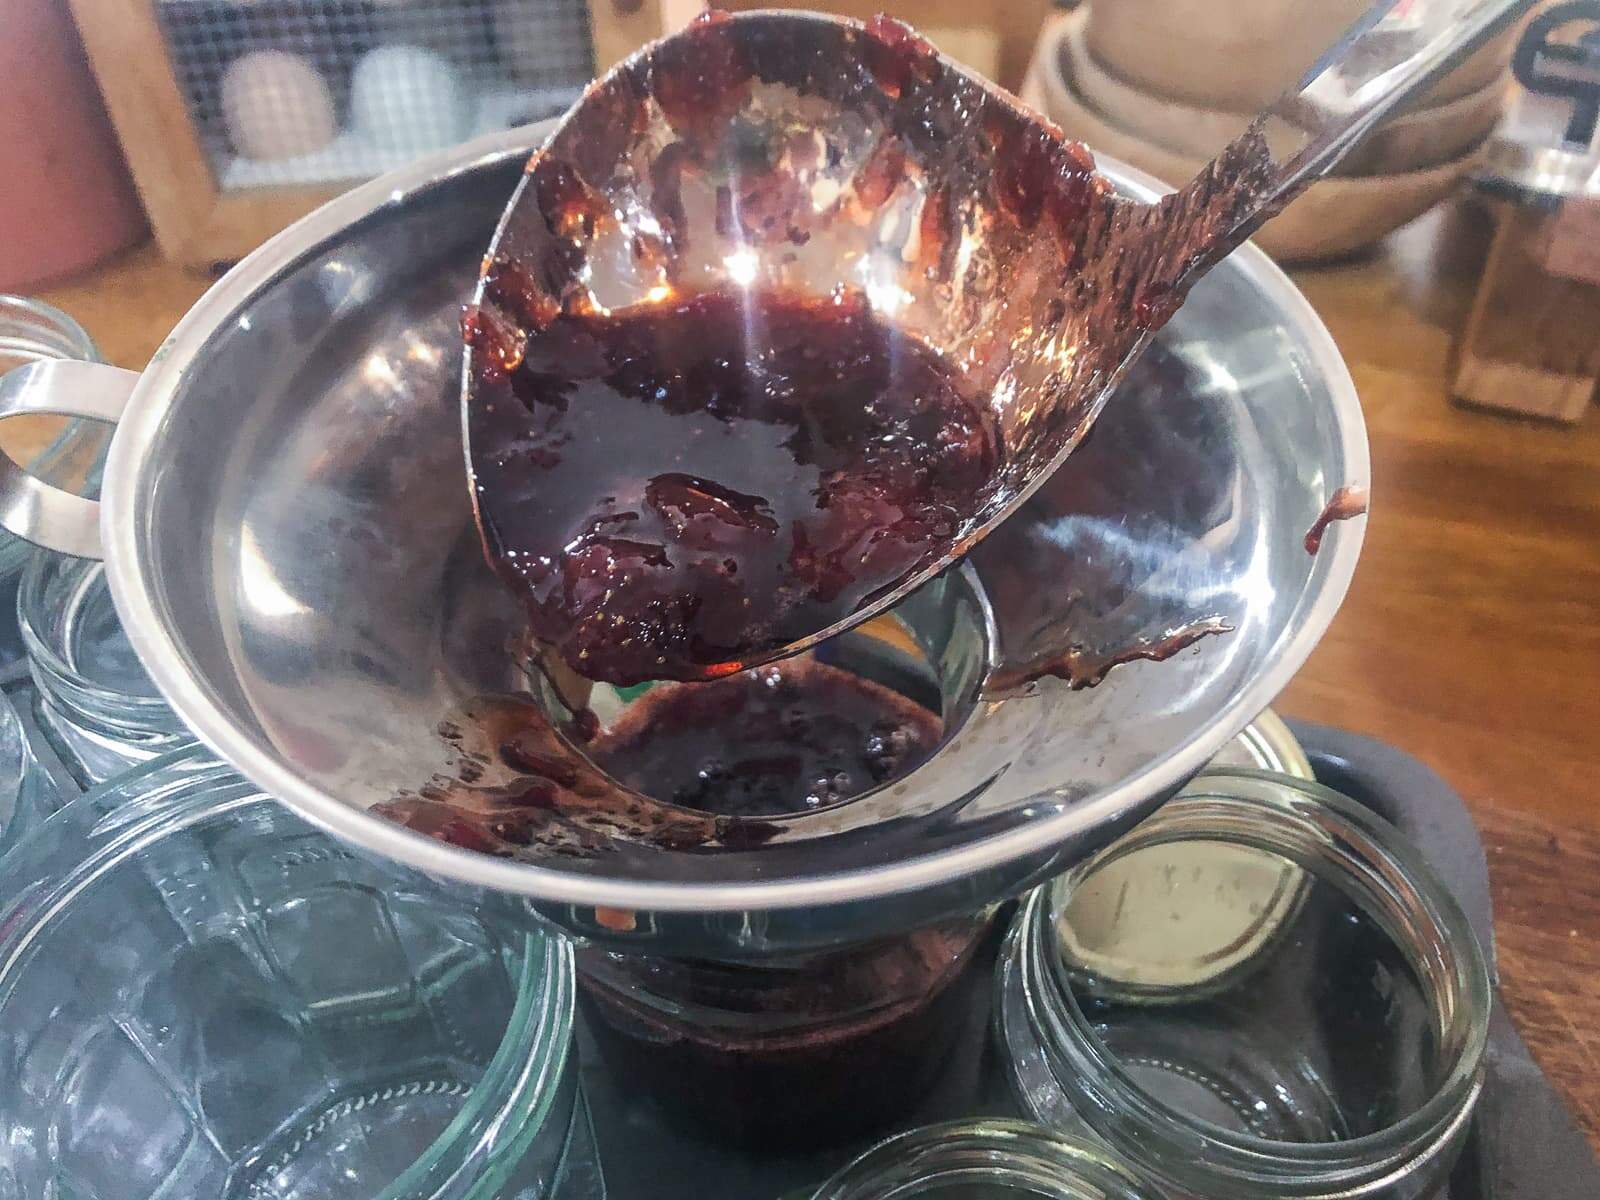
Finally take real care when decanting the molten jelly liquid into jars. You do not want to burn yourself, nor spill this liquid. I like to keep my jars in a metal baking tray with sides, that way if I do spill a little it doesn't run everywhere.
I also recommend using a jam funnel. The funnel is placed on top of the empty jam jar. It has a wide lip which then funnels the hot liquid down into the jar.
Place a wax jam disc over the top of the jam/jelly, this keeps the jam fresh and keeps air from spoiling it. Seal with a tight fitting lid and set aside to cool before labeling.
How to avoid overly sweet jam?
The rule of thumb when making jam is equal quantities fruit to sugar. However. with some fruits this can lead to an overly sweet jam. Lemons are naturally high in pectin so by adding the lemon juice this not only helps set the jam, but also balances sweetness.
Flavour variations:
Scottish strawberry jam is deliciously sweet, however you may want to experiment with some other flavour combinations.
Strawberries work really well with other fruits, try combining them with:
- rhubarb
- mango
- passion fruit
- stone fruits like peaches, nectarines or apricots
Simply wash, peel and prepare the fruit that you intend using. Then mix with the strawberries keeping to the same overall fruit weight. For example 600g strawberries and say 400g mango.
Pin the recipe:

Additional recipe suggestions:
If you enjoy making jams and jellies as much as we do then why not try out some of our other recipes:
- Scottish Raspberry Jam
- Rhubarb & Ginger Jam
- Blackcurrant Jelly
- Blackberry (Bramble) Jelly
- Apple Jelly
These jams and jellies taste great with some fresh home bakes:
Scottish Strawberry Jam
Equipment
- Large jam pan or stock pot
- Sterlised jars
- Thermometer
- Jam funnel (optional)
- Wax paper discs (for setting on top of jelly)
Ingredients
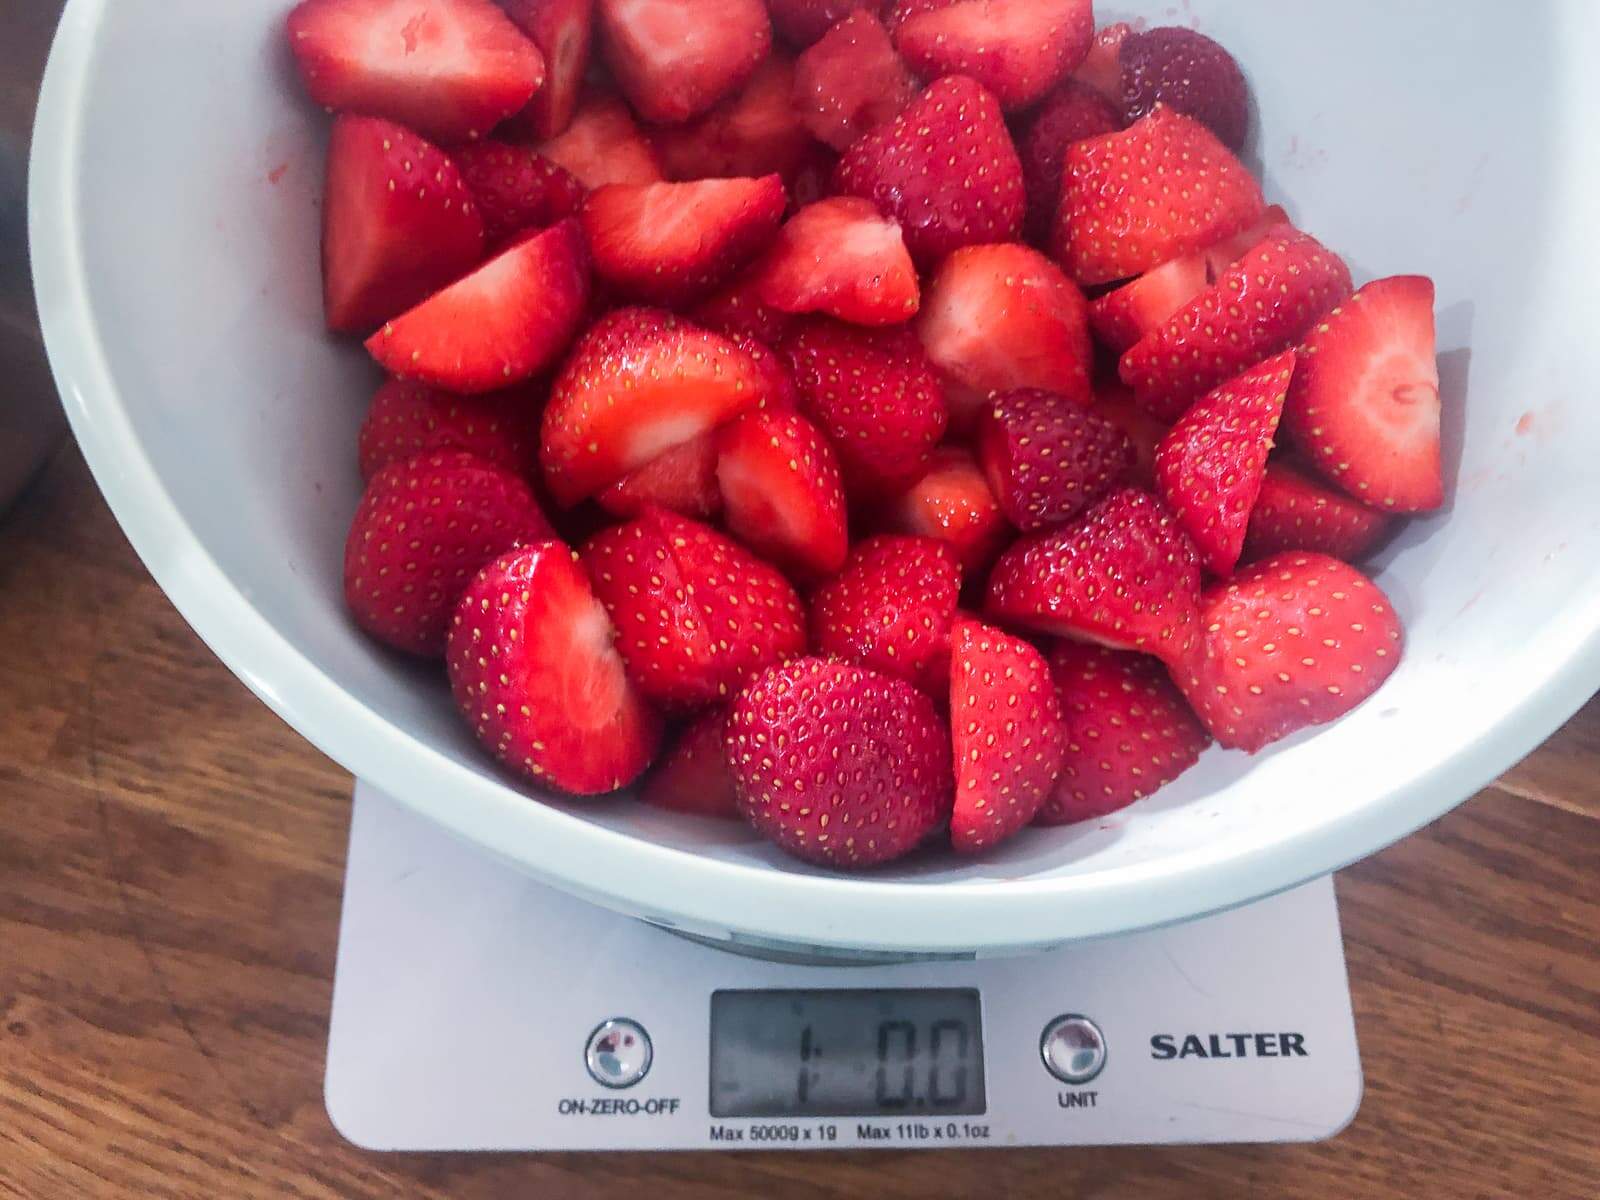
- 1 kg strawberries
- juice of one lemon
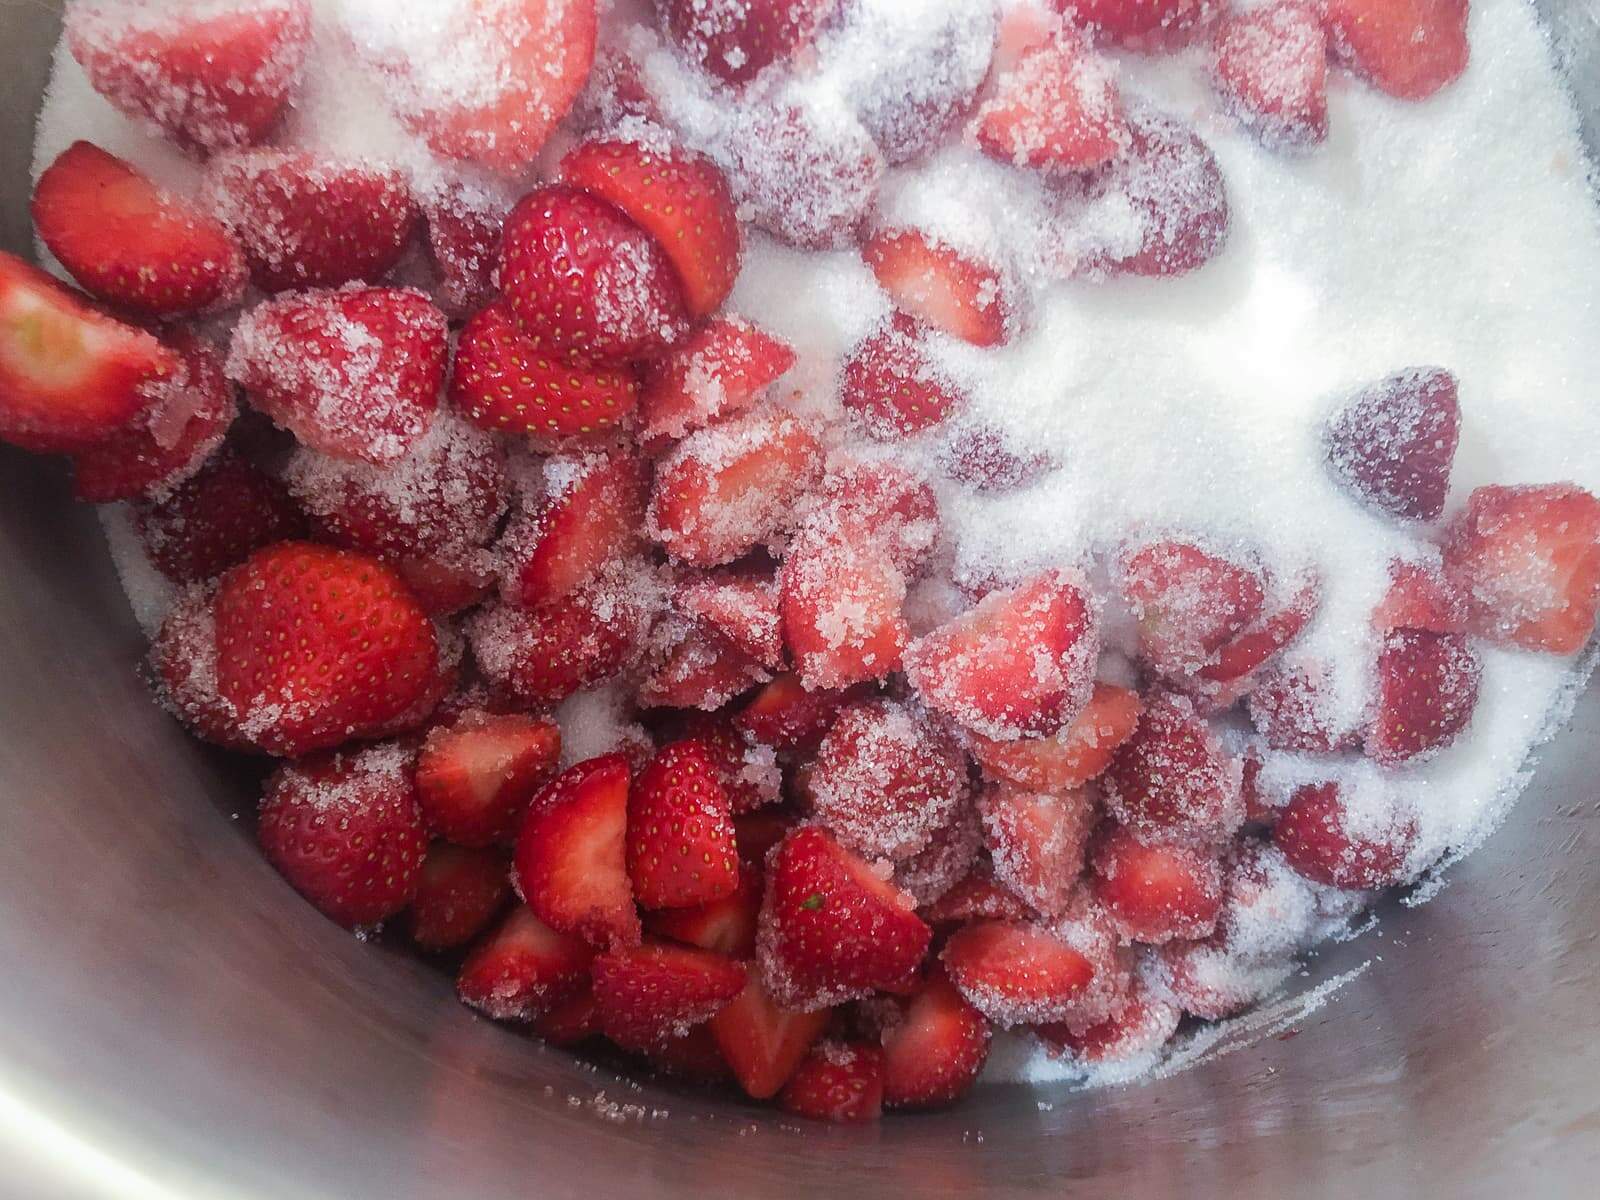
- 1 kg granulated sugar
Instructions
Set up equipment
- Before you start get your equipment ready and set up. You will need a jam pan or a large stock pot for boiling the jam.
Sterilise jars
- Sterilise your jars and lids (ensure lid is separate to jar). My preferred method is to put them through a cycle in my dishwasher, unloading them while still hot onto an ovenproof tray. Place them in an oven at 170C/150CFan until needed.
- Place a saucer in the freezer for testing the jam later.
Make the strawberry jam
- Gently wash and hull the strawberries and place them in a large stock pot. Juice the lemons and add them to the strawberries and place them on the hob over a medium heat. [Strawberries are not naturally high in pectin so lemon juice is added to the jam to help it set. See further note on sugar in the recipe post.]
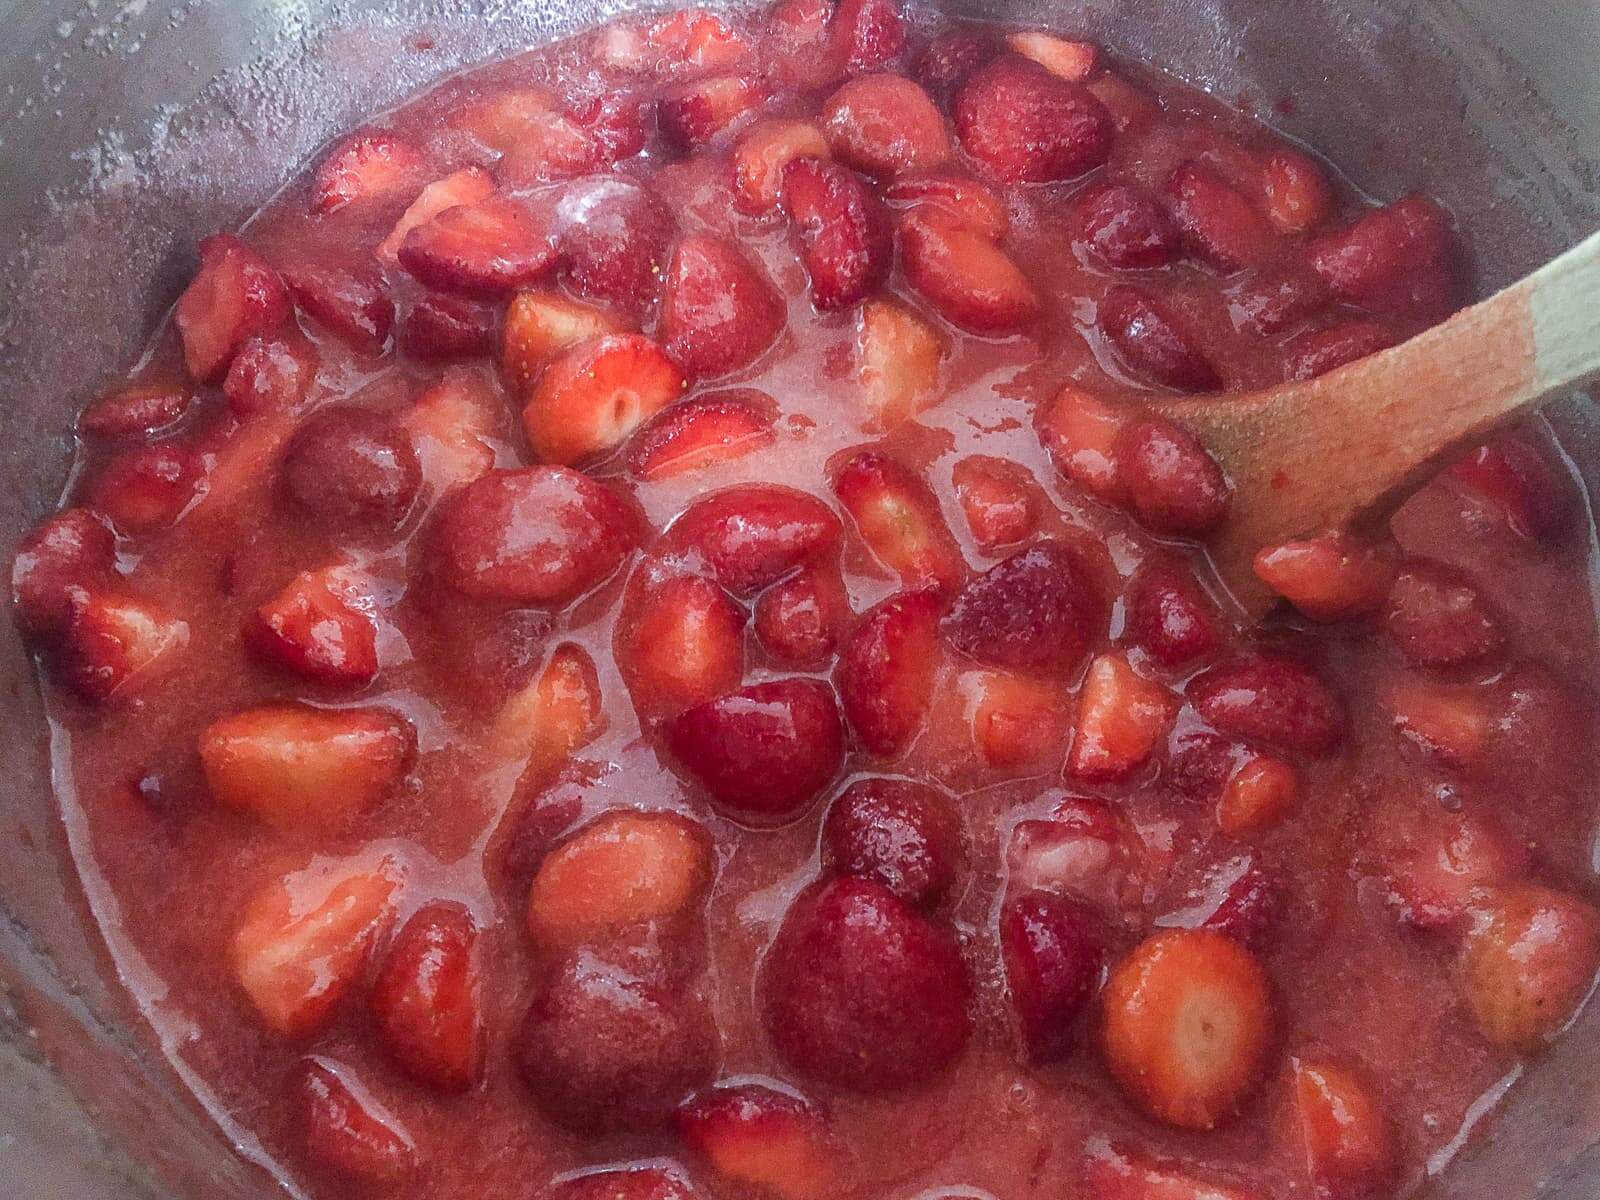
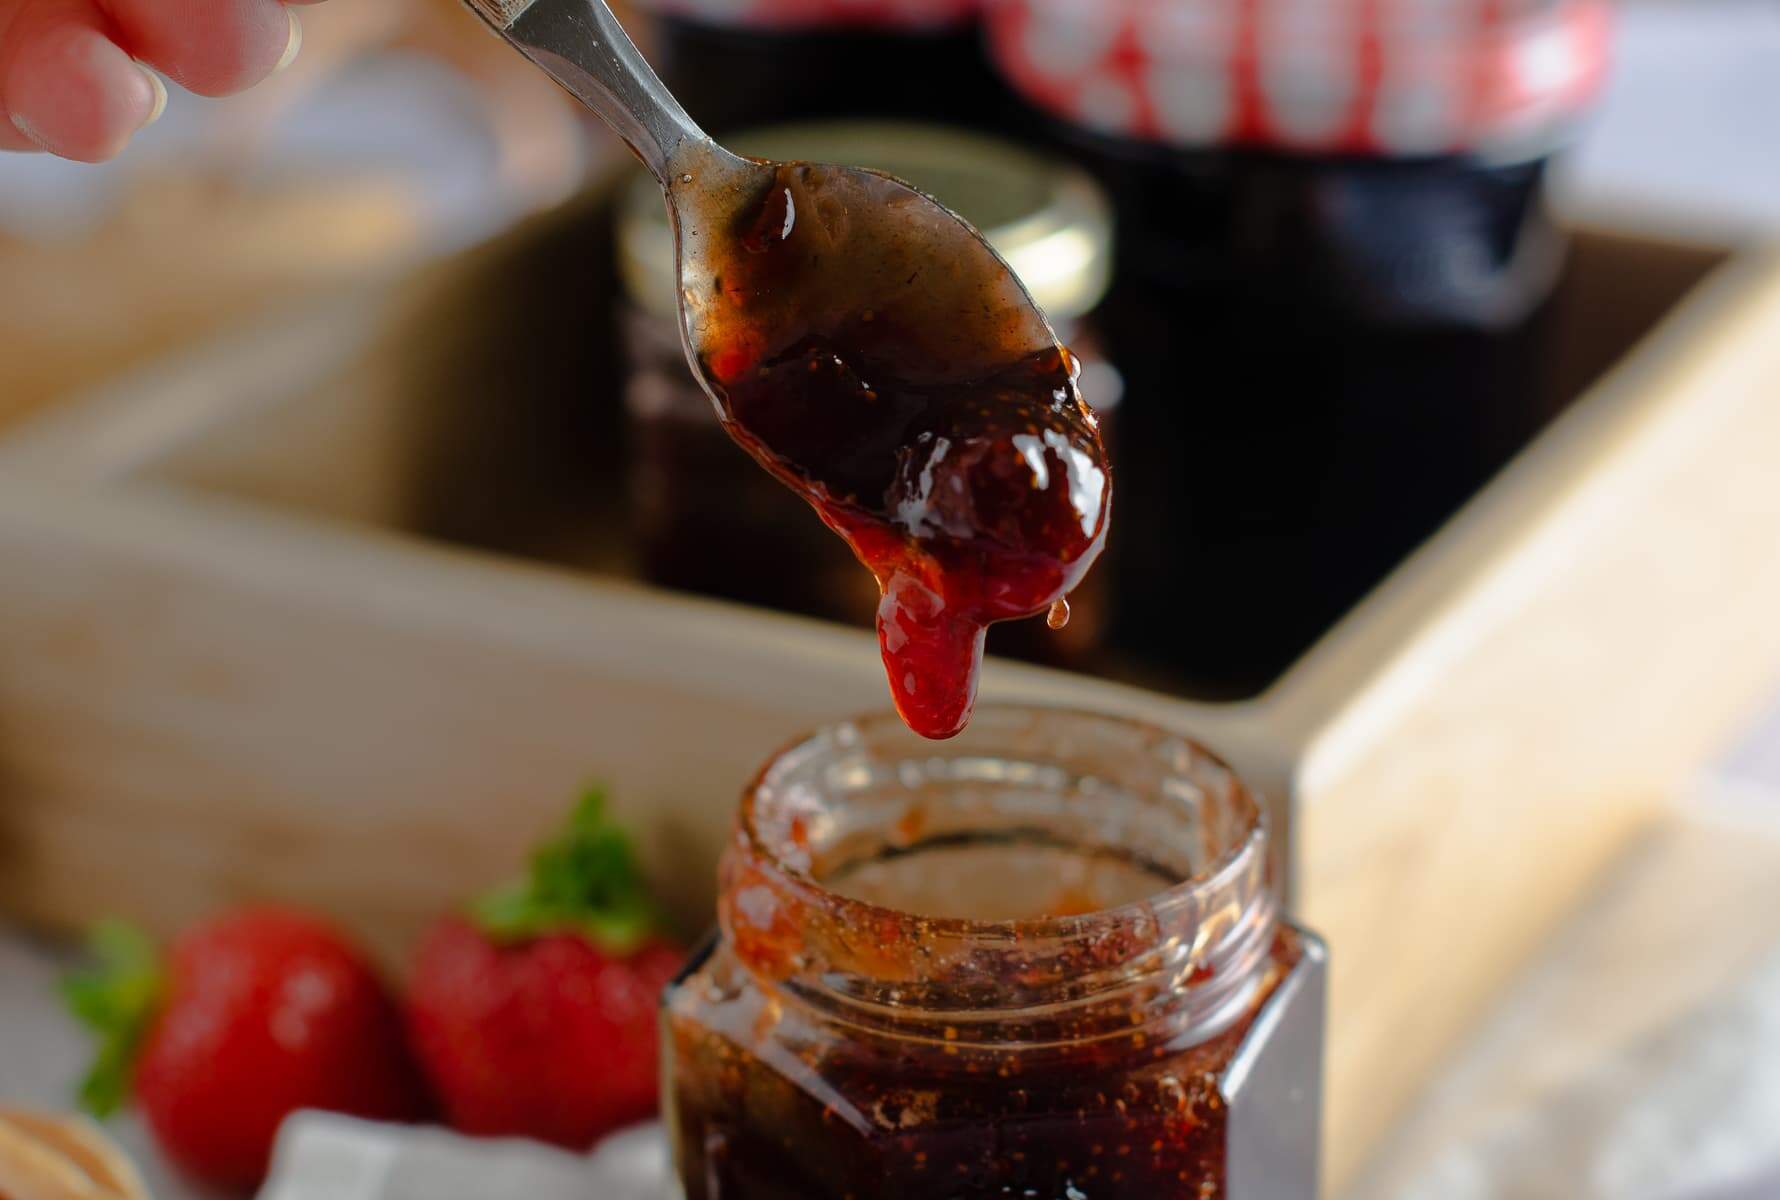
- Once the strawberries come to a simmer they will soften and the juices will start to run. Add the sugar to the fruit and gently stir through until dissolved. Once the fruit has softened mash the fruit down to the consistency that you like to eat. Some people like a smooth jam, others prefer to leave some of the smaller fruits whole, it is entirely personal choice.
- Now increase the heat and bring to the boil to get a good rolling boil. This is really important as a rolling boil is required to get the jelly to the right temperature for setting. Try not to stir the liquid as stirring will only reduce the temperature. As you are heating the liquid skim off an scum that may appear, whilst doing you no harm it doesn't look good once set. You want to achieve a nice clear jam.
Testing the set of the jam
- Here comes the difficult bit, knowing when to take the jam off the heat. There are a number of tests, if using a jam thermometer the setting point for jam is around 104.5C/220F. Use a jam thermometer to let you know when the jam is ready.
- When ready to test the jam take the pan off the heat until you test the set. This will stop the jam from cooking too much while you test.
- It is then worth doing the wrinkle test. If you placed a plate in the freezer before you started making jam, take it out when you think it is almost ready to set. Spoon some jam onto the cold plate, pop it back in the freezer for a minute or two, then take it back out and push the jam with my finger to see if it wrinkles. If it does then the jam is ready.
- If you want a really firm set the wrinkle will stay in place after you have removed your finger. [This is the most difficult part of the process and it is something that becomes easier over time as your begin to know what to look for.]
- If you think the jam is a little runny and loose, return the pan to the heat and get it back on a rolling boil for another 10 minutes and test again.
- When ready to pot up, remove the pan from the heat, skim off any remaining scum and set the pan aside for 10 minutes to cool a little. By allowing the jam to sit, the fruit will settle a little and this results in better distribution of fruit when you come to pot up the jam.
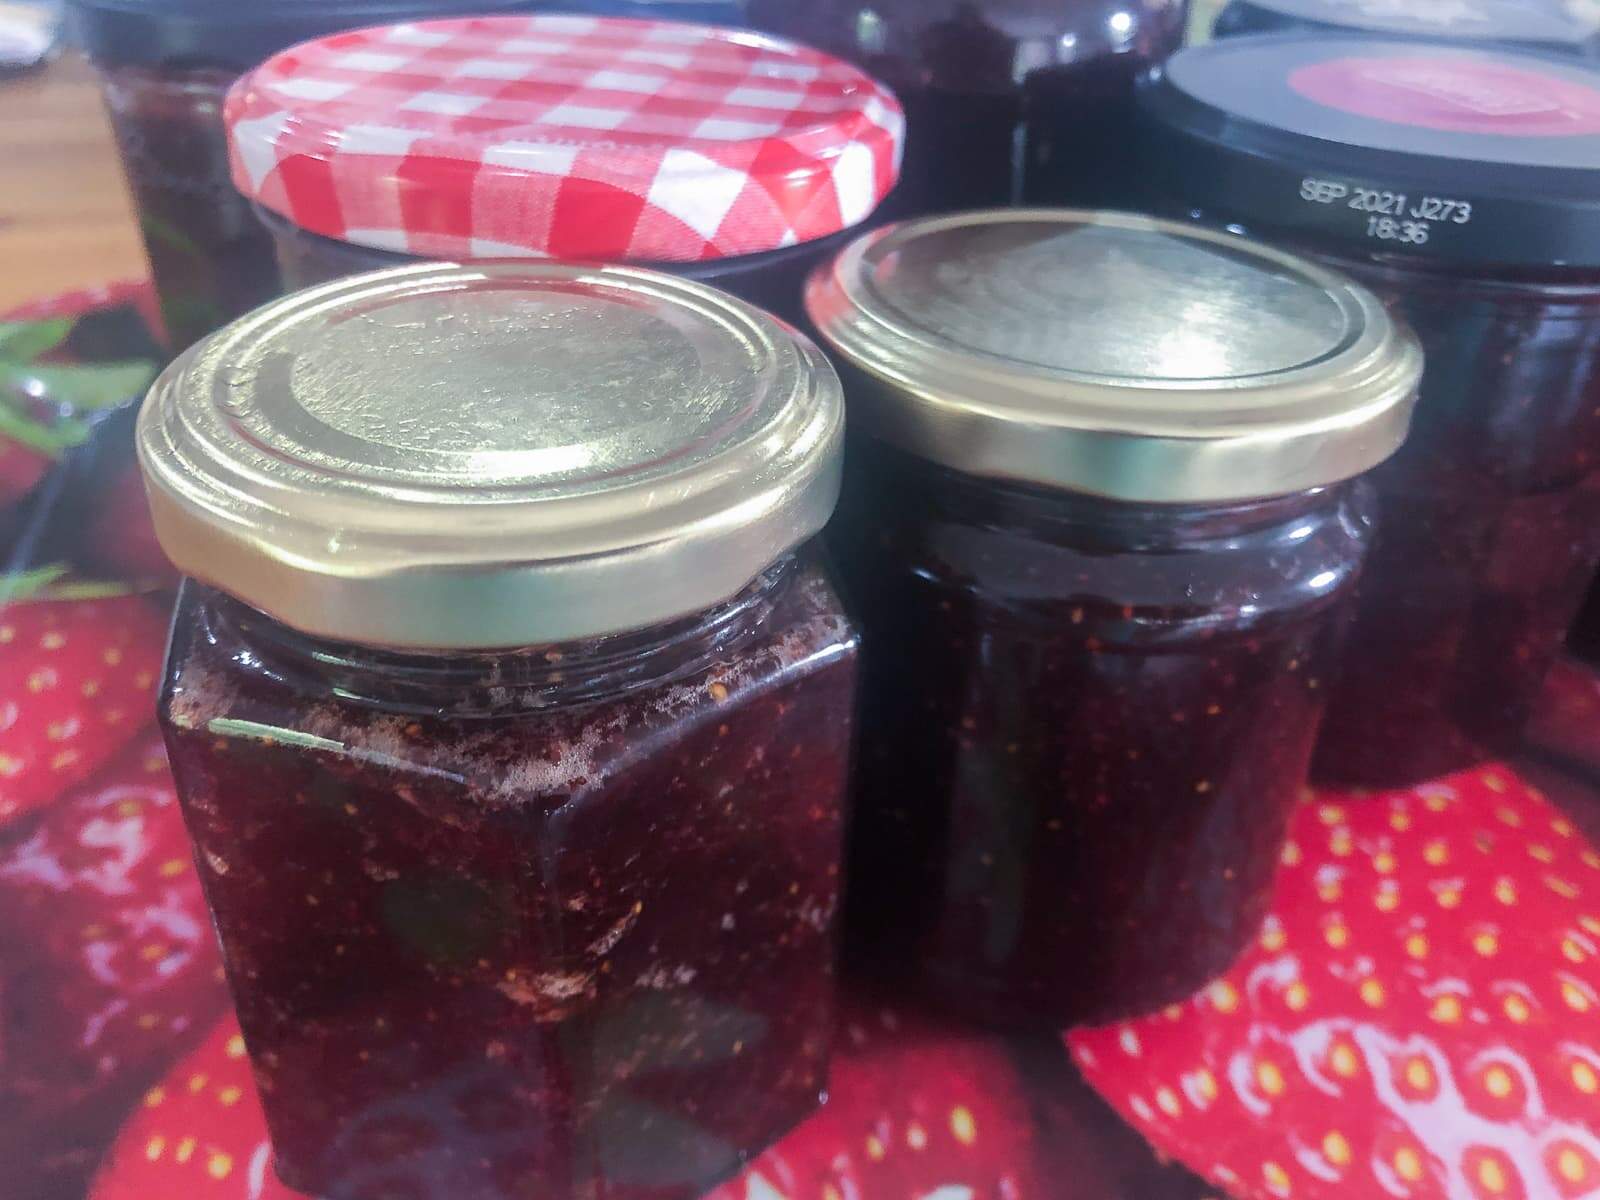
- Now pot the jam into the sterilised jars. Take care as the liquid is very hot, use a jam funnel over the top of the jars to get the jam cleanly into the jars and avoid spillage. Next place a wax paper disc on top as it prevents the jam drying out and also stops any mould from forming. Seal tightly with a screw on lid and set aside to cool. Once cool label the jam and store in a cool, dry place. The jam should keep for at least year stored like this.
Notes
• Please note that the nutrition information provided above is approximate and meant as a guideline only •
This recipe has been shared to CookBlogShare, click on the link to find recipes by fellow food bloggers.

Mel says
I tried a jam recipe last week & it was a complete disaster! I wish I’d gone with this recipe first. So easy to follow & make. I doubled the quantity as I am making quite a few jars as Christmas gifts. Thank you for the fantastic recipe! Can I just ask, once opened should the jam be stored in the fridge? Many thanks ☺️
Lesley says
Hi Mel, I'm so happy to hear my recipe worked for you, it's a very well tested recipe that has given me lots of lovely strawberry jam over the years. I love that you've made Christmas gifts of jam, I always love handing over a jar of homemade jam or chutney to friends and family. Yes, once opened I prefer to keep my jam in the fridge. Have a great Christmas!
Christopher says
The advice not to stir is a disaster. Strawberries stick to the bottom of the pan and burn, tainting the jam. To clean the pan is nearly impossible and requires a great deal of time and sweat. STIR THE JAM AT FREQUENT INTERVALS.
Michelle says
Christopher, sorry that you had trouble. Its quite possible that your pan was maybe slightly too high a temperature. Stirring can cause the jam to bubble up too much and therefore adding the possibility of burning your skin or boiling over. I've never had any issues with it burning the bottom of the pan, again possibly a pan that is not heavy bottomed enough could cause the heat to become too intense. I recommend a thick bottomed pan for jam. Regards, Michelle
Mary jamieson says
I just cannot get my jam to reach setting point! I’m always left with strawberry syrup which although absolutely delicious is a bit messy for scones. How long should the rolling boil take to reach 220 without overflowing? Thanks
Lesley says
The length of time it takes to reach a rolling boil, depends on the size of the pan and the hob you are using - which are all different. I use a really big stock pot, which I find helps stop the jam from overflowing. It also has a wider base which really helps get it up to temperature quicker. I usually get my jam up to a rolling boil then leave it there till is hits 105C/220F, I then test it. If it still doesn't set I leave it for another 5 minutes and work up from there.
Cat says
Incredibly delicious! Such great instructions for a jam novice like me and the perfect way to make the most of tasty strawberries when they're in season.
Lesley says
Thank you Cat, when you break down the recipe, homemade jam is a lot easier than it might first appear.