
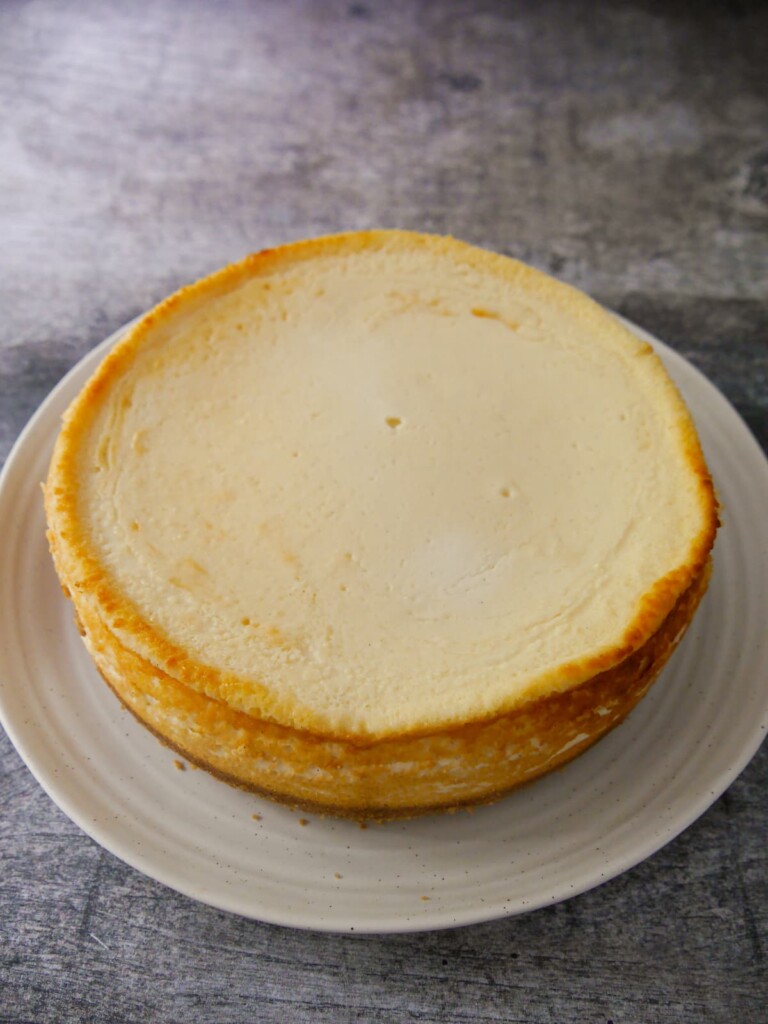
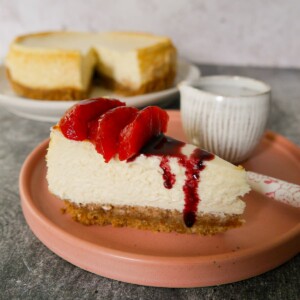
My baked vanilla cheesecake is a rich and creamy cheesecake, similar in style to a New York Cheesecake. I use both cream cheese and sour cream in the filling, flavouring it with some vanilla.
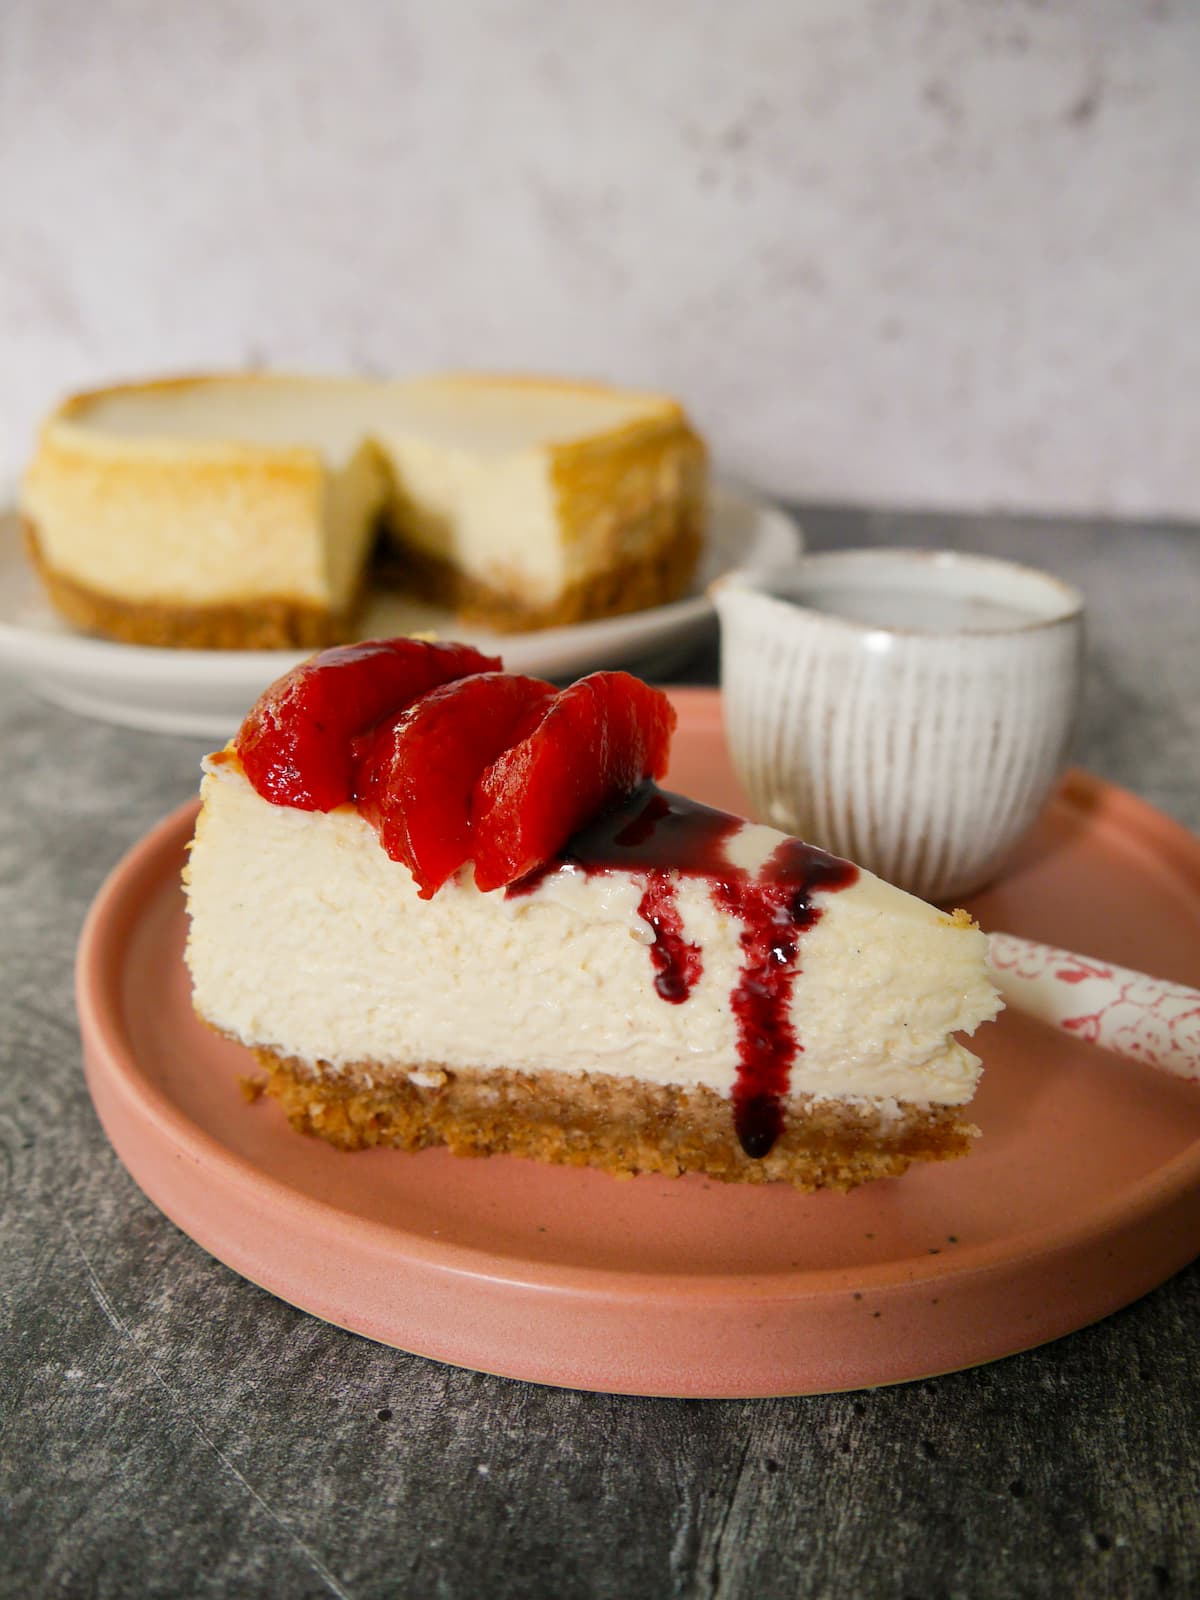
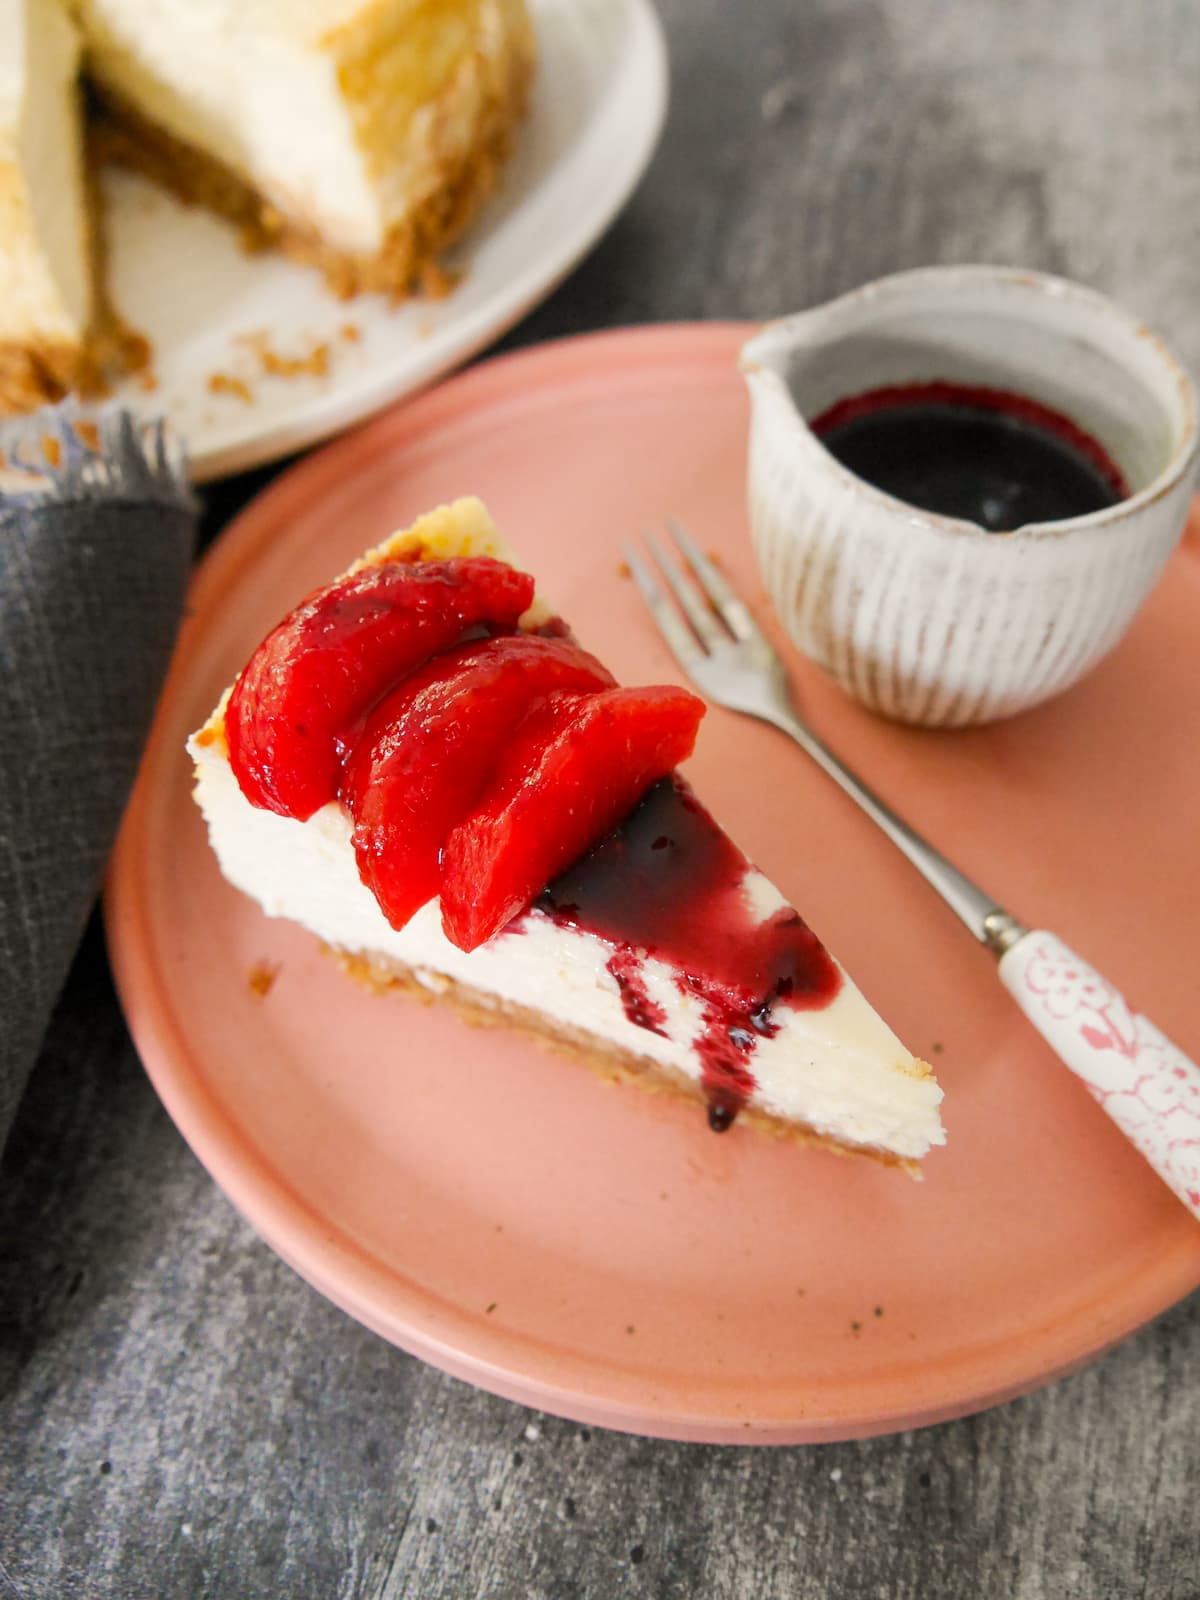
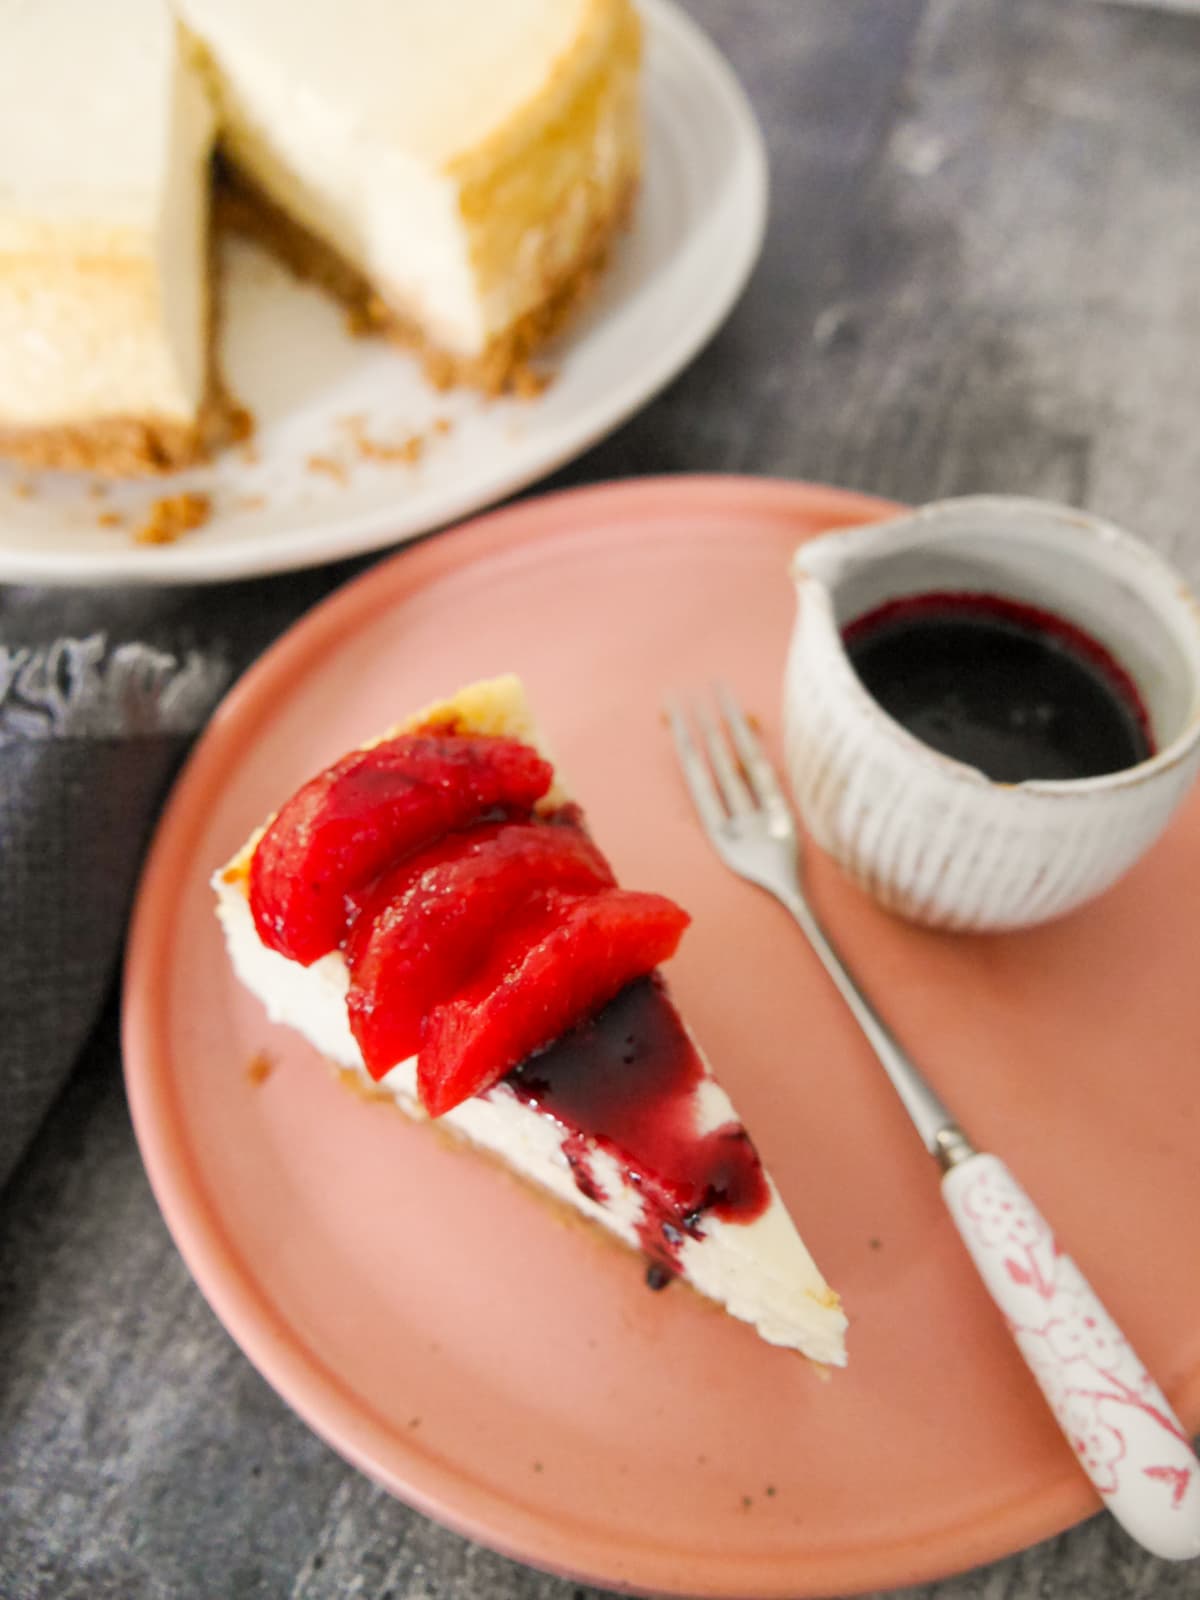
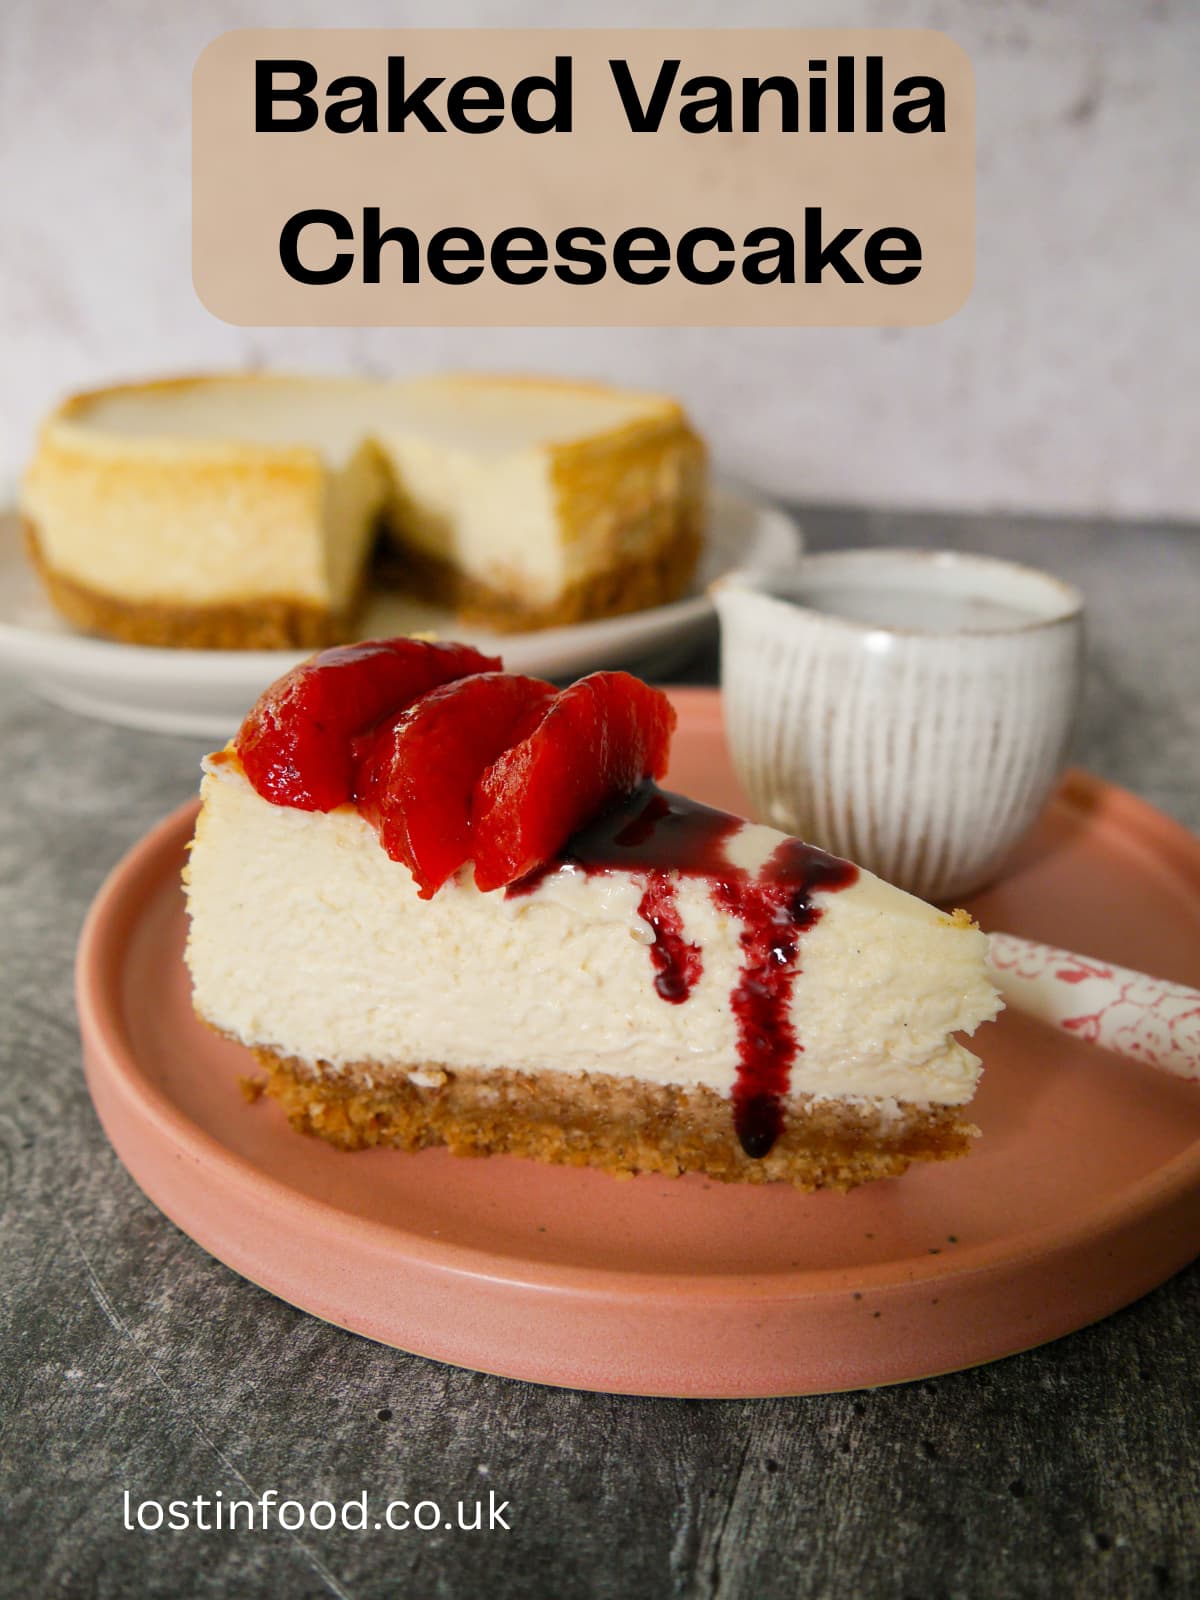
This cheesecake is delicious as it is, served plain. Or you can add some fruit toppings, like the mulled plums and syrup I've used here. You could also add some fresh fruits, or make a fruit compote.
Despite appearances, this baked vanilla cheesecake recipe is fairly straightforward. Just follow the steps and prepare well in advance so that the cheesecake has plenty time to cool and then set in the fridge.
Baked cheesecake a great dessert when entertaining family and friends. Cheesecake is always best made the day before you need it so this is a great festive prep-ahead dessert at Thanksgiving or on Christmas day!
Why you'll love this recipe
- A great make ahead dessert as you really are best to start it the day before and allow it to cool and set overnight in the fridge.
- Great for feeding a crowd as you can get 12 generous portions from one cheesecake. Making it an ideal dinner party or holiday dessert.
- Freezes really well, cut any leftovers into slices and store individually in the freezer for up to 3 months.
- Versatile recipe as the cheesecake tastes great on it's own. However, you can add other toppings like fresh or poached fruit, or fruit compotes, sauces and syrups.
Recipe ingredients
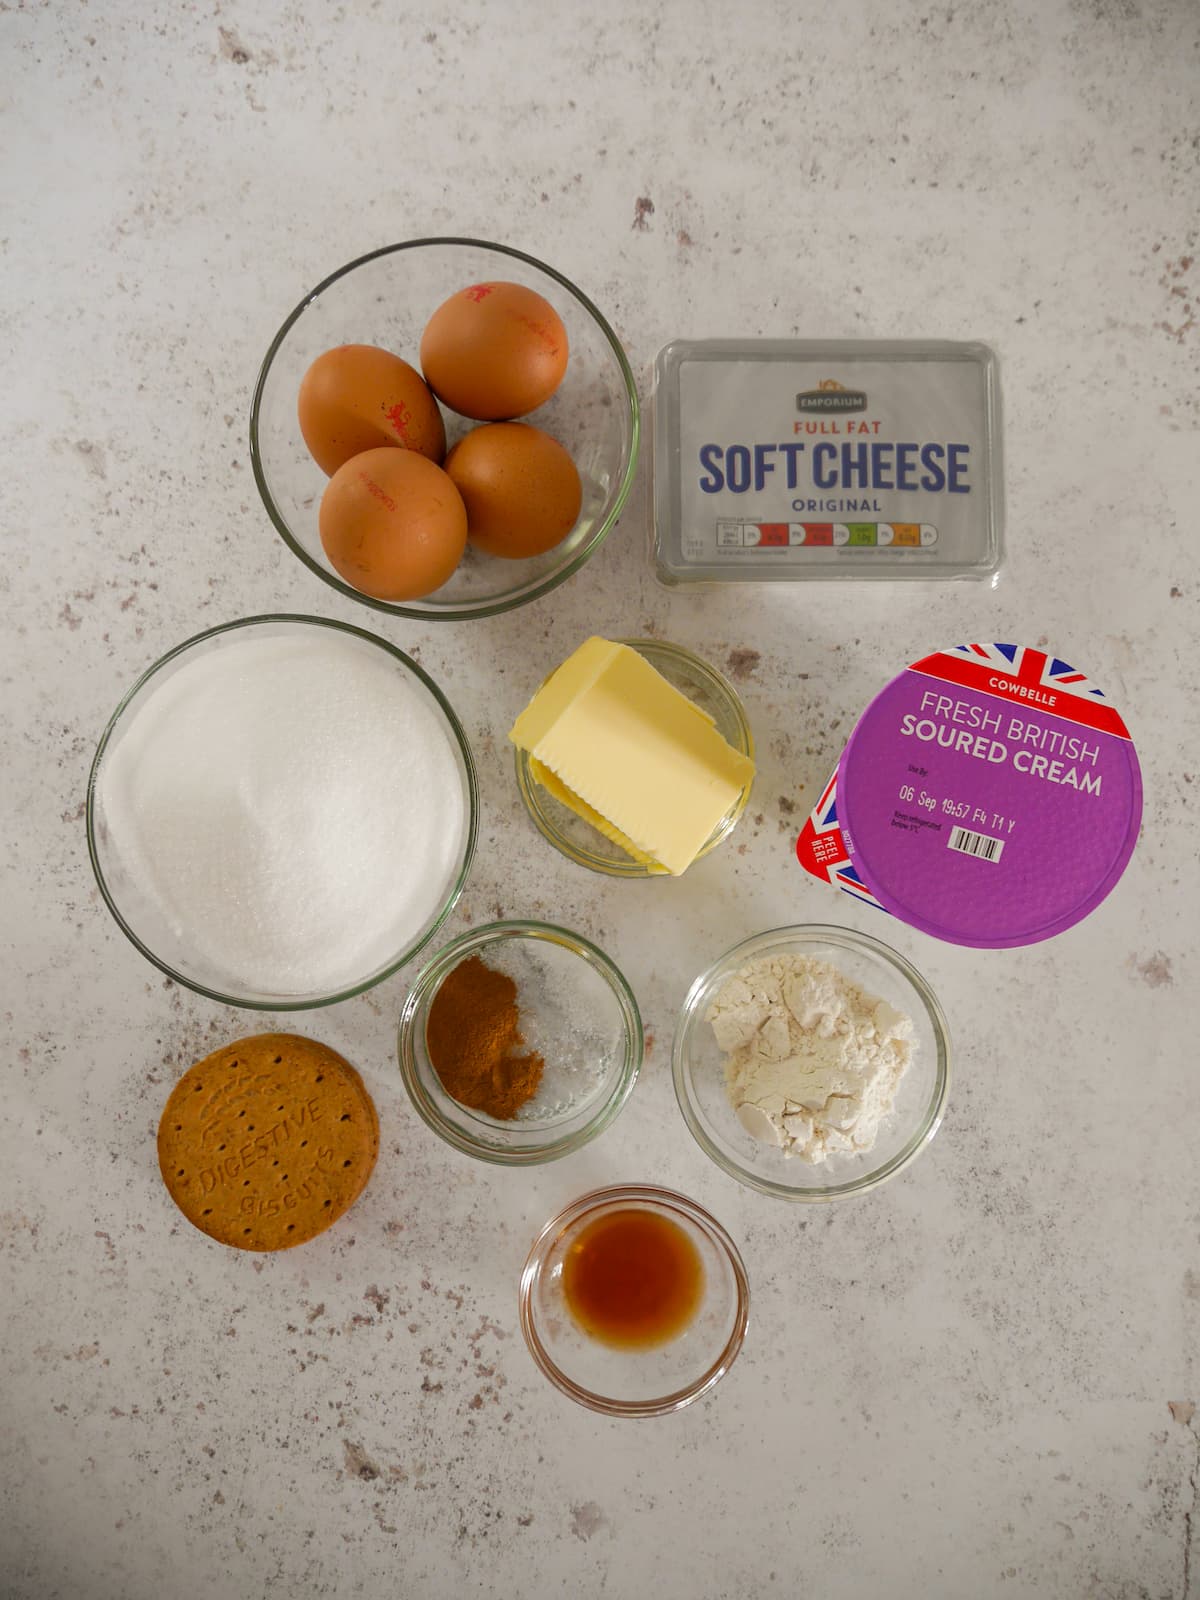
- Biscuit - I used digestive biscuits, you can use Graham Crackers or similar biscuit.
- Seasoning - to flavour the biscuit base I add some ground cinnamon, this is entirely optional. I also like to add fine sea salt to the base, the salt balances out the sweet flavours in this dessert.
- Butter - I used unsalted butter to make the cheesecake base. If using salted butter, omit the salt.
- Cheese - I always use full fat cream cheese when making a baked cheesecake as full fat will give the filling the best texture and set. Remove the cheese from the fridge 30 minutes prior to prep and allow it to come to room temperature. This makes for a creamier filling.
- Sugar - I use regular caster sugar, although you can also use golden caster sugar if you prefer.
- Flour - I add a little plain flour (all purpose flour) to the filling.
- Vanilla - I use vanilla extract to flavour the filling, you could also use vanilla bean paste.
- Eggs - I use 3 large free range eggs in the filling.
- Sour cream - I use sour cream in the filling which adds a creamy texture and a little acidity to the mixture.
How to make Baked Vanilla Cheesecake
- Preheat the oven to 220C/200CFan/430F. Place oven rack in middle shelf.
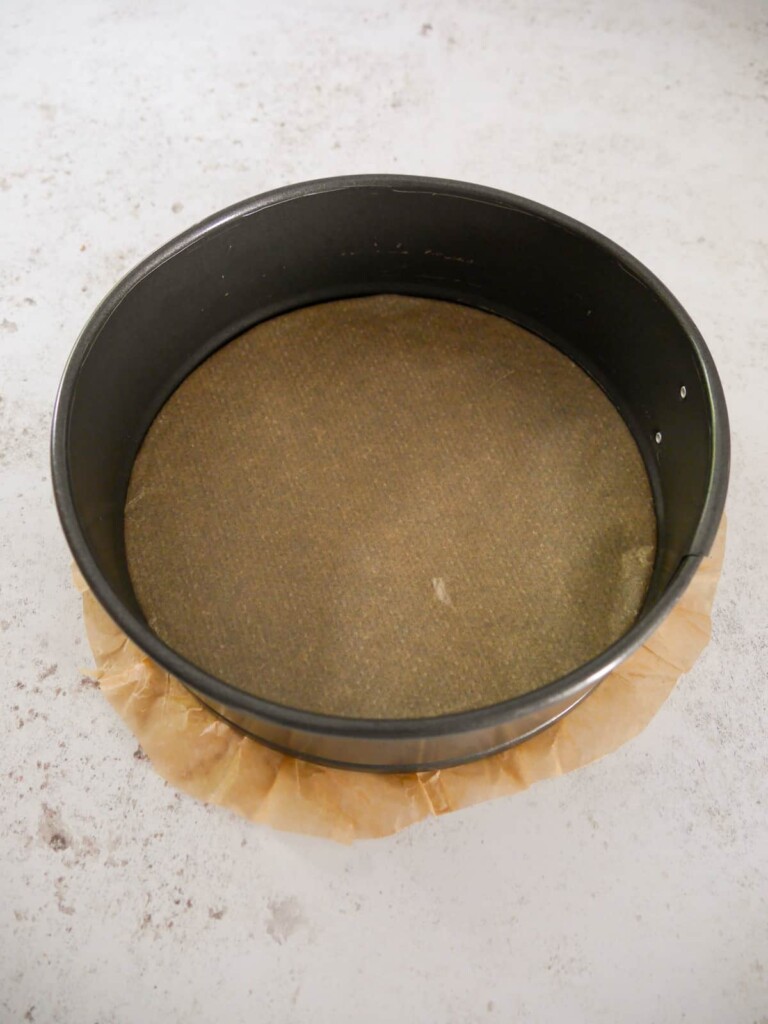
- Line the base of a 23cm (9") springform cake tin by putting a piece of parchment paper on the tin base and then clipping the side on so the paper is trapped and any excess paper sticks out of the bottom.
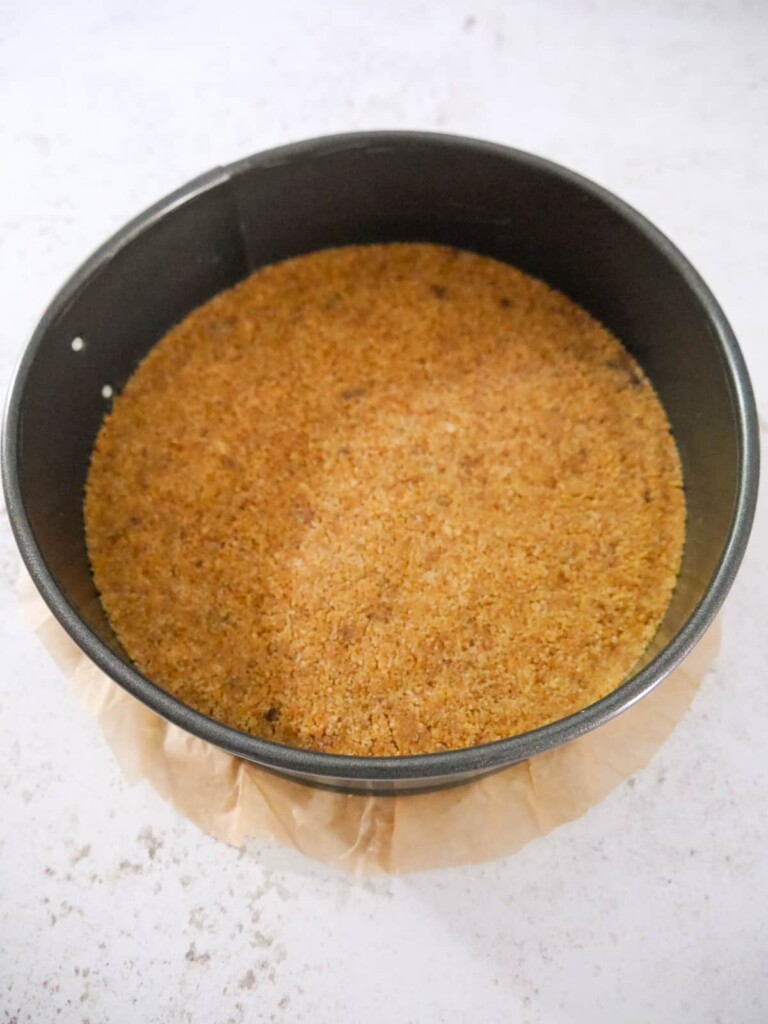
- For the base, start by placing the digestive biscuits into a large Ziploc bag and break down to a fine crumb like consistency using a rolling pin. Pour the mixture into a large mixing bowl. Stir through the ground cinnamon and sea salt.
- Melt the butter in a small saucepan and add to the digestive biscuit mixture, stir well to combine. Press the mixture into the bottom of the springform pan and place into the fridge to chill while you prepare the filling.
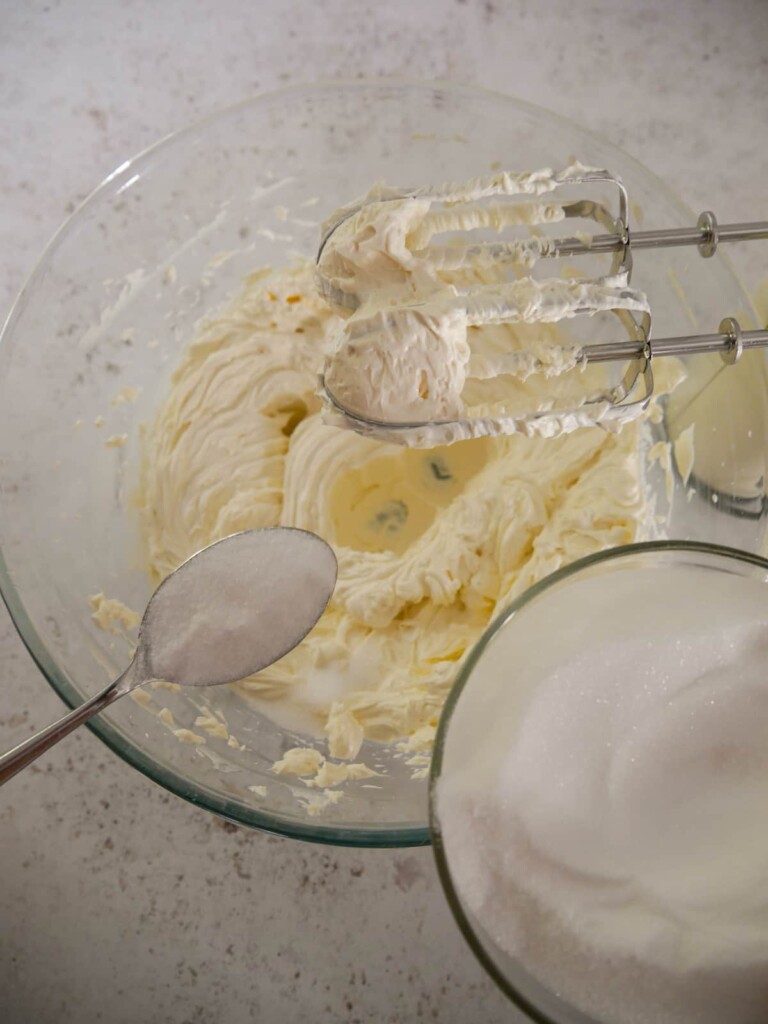

- Place the cream cheese into a large bowl and using an electric hand mixer beat the cheese until creamy, about 2 minutes.
- With the mixer on low, gradually add the caster sugar a spoon at a time. Then add the flour, scraping down the sides of the bowl when needed.
- Add the vanilla extract and whisk in 3 large eggs, one at a time, scraping down the sides of the bowl as needed.
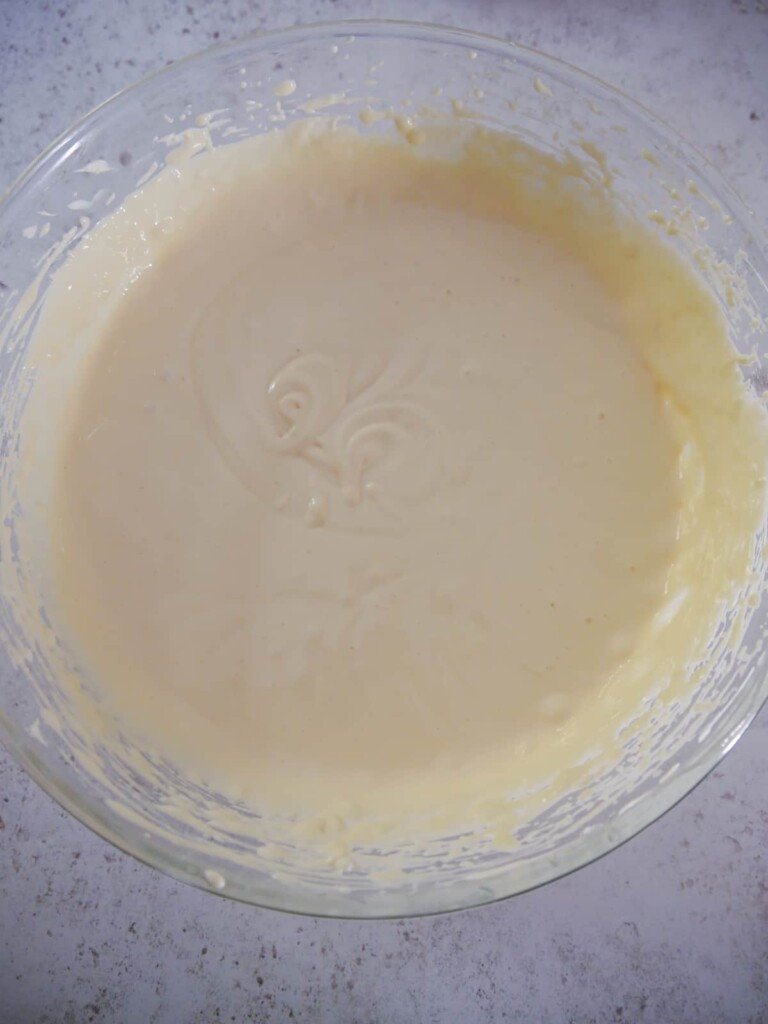
- Stir the soured cream until smooth and add to the filling mixture. Continue on low speed to blend until you have a smooth, light batter, but don't over-mix.
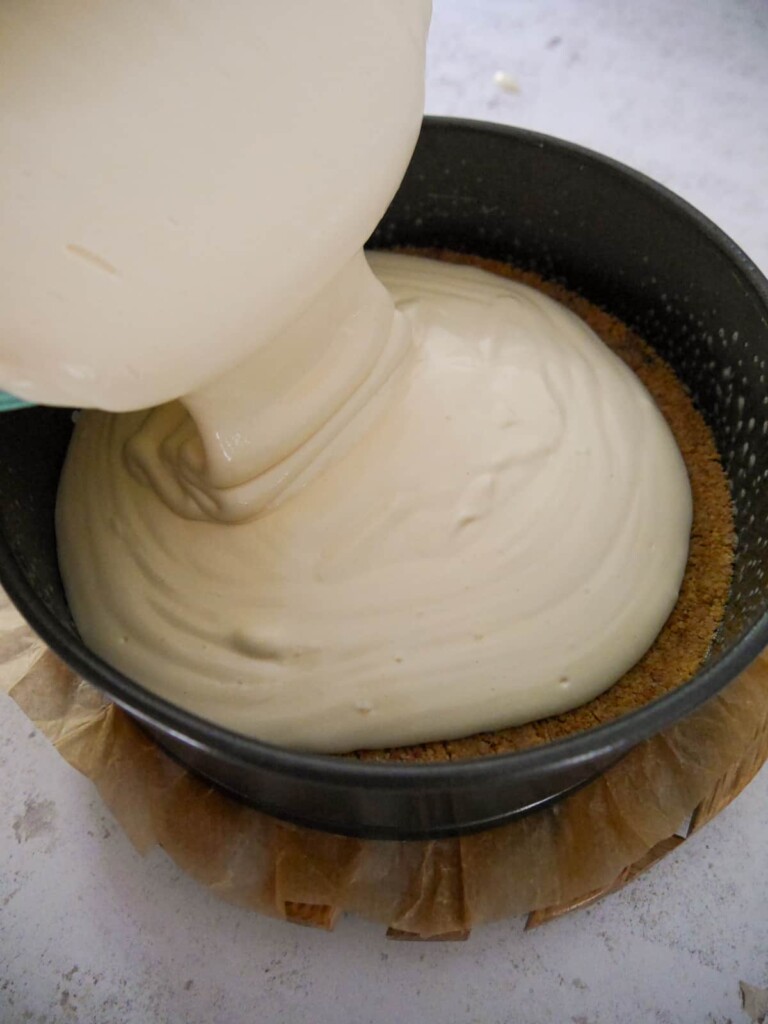
- Place the baking tin onto a baking sheet. Use a little melted butter to brush around the sides of the tin.
- Pour the filling over the biscuit base. The top of the filling should be smooth, if there are too many bubbles pierce them with a toothpick.
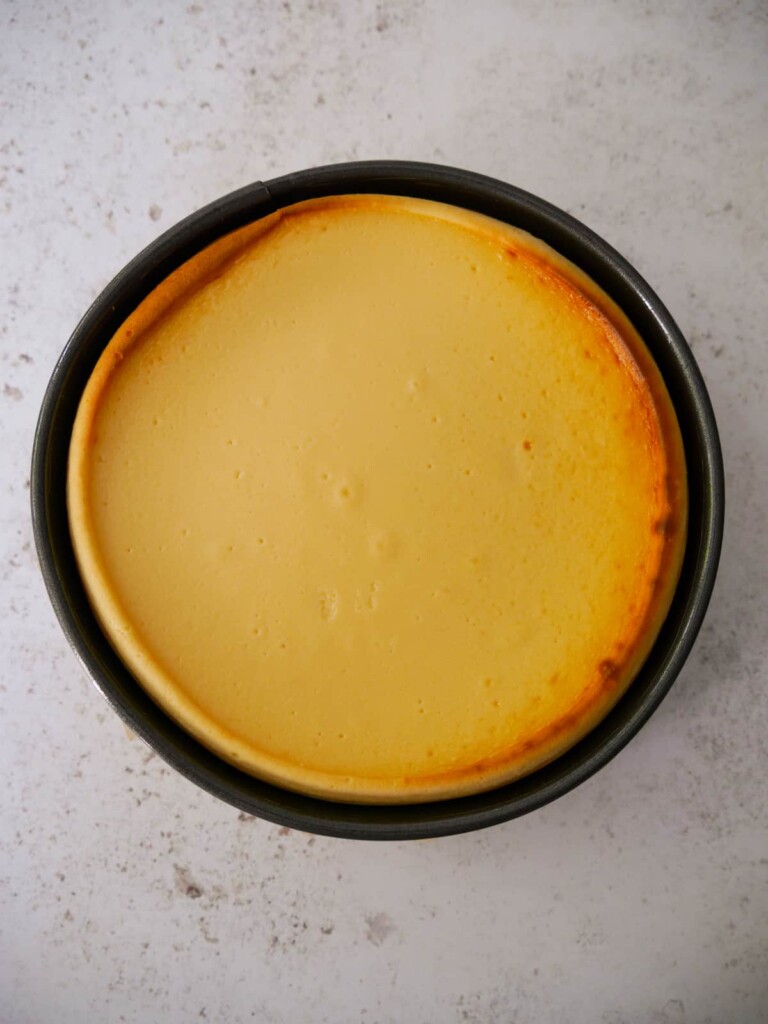
- Bake the cheesecake for 10 minutes.
- Now reduce the oven temperature to 110C/ 90CFan/230F and bake for 45 minutes more.
- The cheesecake is baked when the filling still has a slight wobble when you gently shake the tin. Turn off the oven.
- For a cheesecake with a creamy centre open the oven door and allow the cheesecake to cool in the oven for 2-3 hours.
- For a drier texture to your cheesecake leave the oven door closed while it cools. Again leave it to cool in the oven for 2-3 hours.
- While it cools in the oven, the cheesecake may get a slight crack on top, this is normal and nothing to worry about.
- Once completely cool, remove the cake tin from the oven, cover and place into the fridge for 6-8 hours, or ideally overnight. This chill time is essential to allow the cheesecake to properly firm up and set. Only once it has been properly chilled can you slice the cheesecake.
LESLEY'S TOP TIP: DO NOT OPEN THE OVEN while the cheesecake is baking, the temperature needs to remain constant!
Top tips for baking the perfect cheesecake
- Give yourself time! Make sure you won't need to use your oven immediately after baking the cheesecake, as once baked the cake needs time to cool completely.
- Start with room temperature ingredients. Ensure the cream cheese, eggs and sour cream have been taken out of the fridge at least an hour before starting.
- DO NOT over-mix the batter. Whisk until incorporated and stop there.
- Make sure your oven is not too hot. If the outside bakes too fast it will shrink resulting in cracks in the top when it cools.
- DO NOT remove the cheesecake from the oven immediately after baking. Allow the cheesecake to slowly come down to room temperature until internal and external temperatures match - around 2-3 hours.
- For a creamy filling open the oven door while it cools, for a drier filling leave the oven door closed.
- FINALLY - do not be tempted to cut the cheesecake too soon. This is one bake that benefits being made ahead of time and needs a minimum of 6-8 hours, ideally overnight, to firm up in the fridge, before attempting to cut.
LESLEY'S TOP TIPS: These are tips to help you achieve a perfect flat top. But remember, if the top cracks these things do happen. You can add fruit or toppings, no one will be the wiser, and the cheesecake will still taste amazing!
Recipe variations
- Biscuit - I used digestive biscuits, Graham Crackers would a great substitute if you are in the USA. You could also use a hard ginger biscuit as the base, which adds extra flavour.
- Citrus -I've substituted the vanilla extract with lemon zest and this worked equally well. Citrus flavours work great in a baked cheesecake, orange zest would also be delicious.
- Gluten Free - to make a Gluten free cheesecake swap the digestive biscuits for a gluten free biscuit, and replace regular plain flour (all purpose) with a gluten free plain flour. [Allergy Advice - soya free and nut free. For comprehensive and detailed allergy advice go to Allergy UK.]
Serving suggestions
Served on its own, this New York style cheesecake is smooth, creamy and utterly delicious. You can serve it with a little double cream (heavy cream) if you wish.
You can also get creative with the toppings. Add fresh fruits or some poached fruit, like the Mulled Plums & Syrup I've used here. Top with some fresh berries, or slices of fresh fruits like peaches.
You can also turn fresh fruit or frozen fruit turned into a compote, try my Black Cherry Compote or Blueberry Compote.
FAQs
The plain cheesecake, without any fruit toppings, is ideal for freezing. I recommend cutting the cheesecake into serving sizes and placing a small piece of baking parchment between each of the slices to keep them separate. When ready to enjoy remove the required number of slices from the freezer and allow to defrost in the fridge.
Yes you can, plain yogurt and Greek yogurt are easy substitutes for sour cream in this recipe.
It comes down to personal preference. Sour cream is not essential, but it does add a balance of acidity and helps to create a creamier cheesecake filling. Without the sour cream you will get a more cream cheese tasting dessert.
Pin the recipe
Additional recipe suggestions
If you like this recipe then try some of my favourite dessert recipes:
- Dark Chocolate Parfait with Cherry Compote
- No-bake Lime & Ginger Cheesecake
- No-bake Chocolate Orange Cheesecake
- Individual Sherry Trifles
- Christmas Pavlova
- Plum & Almond Galette
- Profiteroles with Chestnut Cream
Baked Vanilla Cheesecake Recipe
Equipment
- electric hand mixer
- 23 cm (9") springform cake tin
- baking parchment
- large mixing bowl
- weighing scales
- measuring spoons
Ingredients
- 250 g digestive biscuits (or use Graham Crackers or similar biscuit)
- 1 teaspoon ground cinnamon
- ½ teaspoon fine sea salt
- 100 g butter
- 600 g full fat cream cheese (room temperature - remove from fridge 30 minutes prior to prep)
- 200 g caster sugar
- 50 g plain flour
- 2 teaspoon vanilla extract (or 1 ½ of vanilla bean paste)
- 3 large free range eggs
- 200 ml sour cream
Instructions
- Preheat the oven to 220C/200CFan/430F. Place oven rack in middle shelf.
- Line the base of a 23cm (9") springform cake tin by putting a piece of parchment paper on the tin base and then clipping the side on so the paper is trapped and any excess paper sticks out of the bottom.
- For the base, start by placing the digestive biscuits into a large Ziploc bag and break down to a fine crumb like consistency using a rolling pin. Pour the mixture into a large mixing bowl. Stir through the ground cinnamon and sea salt.
- Melt the butter in a small saucepan and add to the digestive biscuit mixture, stir well to combine. Press the mixture into the bottom of the springform pan and place into the fridge to chill while you prepare the filling.
- Place the cream cheese into a large bowl and using an electric hand mixer beat the cheese until creamy, about 2 minutes.
- With the mixer on low, gradually add the caster sugar a spoon at a time. Then add the flour, scraping down the sides of the bowl when needed.
- Add the vanilla extract and whisk in 3 large eggs, one at a time, scraping down the sides of the bowl as needed.
- Stir the soured cream until smooth and add to the filling mixture. Continue on low speed to blend until you have a smooth, light batter, but don't over-mix.
- Place the baking tin onto a baking sheet. Use a little melted butter to brush around the sides of the tin.
- Pour the filling over the biscuit base. The top of the filling should be smooth, if there are too many bubbles pierce them with a toothpick. Bake the cheesecake for 10 minutes.
- Now reduce the oven temperature to 110C/ 90CFan/230F and bake for 45 minutes more. TOP TIP: DO NOT OPEN THE OVEN while the cheesecake is baking, the temperature needs to remain constant!
- The cheesecake is baked when the filling still has a slight wobble when you gently shake the tin. Turn off the oven.
- For a cheesecake with a creamy centre open the oven door and allow the cheesecake to cool in the oven for 2-3 hours.
- For a drier texture to your cheesecake leave the oven door closed while it cools. Again leave it to cool in the oven for 2-3 hours.
- While it cools, the cheesecake may get a slight crack on top, this is normal and nothing to worry about.
- Once completely cool, remove the cake tin from the oven, cover and place into the fridge for 6-8 hours, or ideally overnight. This chill time is essential to allow the cheesecake to properly firm up and set. Only once it has been properly chilled can you slice the cheesecake.
Notes
• Please note that the nutrition information provided above is approximate and meant as a guideline only •
Chloe says
I cannot get enough of baked cheesecake and this version didn't disappoint!
Lesley says
Thank you Chloe I love a baked cheesecake.
Hazel says
What a delicious cheesecake. We had it at the weekend when family came for dinner and it was a big hit!
Lesley says
Thank you Hazel, I'm really glad you enjoyed it.
Petta says
Hello!
I was wondering is it possible to make this cake using frozen plums?
Thank you
Lesley says
Hello Petta, yes you can use frozen plums to make the mulled plums for topping the cheesecake. Having been frozen they are likely to be a little softer, but just watch as you cook them, they should be absolutely fine and a great use of your frozen fruit.