
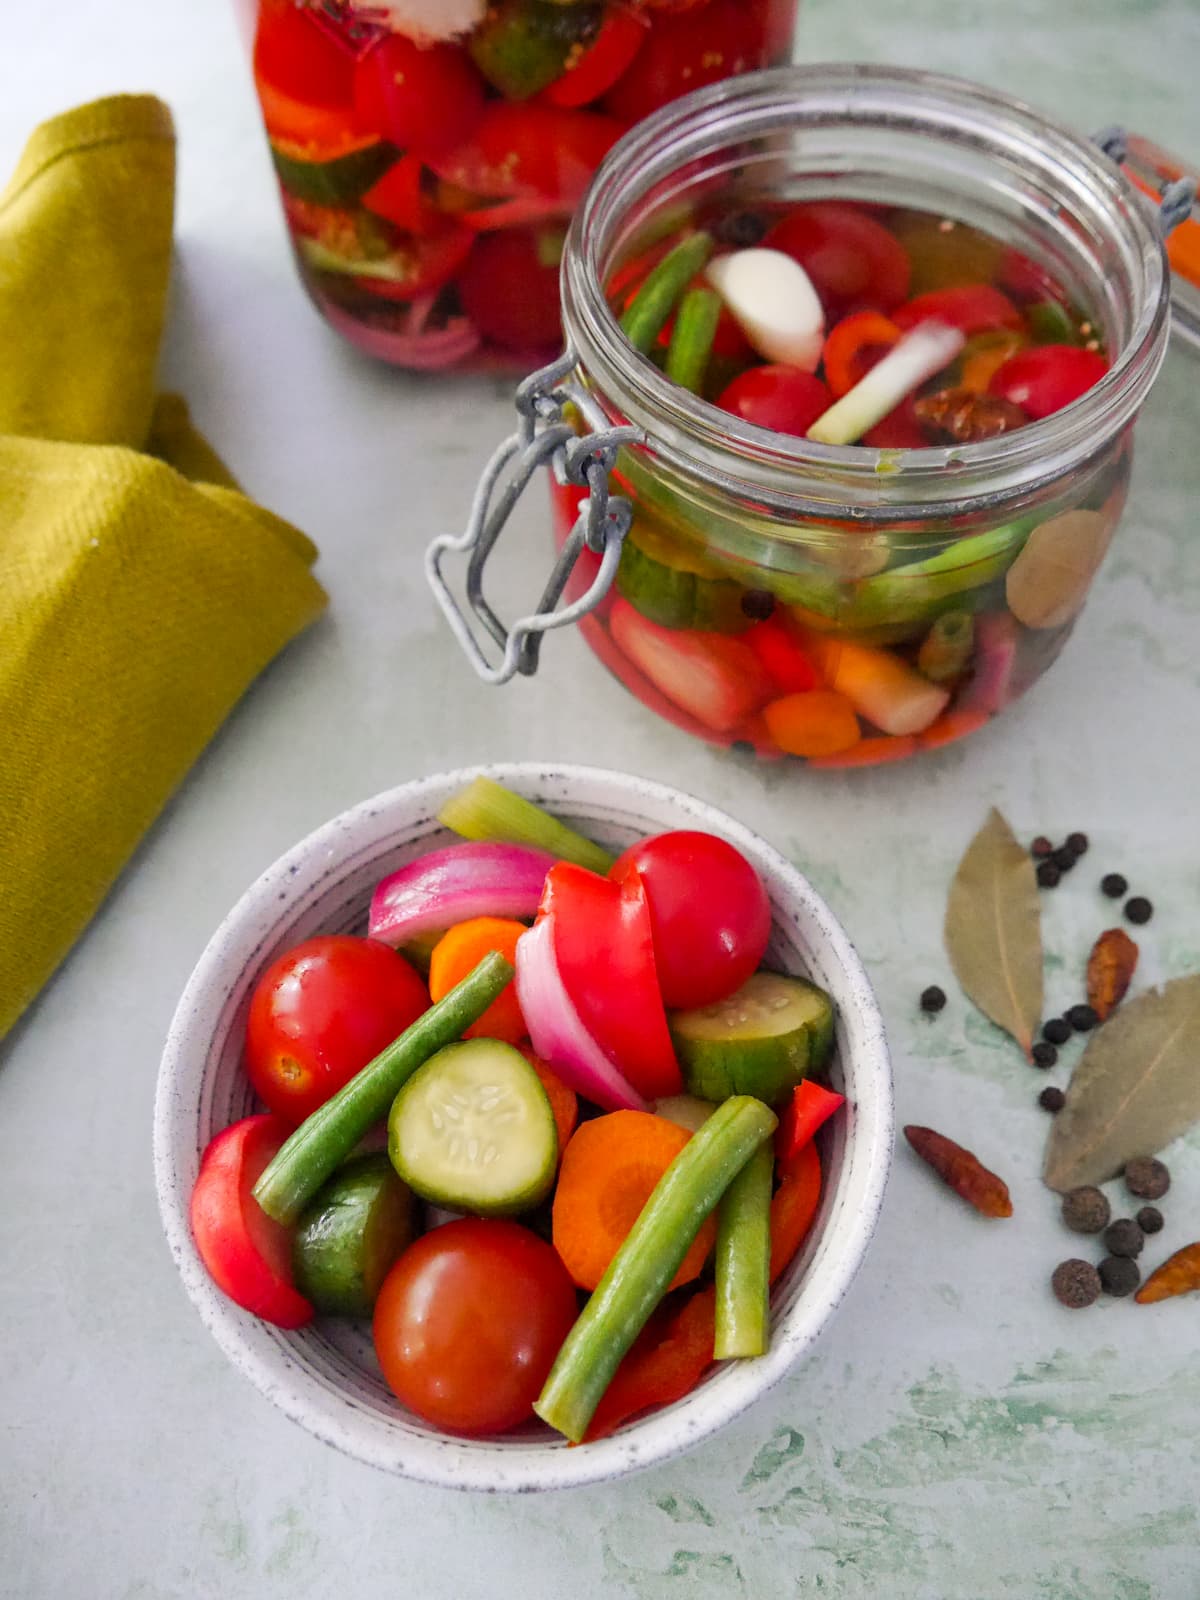
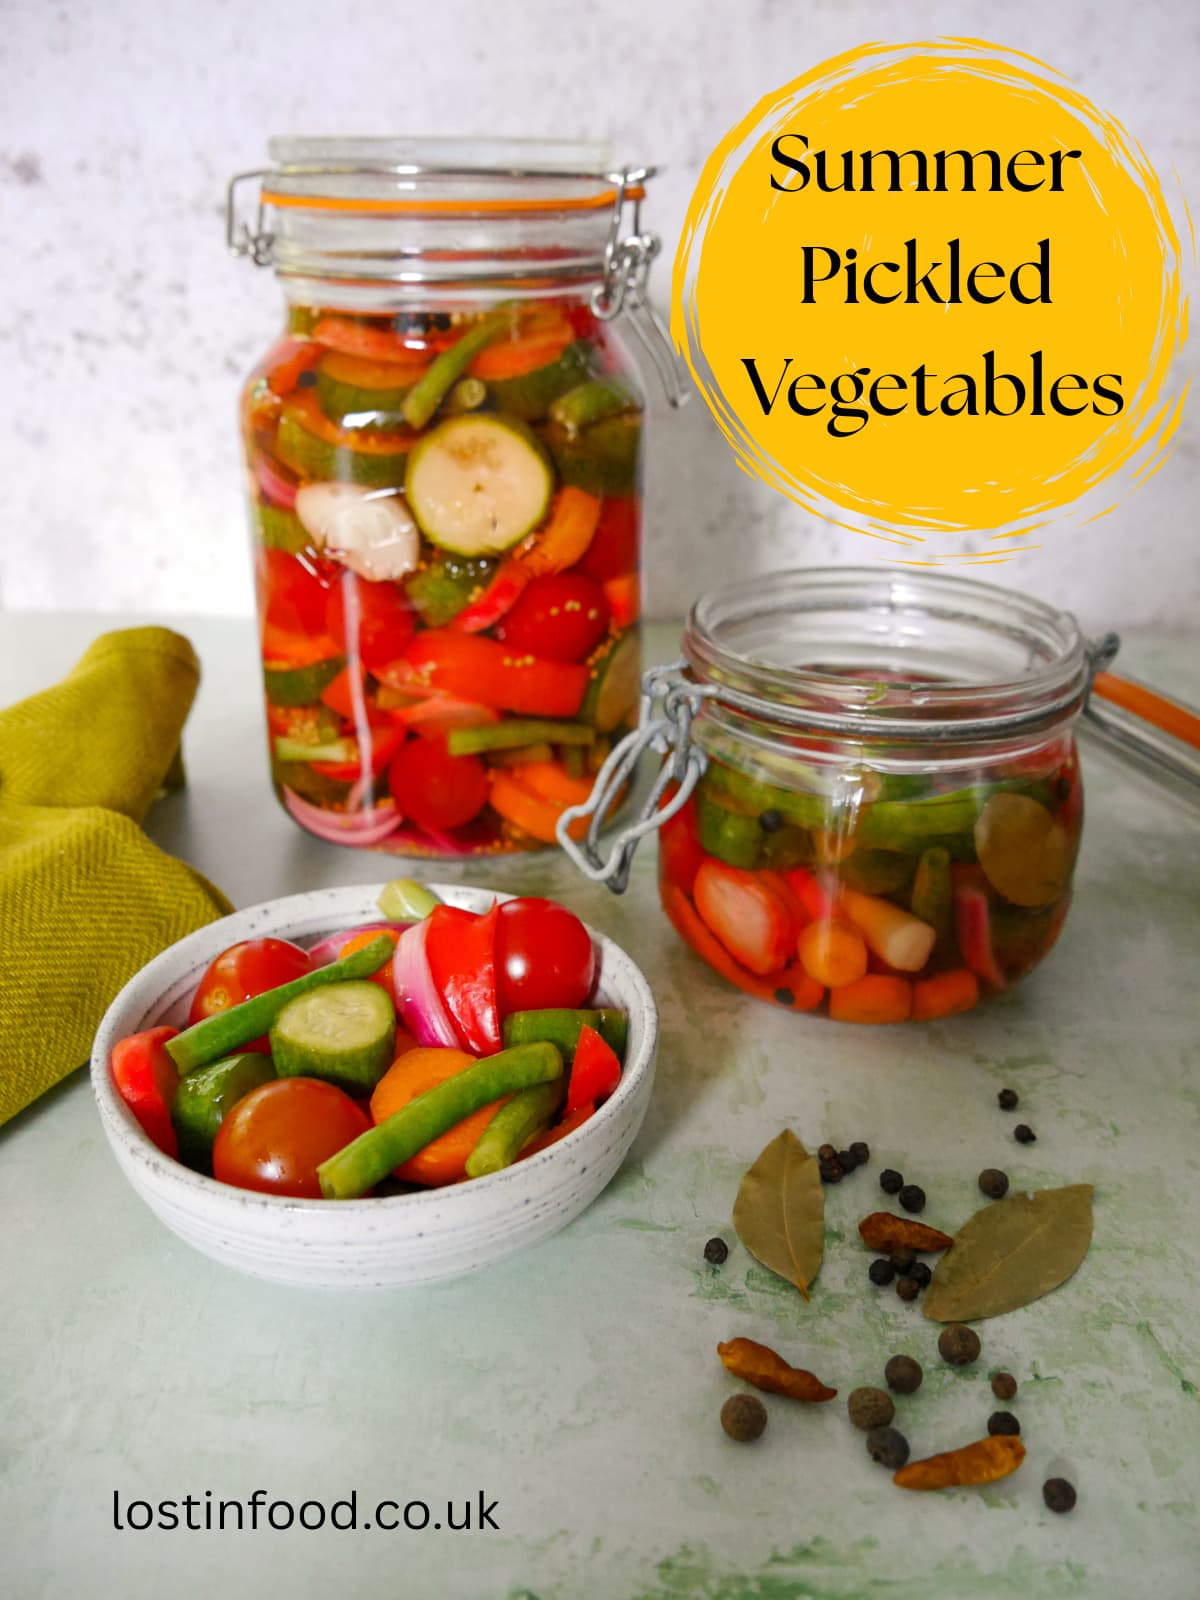
This colourful summer pickled vegetables recipe takes some of my favourite summer vegetables, combining them in a sweet, sour and mildly spiced pickling vinegar.
Old fashioned summer pickled vegetables are the perfect way to preserve summer fresh vegetables, particularly if you have an abundance growing in your gardens at home.
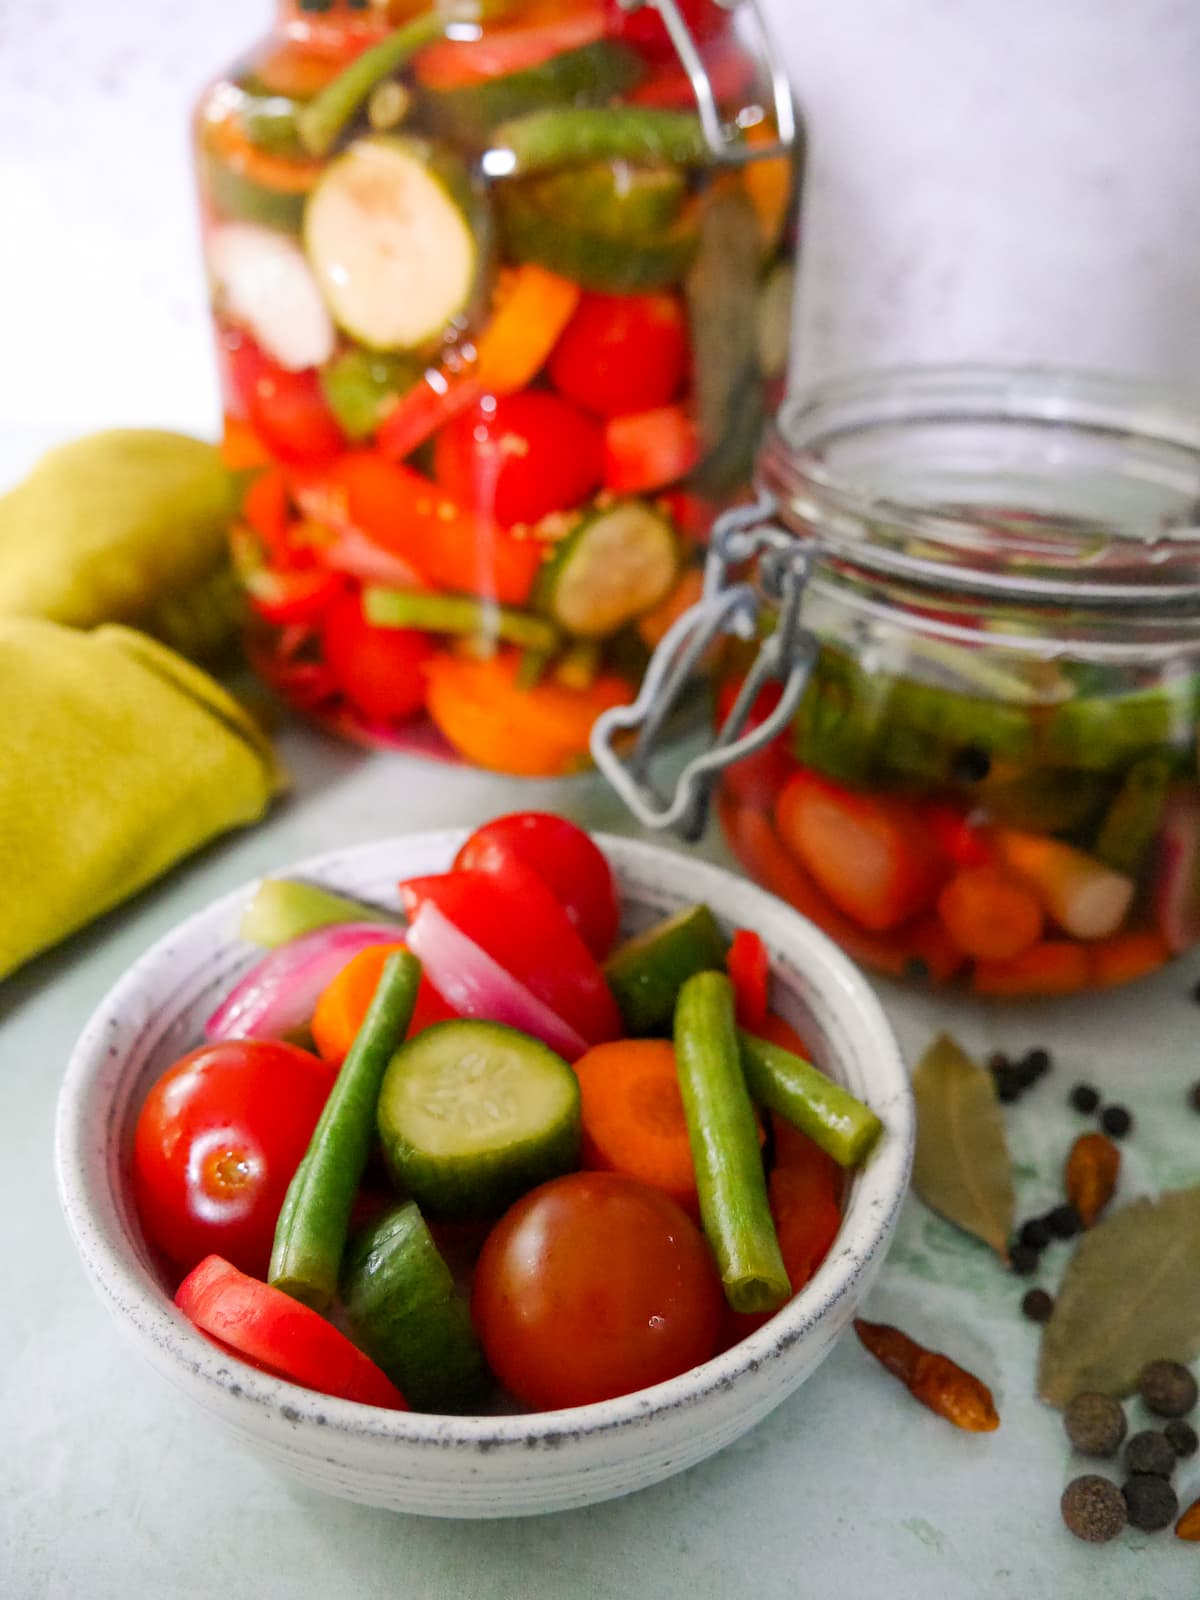
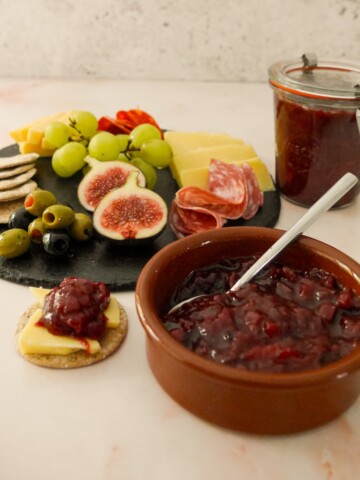
These sweet summer pickled vegetables are the perfect additional to cold cuts and cheeseboards. However, they also make a great barbecue side, the tangy vegetables cutting through the smoky meats.
Why you'll love this recipe
- This is a quick pickle recipe as the pickles can be enjoyed within 6 hours of making, although for the best flavour I recommend leaving them to sit for a week in the fridge.
- The perfect balance of flavours the finished pickles are sweet, sour, tangy and mildly spicy.
- Adapt the recipe to suit your own tastes and the fruits and vegetables that you enjoy eating.
Recipe ingredients
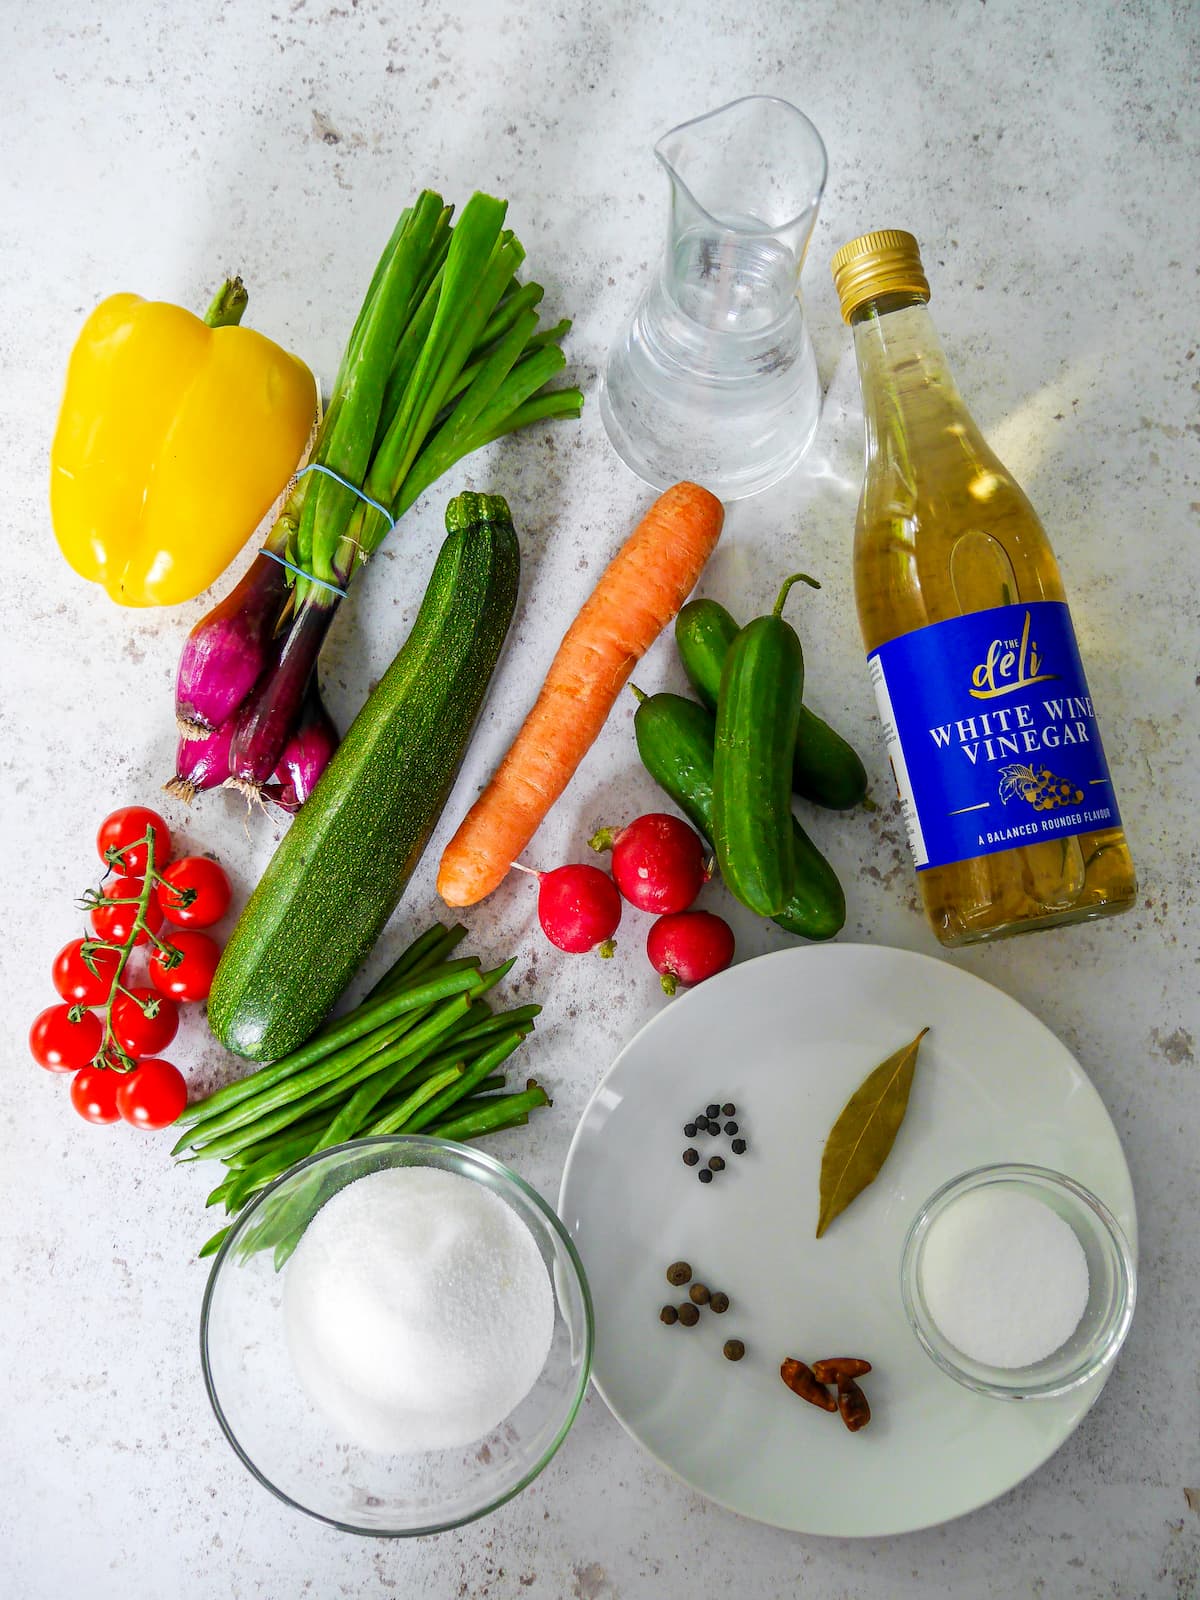
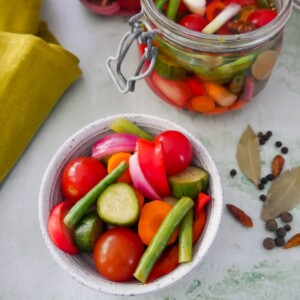
- Vegetables - I used a combination of carrot, bell pepper, spring onions (green onions), radish, mini cucumbers, courgette (zucchini) and fine green beans in this pickle.
- Tomatoes - if adding tomatoes only use small tomatoes, like a cherry or baby plum tomato.
- Brining liquid - a litre of cold water and fine sea salt is used to brine the vegetables before pickling. This salty water is washed off before the vegetables are placed in the jar.
- Pickling liquid - I combine fine caster sugar with white wine vinegar to form the base of the pickling liquid.
- Dried spices - I add a bay leaf, black peppercorns, allspice berries and dried chillies to the pickling liquid for extra flavour.
How to pickle vegetables for storage
- Prepare all the vegetables. Make a brining liquid by dissolving the salt in the cold water.
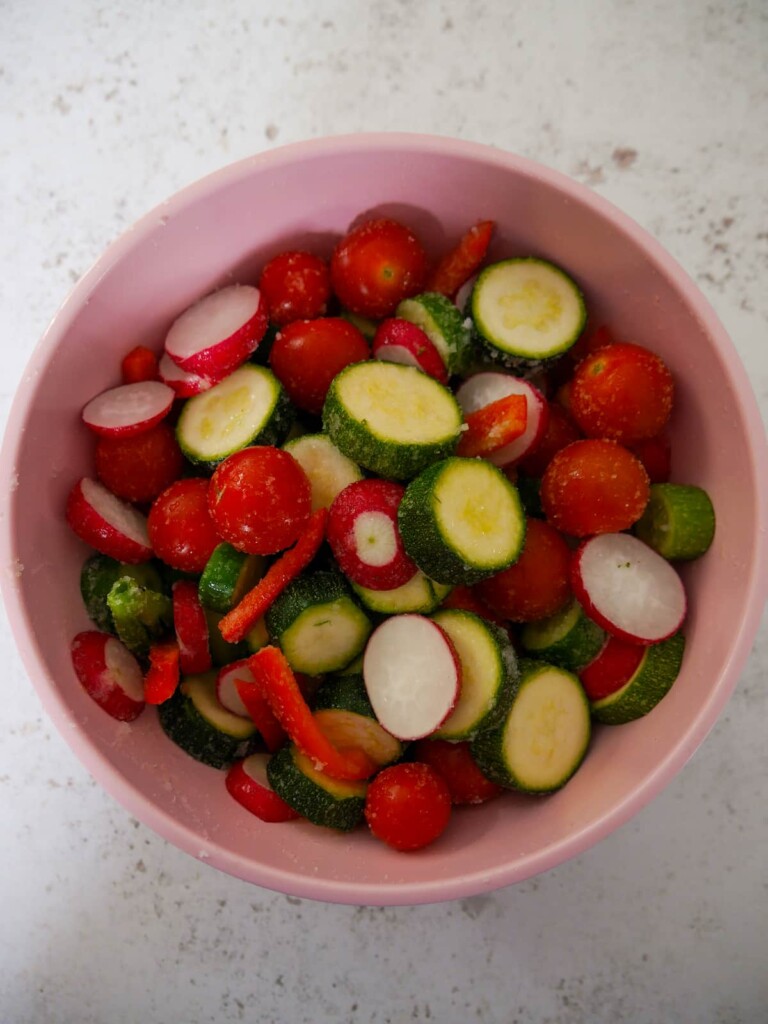
- Place the cucumber, courgette, radish, bell pepper and tomatoes in a bowl. Pour some fine sea salt between each layer of vegetable and mix thoroughly to coat the fruits and vegetables. Cover and set aside for at least 6 hours, or 12 hours overnight.
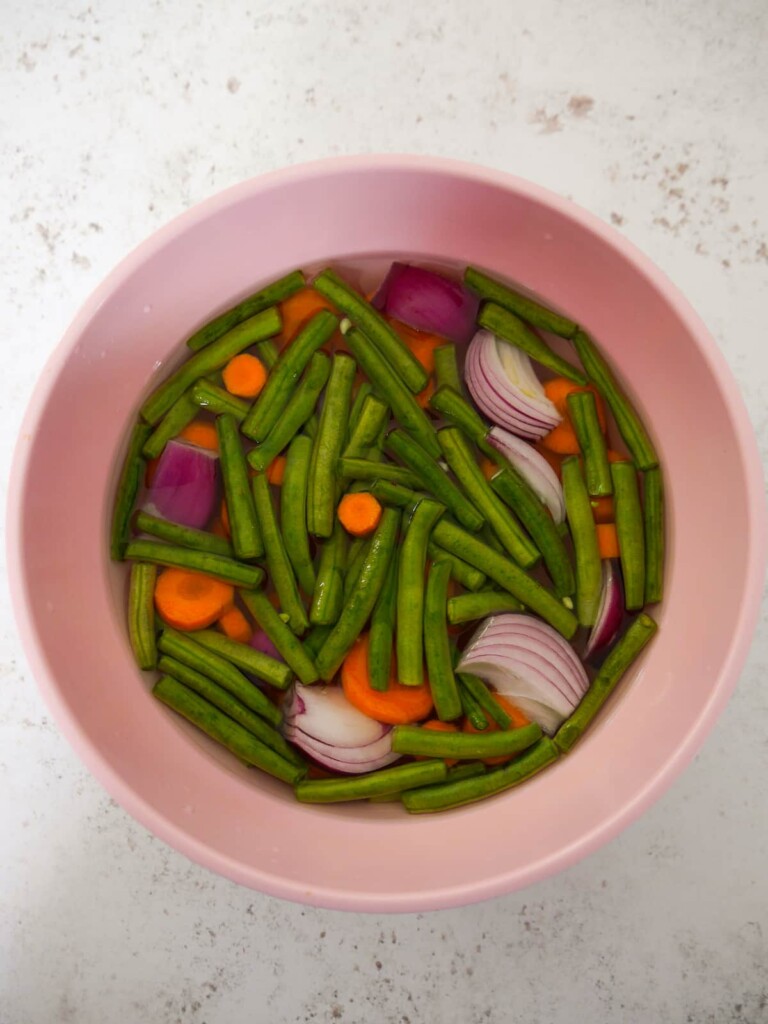
- Place the carrots, green beans and red onion and spring onions into the bowl with the brining liquid. Cover and set aside for at least 6 hours, or 12 hours overnight.

- Next day, prepare and sterilise a 1.5L Mason/Kilner jar.
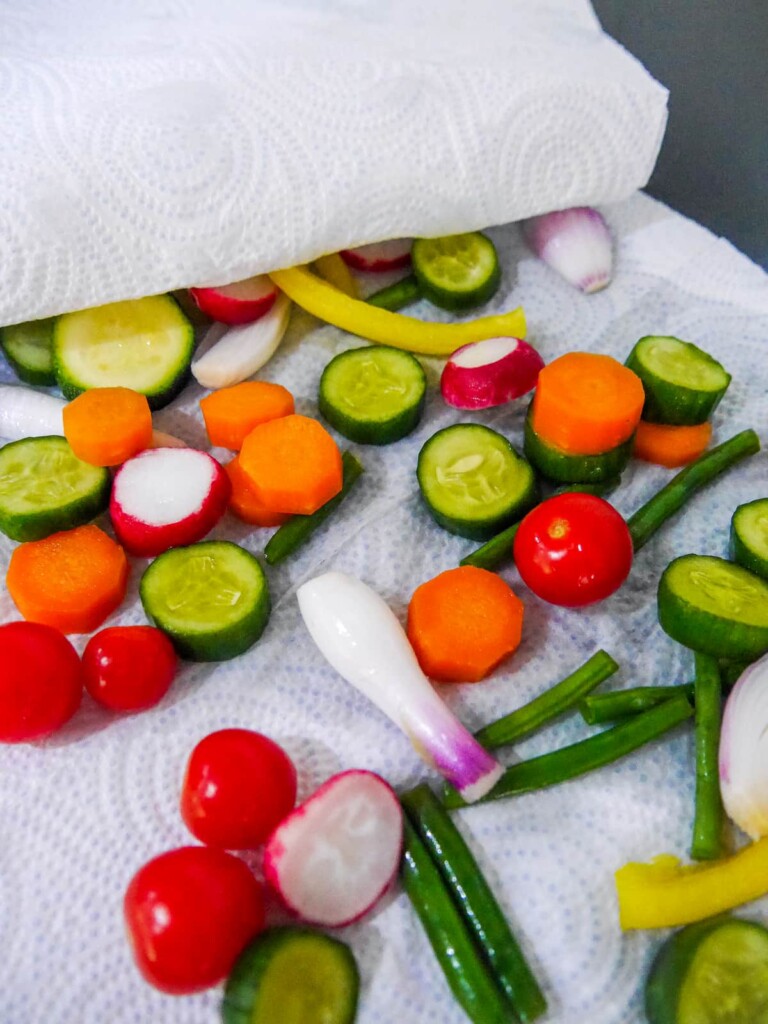
- Take both bowls of vegetables and drain off the salted water, then thoroughly rinse the vegetables under cold running water to remove as much salt/brine as possible. Place onto kitchen paper and pat dry.
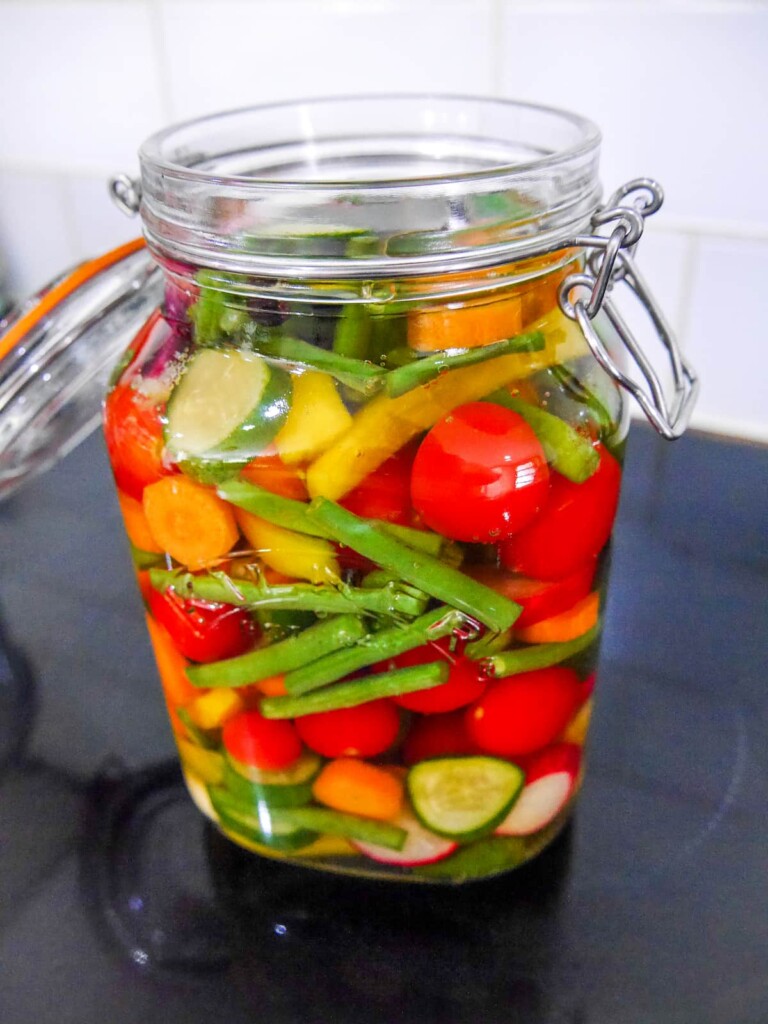
- Place the dried vegetables into the warm, sterilised jar.
- Place the vinegar, sugar and spices into a saucepan, bring to a boil and cook for 5 minutes.
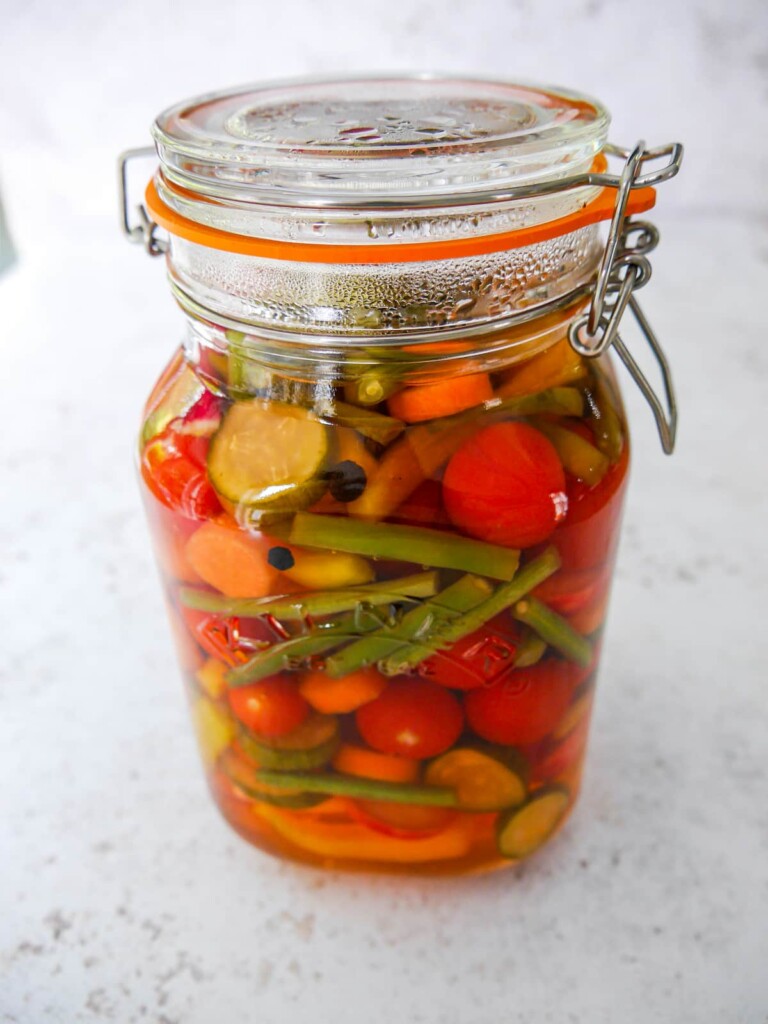
- Pour the pickling liquid, including all the dried spices, over the vegetables and seal the jar tightly.
- Once cooled place the pickled into the fridge. They can be enjoyed after a couple of hours, but I recommend leaving the pickles for a week before eating, this gives the pickles time to absorb more of the pickle flavour.
- Store in the fridge and enjoy within 8 weeks, although you can store for 3 months.
Salting/brining vegetables
When pickling any vegetables I always salt and/or brine them first overnight. These processes remove excess water from the vegetables, improving their texture and leaving them crisp.
The particular process I use depends on what fruit and vegetable I'm planning on pickling. Below I provide guidance on what process works best with what type of fruit or vegetable!
Dry salting
This process requires the prepared fruits and vegetables to be layered in a bowl with plenty sea salt. Use this with high content fruits and vegetables like cucumber, courgette (zucchini), cabbage, peppers or tomatoes.
Brining
This process requires the prepared fruits and vegetables to be covered in a salty brine (sea salt and water). Use this onions, shallots, carrots and beetroot.

How to sterilise jars?
It is essential that before jarring or bottling any food for storage, that you sterilise the glass jar or bottle first. There are many methods for doing this, all of them relatively straight-forward:
- Firstly, you can wash the glass and lids in hot soapy water, rinse them (do not towel dry) and place on a tray in the oven at 140CFan/160C/320F for 15 minutes, removing when you are ready to fill. This is my preferred method.
- You can put them through a dishwasher cycle, removing them from the dishwasher as soon as the cycle has finished and filling them immediately afterwards. I only use this method if my dishwasher happens to be going on.
- You can boil the jars and lids in a large pan for 10-15 minutes. I’ve never used this method as it involves boiling water and leads to a risk of scalding.
- Finally, you can wash and rinse the glass jars, placing them into the microwave wet and then cooking them on high for 60 seconds. However, the lids would have to be boiled in a pan of water separately for 10-15 minutes as metal cannot go in the microwave!! I've never used this method as it involves 2 separate processes which I think is a bit of a faff!]
Recipe variations
- Vegetables - you can adapt the vegetables to suit your own tastes. Try adding celery, shallot, red onion, fresh chillies, fresh slices of root ginger.
- Fresh herbs - add fresh herbs to the pickle, placing them into the jar with the vegetables before pouring over the pickling liquid. Try dill, basil, parsley, rosemary tarragon or thyme.
- Spices - you can add a variety of whole dried spices to flavour the pickling liquor, try mustard seeds, chilli flakes (red pepper flakes), cinnamon sticks, coriander seeds, cloves, saffron strands, mace.
- Vinegar - I used white wine vinegar, as I prefer a clear vinegar which doesn't colour the vegetables. You can also use distilled white vinegar, red wine vinegar or apple cider vinegar. They will all bring a different flavour to the pickle, so feel free to experiment.
Serving suggestions
- Great on a cheeseboard or cold cuts platter, alongside some crusty bread, grapes and olives.
- The perfect addition to add a tangy crunch to salads and sandwiches.
- I like to serve pickles with barbecued food, the sharp pickle cutting through the smoky meats.
- Add to a meze platter, alongside other vegetables, hummus and dips. For more recipes read my Easy Mezze Platter Ideas post.
Useful hints and tips
- Don't skip the salting/brining process as this does affect the texture of the pickled vegetables and keeps them crisp. I recommend salting/brining for at least 6 hours, ideally 12 hours overnight.
- For the best flavour I recommend storing the pickles in the fridge for a week before opening as this will help the pickle flavour develop. However, if you can't wait you can eat them after a couple of hours, they just won't be quite so pickled.
- Once opened always ensure the vegetables are completely covered in pickling juice to stop them going bad.
- Containing no dairy these pickles are suitable for dairy free and vegan diners.
- Allergy advice: gluten free, dairy free, egg free, soya free and nut free. For comprehensive and detailed allergy advice go to Allergy UK.
FAQs
Yes, when pickling vegetables I recommend salting or brining them first in salty water. These processes help remove excess water from the vegetables, keeping them crisp and improving the texture. Without salting the vegetables like this they will absorb too much vinegar when pickling and become mushy.
These are quick pickles which are best stored in the refrigerator, enjoying them at their best within 8 weeks, although they will store for up to 3 months. Always ensure the vegetables are completely submerged in the pickle juice.
The best jars for pickling are airtight glass jars, with a tight-fitting lid. I recommend jars with a clip lid, like a Mason or Kilner jar.
Pin the recipe
Additional recipe suggestions
If you like this recipe then try some similar pickle and preserve recipes:
- Quick Courgette & Shallot Pickle
- Quick Pickled Radishes
- Italian Marinated Aubergines
- Mulled Pears
- Piccalilli
- Spicy Sweet Chilli Jam
Summer Pickled Vegetables Recipe
Equipment
- chopping board
- Kitchen knife
- 2 large bowls
- large sieve
- kitchen paper
- 1 x 1.5 L Mason/Kilner jar
- Saucepan
Ingredients
- 4 mini cucumbers (sliced into rounds)
- 1 courgette (zucchini) (sliced into rounds)
- 1 bell pepper (any colour) (deseeded and sliced)
- 8 radish (sliced into rounds)
- 20 cherry tomatoes
- 1 carrot (sliced into rounds)
- 20 fine green beans (cut into 2.5cm/1" batons)
- ½ red onion (sliced)
- 5 spring onions (green onions)
- 300 ml white wine vinegar
- 200 ml cold water
- 100 g caster sugar
- 1 bay leaf
- 10 black peppercorns
- 6 allspice berries
- 3 dried chillies
Brining liquid
- 800 ml cold water
- 120 g fine sea salt
Dry salting
- fine sea salt (between each layer of vegetable)
Instructions
- Prepare all the vegetables. Make a brining liquid by dissolving the salt in the cold water.
- Place the cucumber, courgette, radish, bell pepper and tomatoes in a bowl. Pour some fine sea salt between each layer of vegetable and mix thoroughly to coat the fruits and vegetables. Cover and set aside for at least 6 hours, or 12 hours overnight.
- Place the carrots, green beans and red onion and spring onions into the bowl with the brining liquid. Cover and set aside for at least 6 hours, or 12 hours overnight.
- Next day, prepare and sterilise a 1.5L Mason/Kilner jar.
- Take both bowls of vegetables and drain off the salted water, then thoroughly rinse the vegetables under cold running water to remove as much salt/brine as possible. Place onto kitchen paper and pat dry.
- Place the dried vegetables into the warm, sterilised jar.
- Place the vinegar, sugar and spices into a saucepan, bring to a boil and cook for 5 minutes.
- Pour the pickling liquid, including all the dried spices, over the vegetables and seal the jar tightly.
- Once cooled place the pickled into the fridge. They can be enjoyed after a couple of hours, but I recommend leaving the pickles for a week before eating, this gives the pickles time to absorb more of the pickle flavour.
- Store in the fridge and enjoy within 8 weeks, although you can store for 3 months.
Notes
• Please note that the nutrition information provided above is approximate and meant as a guideline only •

Janice says
I was so excited when I found your recipe because these are all the veggies I grow in my garden. The recipe was easy to follow and the pickle is delicious.
Lesley says
Thank you Janice, this quick pickle is a great way to use your home grown veggies.