
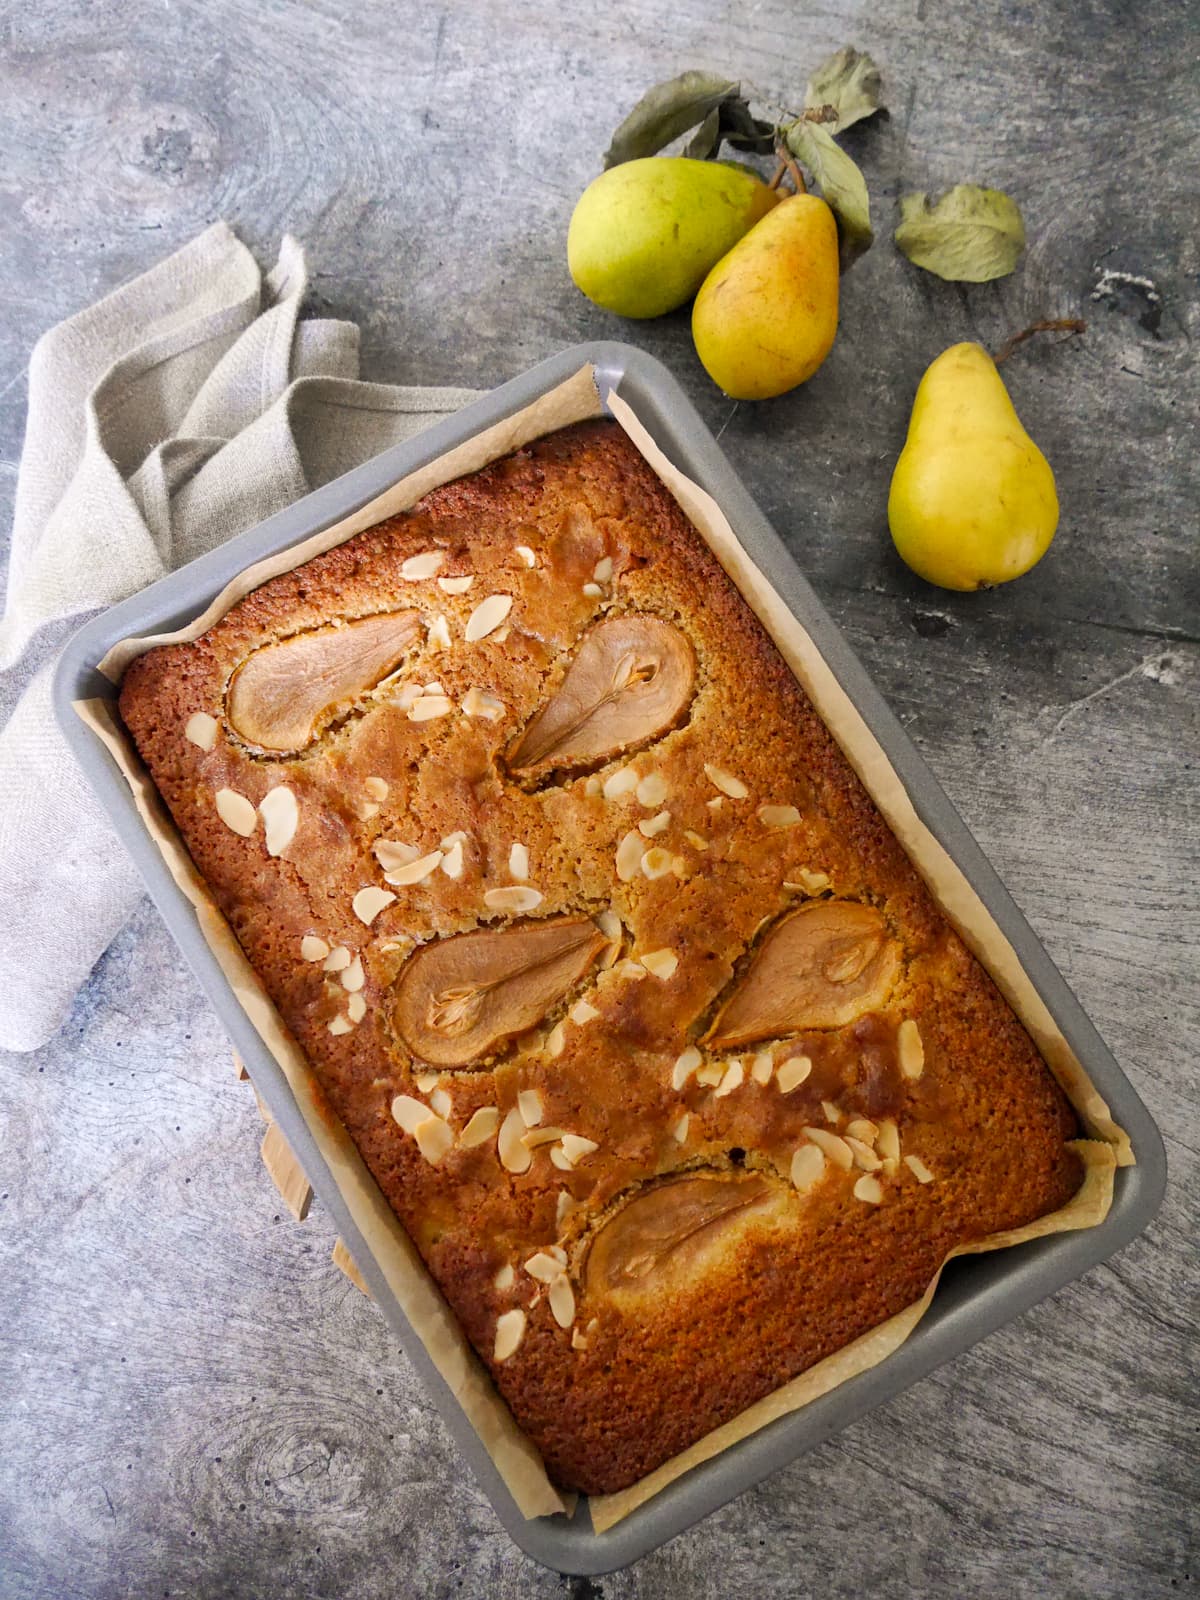
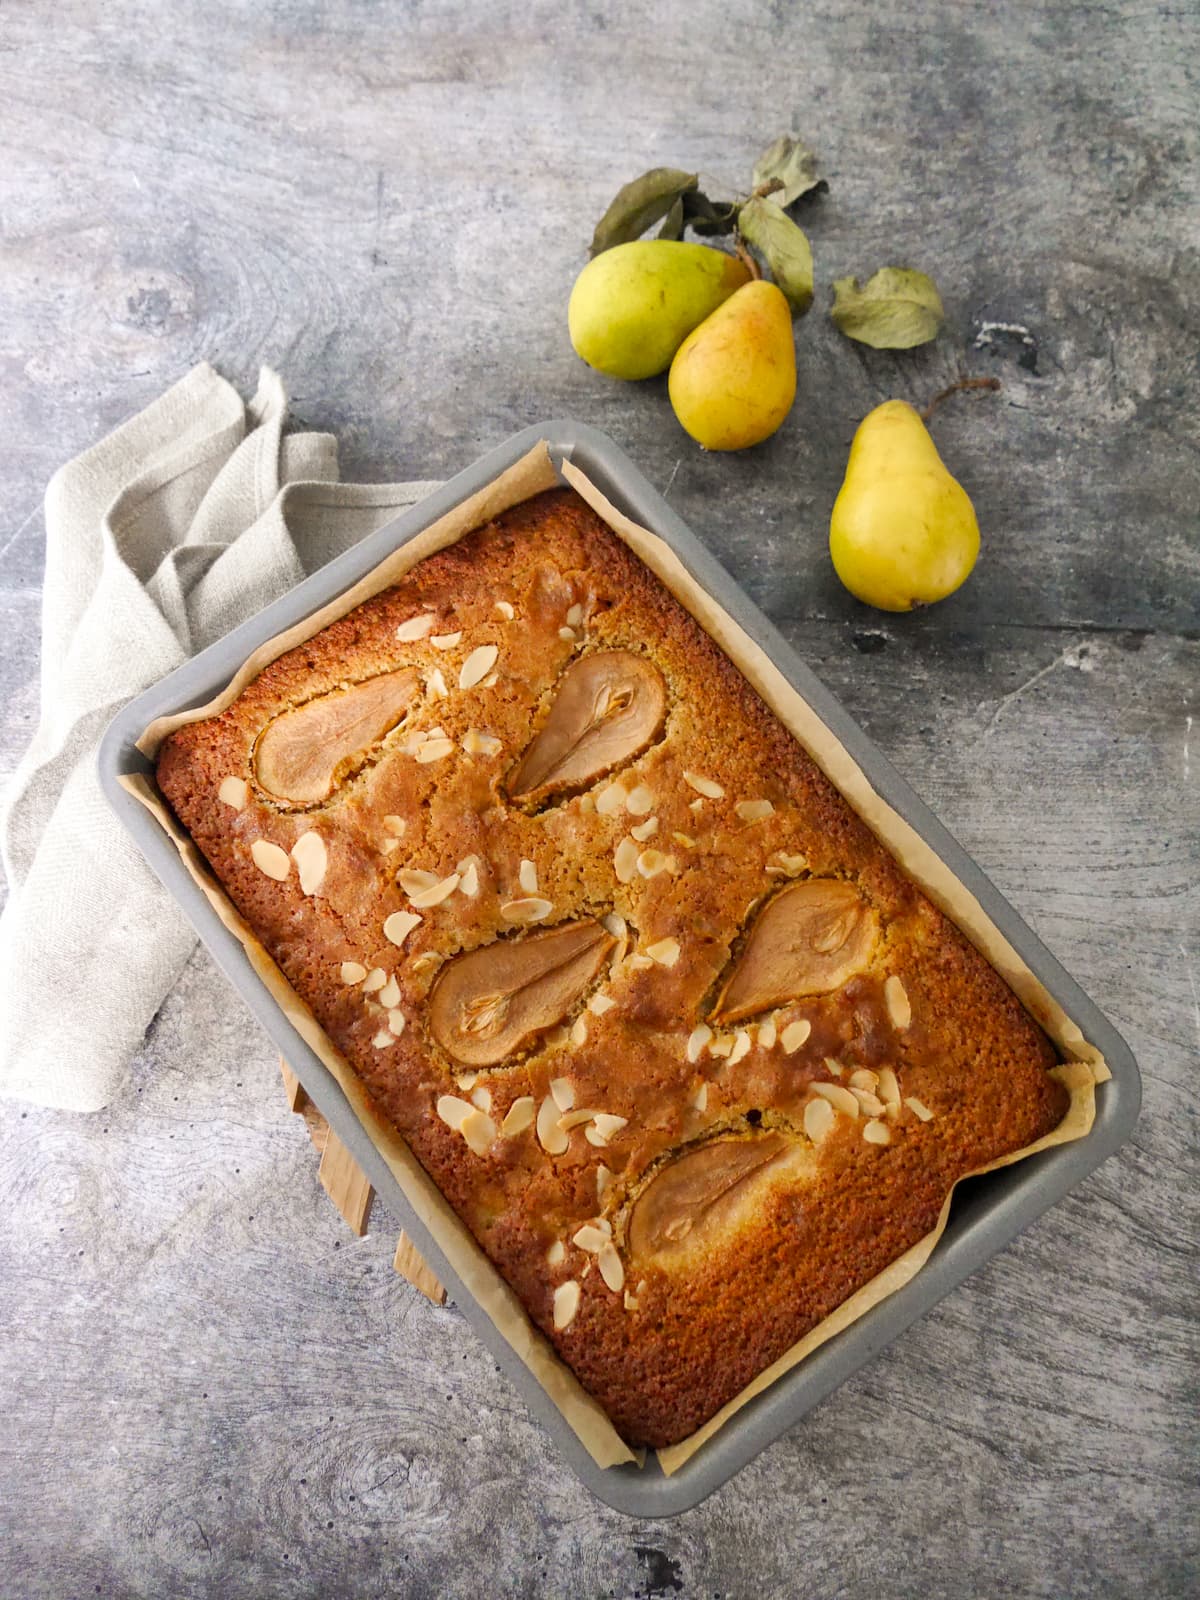
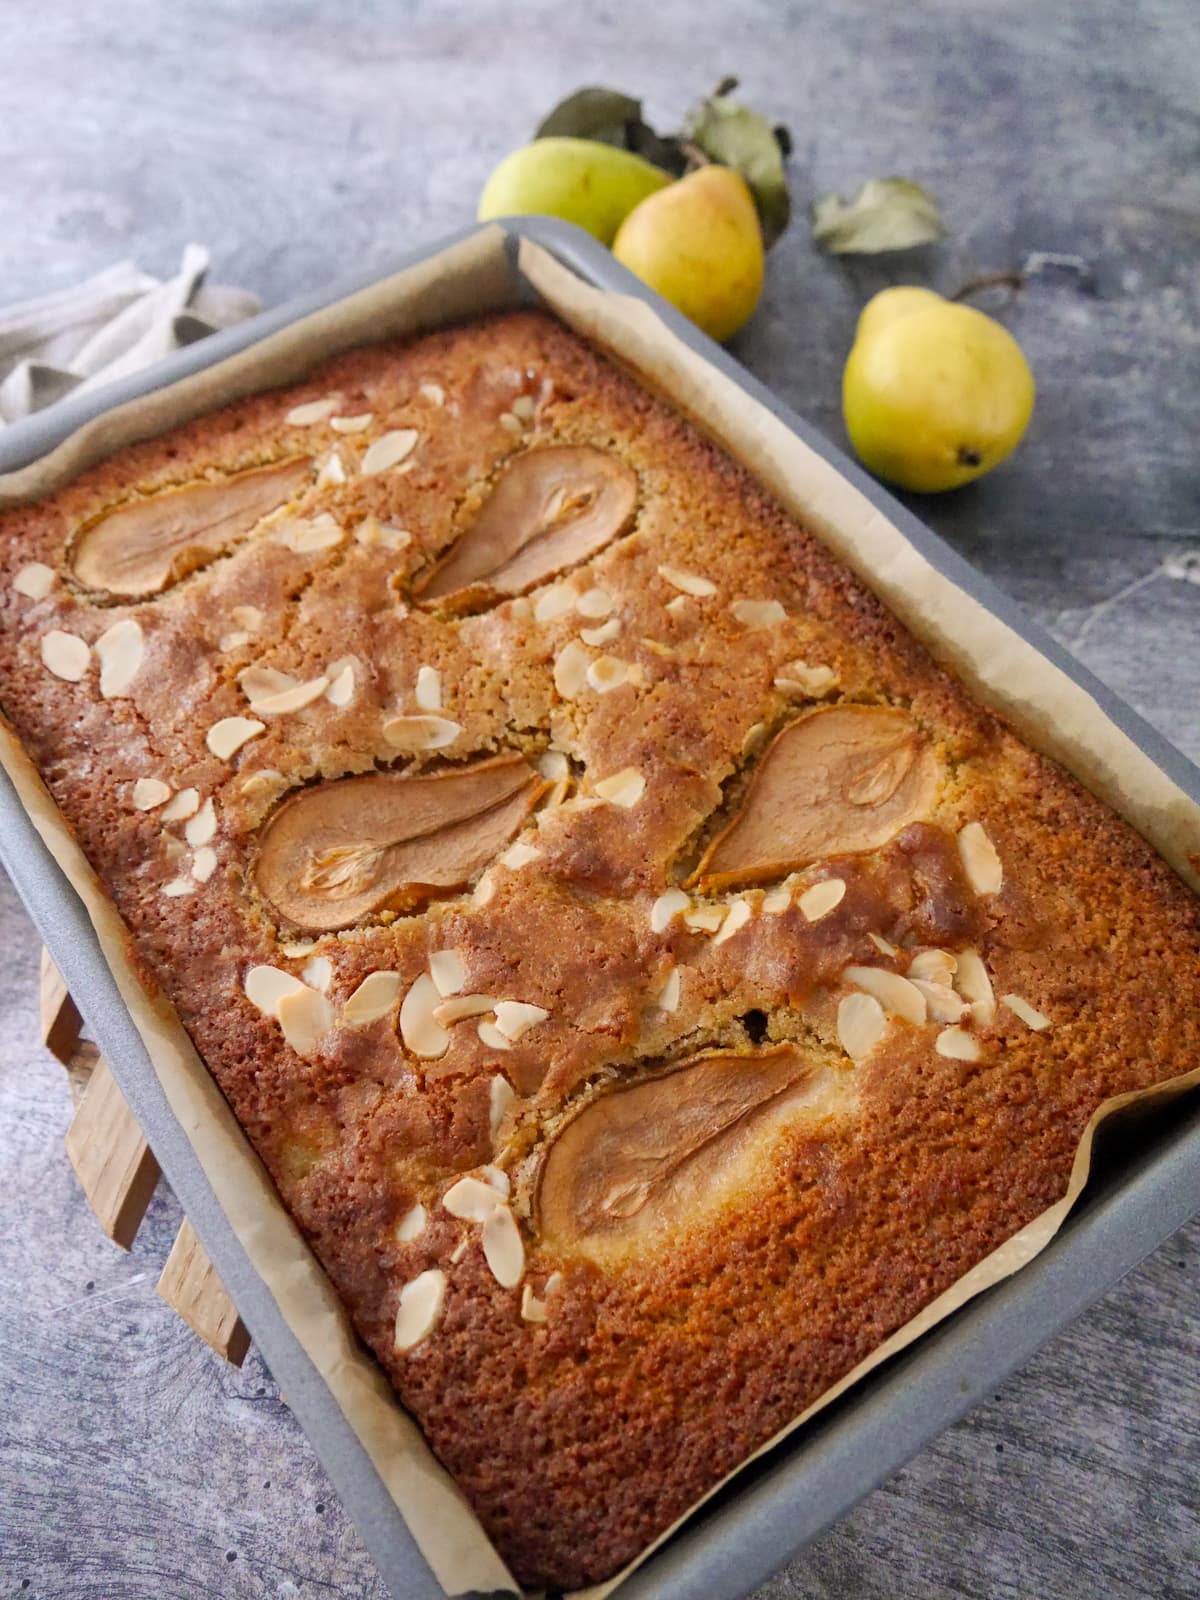
This pear and almond traybake recipe is an easy bake that can be prepared in minutes. Ground almonds form the base of the cake, and fresh diced pear is added to make a deliciously moist cake.
I came up with this recipe after a friend gifted a box of pears, fresh off the tree in her garden. She loves almonds so I decided to come up with a simple almond cake, using ground almonds as the base, and flavouring the cake with the beautiful fragrant pears.
I love using ground almonds in cakes as they add great flavour and texture to a cake. I also added some gluten free self raising flour, rather than regular flour, making this a gluten free almond cake.
Why you'll love this recipe
- Make ahead as this cake will store for up to 3 days on the counter, or 5 days in the fridge. This cake also freezes really well.
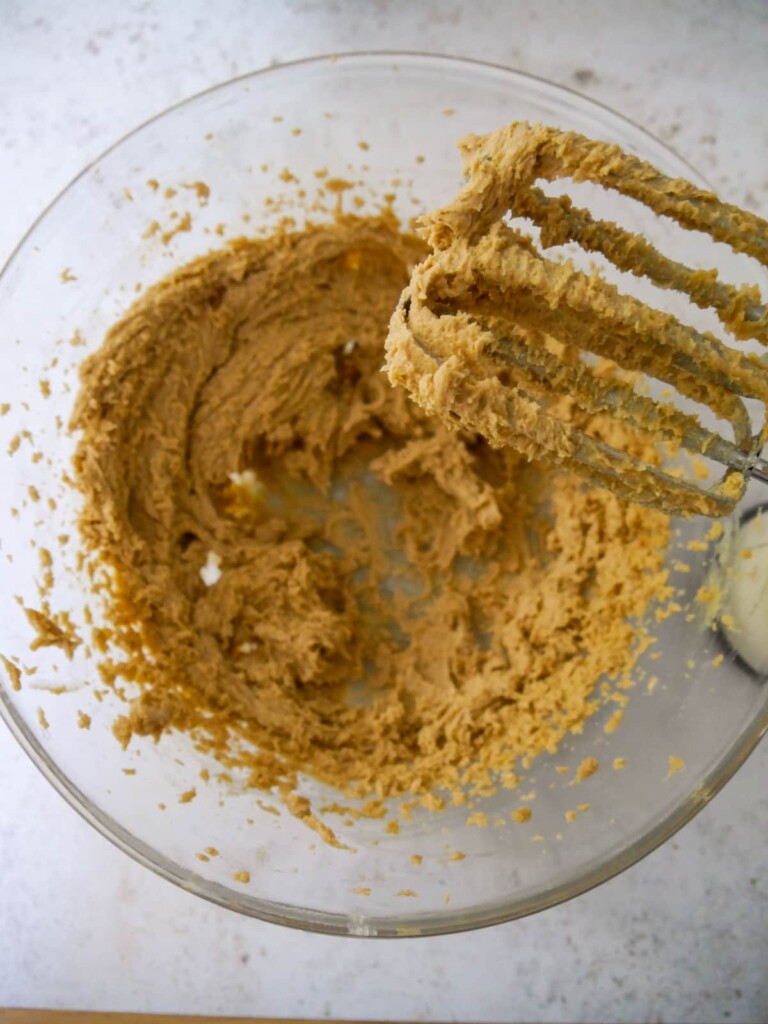
- This is a straightforward bake using simple ingredients. The cake is made using the creaming method (creaming butter and sugar together) which is easy and suitable for all levels of baker.
- Gluten free as the cake batter is made with ground almonds and gluten free flour.
Recipe ingredients
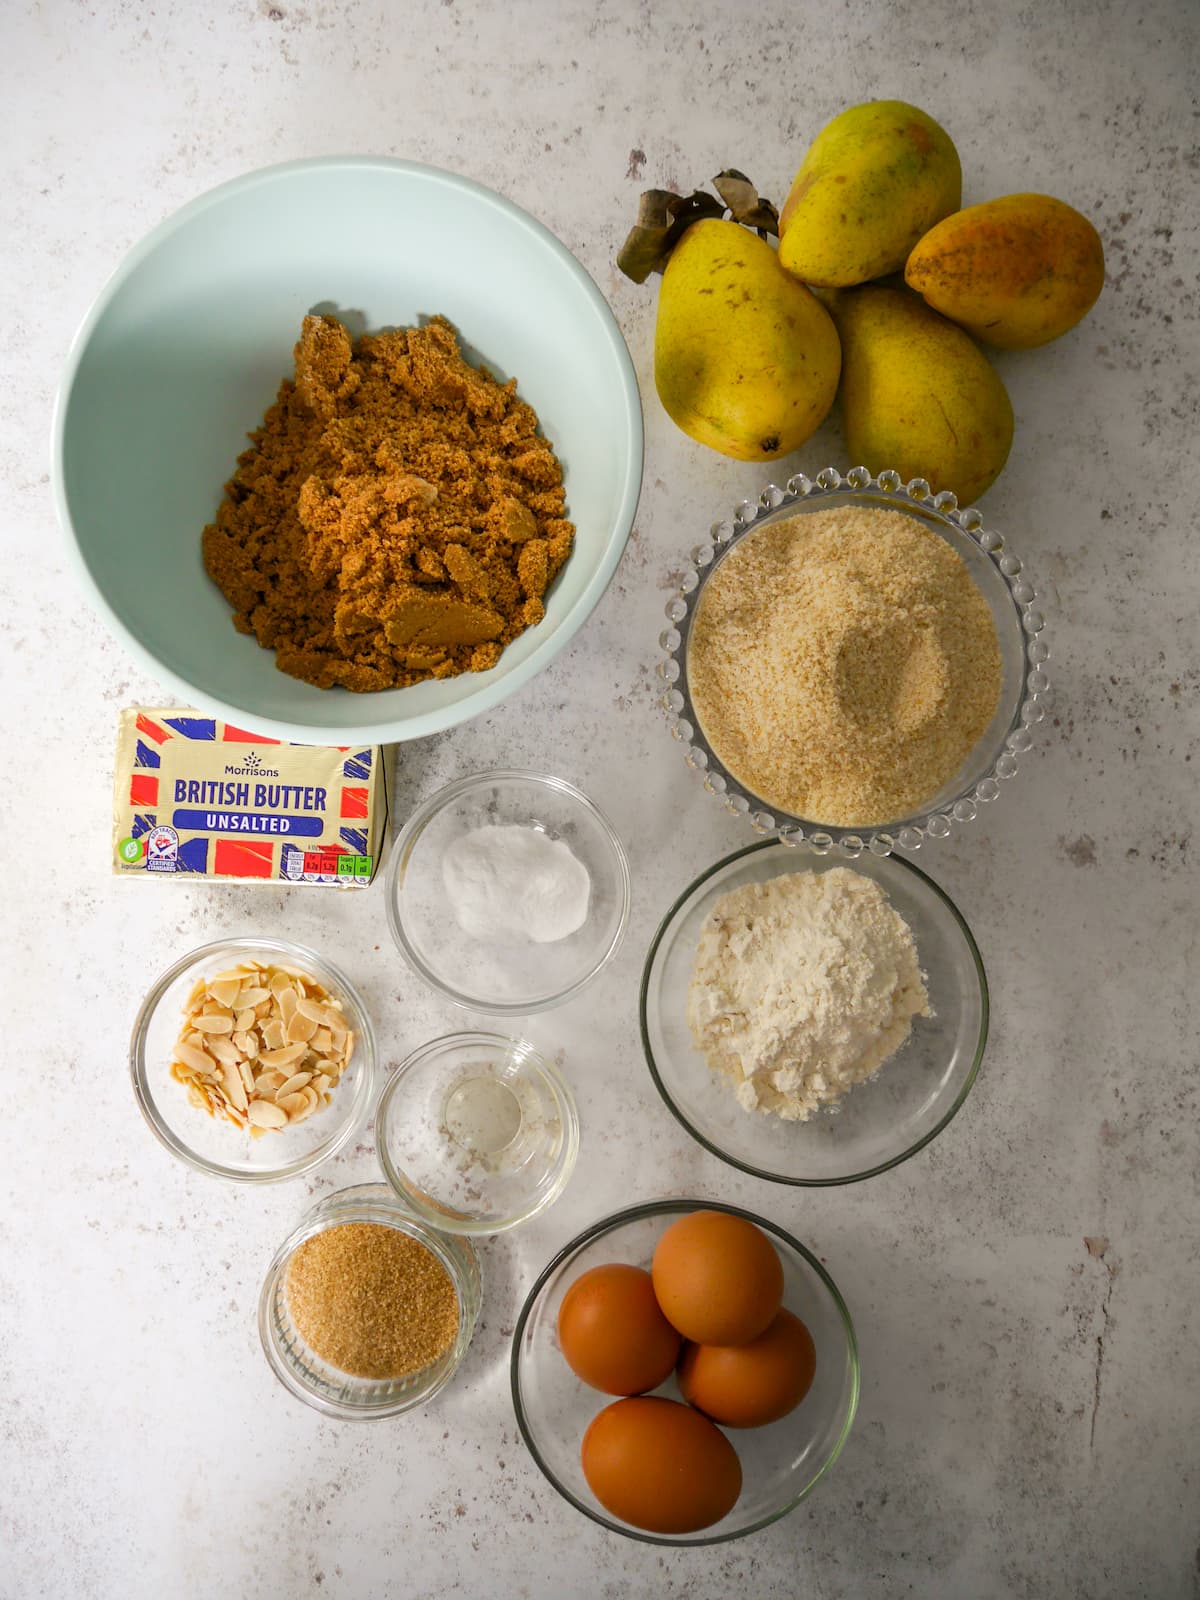
- Butter - I've used unsalted butter so I add a pinch of fine sea salt to the cake batter to help balance the sweetness. If using salted butter you can leave out the salt.
- Sugar - I like to use soft brown sugar in this recipe as it has a deeper molasses flavour. I also sprinkle a tablespoon of demerara sugar over the cake batter before baking.
- Eggs - I use 3 large free range eggs to bake this cake.
- Almond extract - I flavour the cake batter with some almond extract. I prefer extract to essence as it has a stronger depth of flavour
- Almonds - ground almonds form the base of this cake which adds both flavour and texture. I also like to scatter some flaked almonds over the top of the cake, which not only decoration but to add a toasted nut flavour.
- Flour - I use gluten free self raising flour in this cake recipe.
- Raising agent - I use a little baking powder to help give the cake an extra lift.
- Pears - I've used both conference and Williams pears in this recipe and both work equally well. Be sure to use firm pears!
LESLEY'S TOP TIP: This cake is moist, but you can never really account for the water content in the fruit used. For this reason I only ever use firm pears, anything softer than that and the fruit is too juicy and you can end up with a soggy cake.
How to make pear and almond traybake
- Preheat the oven to 180C/160CFan/350F. Line the baking tray with baking parchment.
- Place the butter and sugar into a large mixing bowl and beat together using an electric hand mixer for 2-3 minutes until light and fluffy.
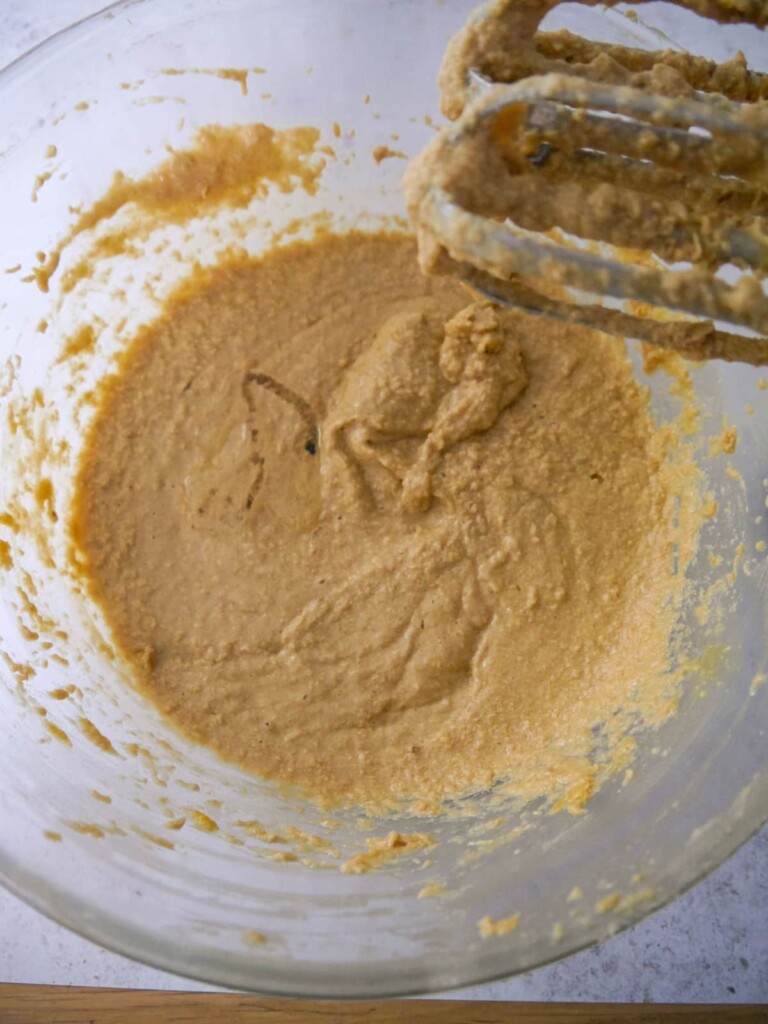
- Add the eggs, one at a time, beating well after each egg is added. Finally beat in the almond extract.
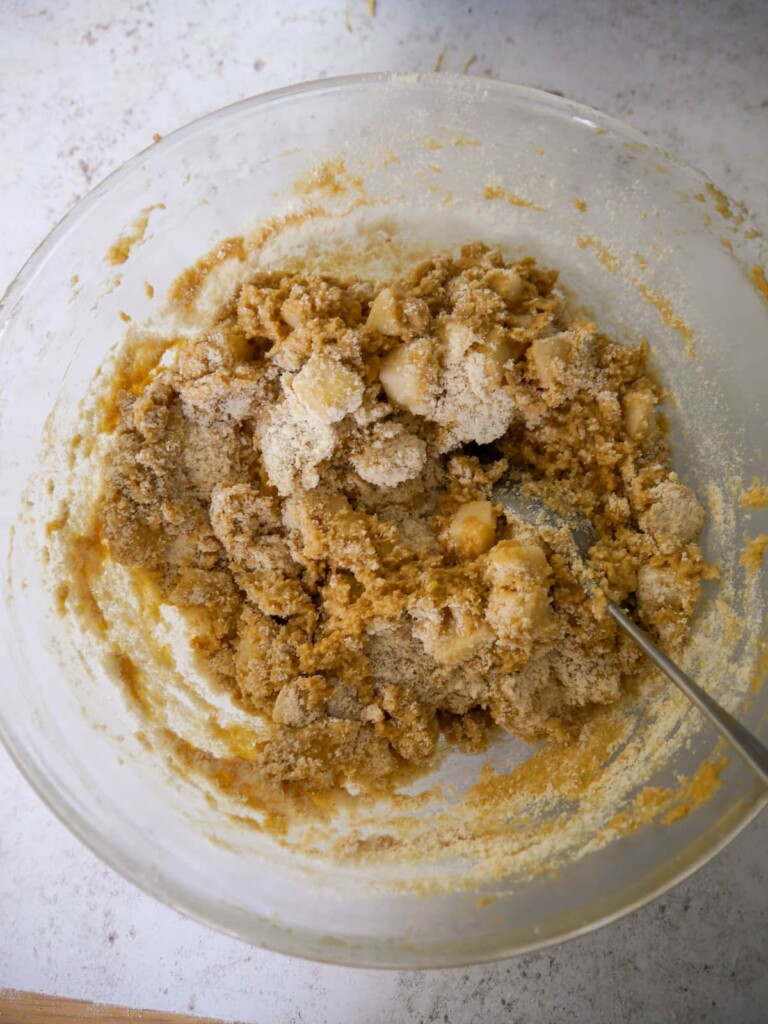
- Place the ground almond, gluten free flour, baking powder and salt into a medium bowl and stir to combine.
- With the hand whisk running, spoon the ground almond mixture into the wet ingredients and beat well. Continue until all the dry mixture has been added.
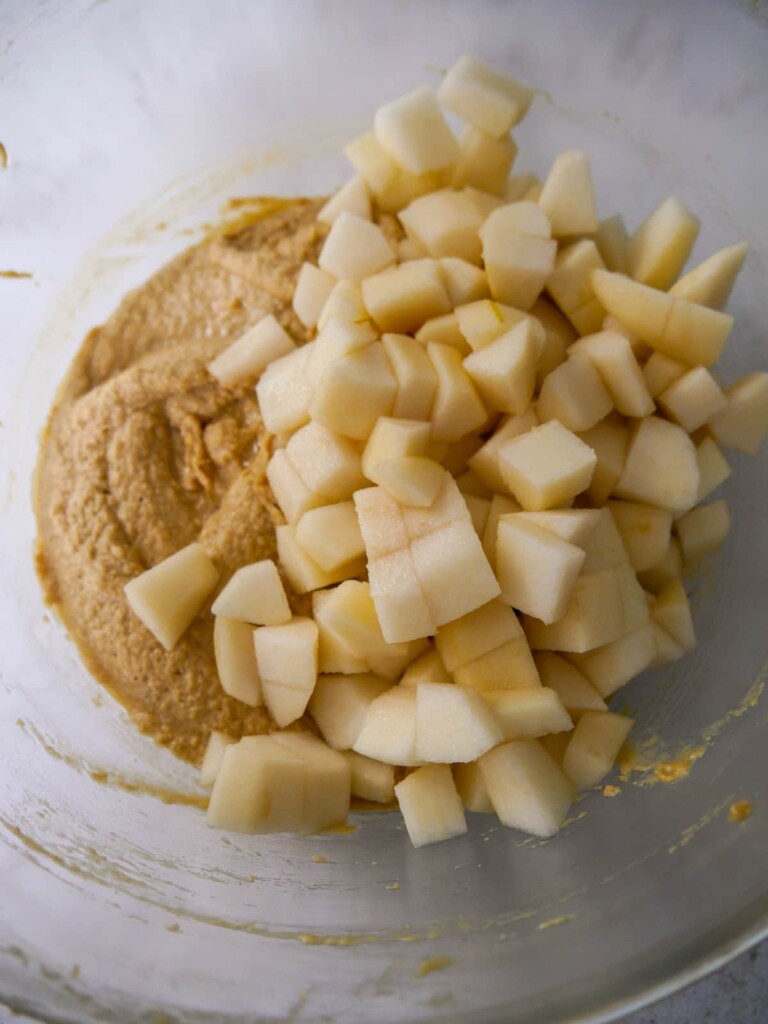
- Now stir through the diced pears and stir until well combined.
- Scrape this mixture into the prepared baking tray and using a flat knife, gently spread the cake batter evenly across the tray.

- Scatter over the flaked almonds and sprinkle on the demerara sugar. You can also add some thin slices of fresh pear to decorate if you wish, this is entirely optional.
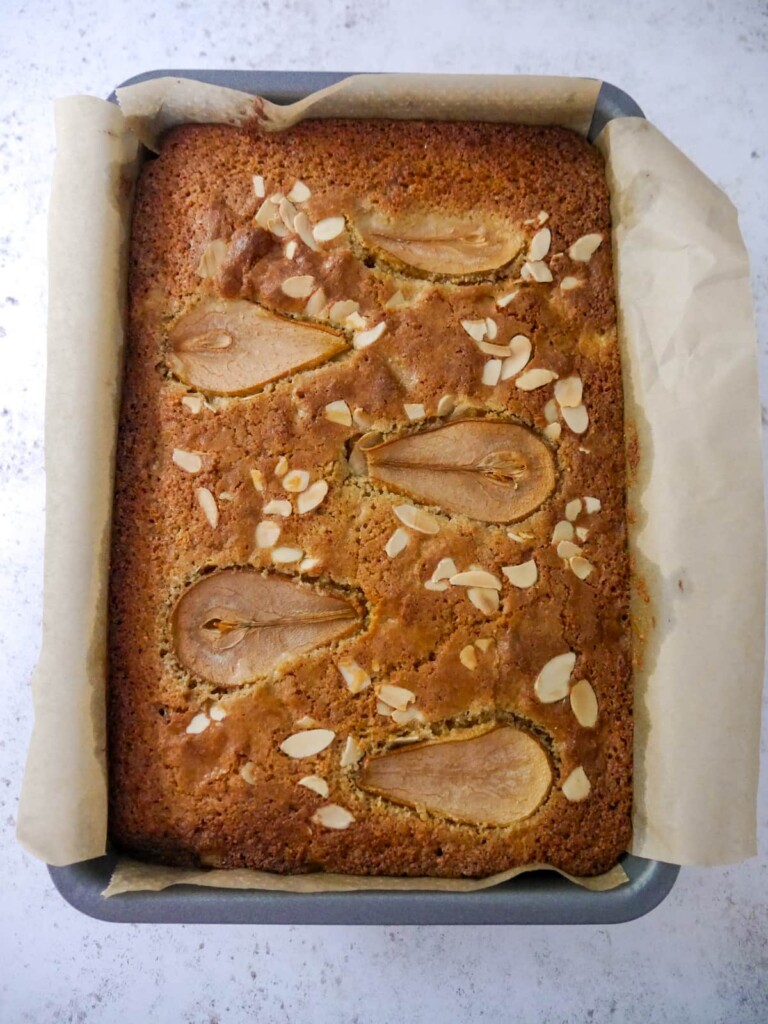
- Place the baking tray into the middle of the hot oven and bake for 45 minutes, or until a skewer inserted into the centre of the cake comes out clean.
- Remove the tray from the oven and set aside on a wire cooling rack. Allow the cake to cool completely in the tray before slicing and serving.
Recipe variations
- Flour - if you aren't worried about this cake being gluten free, you can swap the gluten free flour for regular self-raising flour.
- Fruit - this recipe would work equally well with other fruits like apples, peaches or plums.
- Almond - I enhanced the almond flavour with some almond extract, but you could swap this for vanilla extract if you prefer.
- Decoration - I've decorated the cake with some very thin slices of pear, flakes almonds and demerara sugar. These toppings are entirely optional and you can leave them off if you would prefer.
Serving suggestions
This moist cake is delicious served on it's own with a cup of tea, a perfect afternoon tea treat. However, you can also warm it up and serve as a pudding, it would be delicious with a side of warm custard or vanilla ice cream.
Useful hints and tips
- Take the butter out of the fridge a good couple of hours before you want to start baking as this will make the creaming process a whole lot easier.
- An electric stand or hand mixer makes light work of creaming the butter and sugar together. You can also use a wooden spoon and a bit of elbow grease to beat the ingredients together.
- I have used a rectangular baking tray however you could use a round or square cake tin too. Just adjust cooking times accordingly.
- Gluten free, this cake is made with ground almonds and gluten free flour, therefore suitable for coeliacs or anyone following a gluten free diet.
- Allergy advice: gluten free, soya free. For comprehensive and detailed allergy advice go to Allergy UK.
FAQs
Yes, pear and almond is a classic flavour combination, where neither flavour overpowers the other.
Once baked and cooled store the cake in an airtight container on the counter top for up to 3 days. If you place the cake in the fridge it will last for up to 5 days.
Yes, once the cake has been baked and cooled decide whether you want to freeze the whole cake, or freeze it in slices - I prefer this method. If sliced, place some baking parchment between each slice of cake to stop them sticking together. Then place the cake into an airtight container or Ziplock bag and store in the freezer for up to 3 months. When ready to enjoy defrost the cake at room temperature.
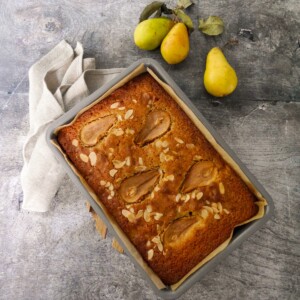
Pin the recipe

Additional recipe suggestions
Try some of my favourite seasonal bakes:
- Pear & Ginger Sponge Puddings
- Spicy Pumpkin Bundt Cake
- Sticky Gingerbread Bundt Cake
- Spiced Apple Cake
- Eve's Pudding
- Plum & Almond Galette
- Pumpkin & Chocolate Muffins
For more cake baking inspiration have a look at my Best Cake Recipes post, which is packed full of recipes, hints and tips to help you bake.
Pear & Almond Traybake Recipe (Gluten Free)
Equipment
- Baking tray 30x20x5cm (12x8x2 inch)
- baking parchment
- electric hand mixer optional
- large mixing bowl
- Medium mixing bowl
- weighing scales
- measuring spoons
- Vegetable peeler
- Kitchen knife
Ingredients
- 200 g unsalted butter (softened)
- 200 g light muscovado sugar
- 3 large eggs
- 1 teaspoon almond extract
- 175 g ground almonds
- 75 g gluten free self raising flour
- 2 teaspoon baking powder
- 1 pinch fine sea salt
- 400 g firm pears (pared, cored and diced small, plus one additional pear for optional decoration)
- 2 tablespoon flaked almonds
- 1 tablespoon demerara sugar
Instructions
- Preheat the oven to 180C/160CFan/350F. Line the baking tray with baking parchment.
- Place the butter and sugar into a large mixing bowl and beat together using an electric hand mixer for 2-3 minutes until light and fluffy.
- Add the eggs, one at a time, beating well after each egg is added. Finally beat in the almond extract.
- Place the ground almond, gluten free flour, baking powder and salt into a medium bowl and stir to combine.
- With the hand whisk running, spoon the ground almond mixture into the wet ingredients and beat well. Continue until all the dry mixture has been added.
- Now stir through the diced pears and stir until well combined.
- Scrape this mixture into the prepared baking tray and using a flat knife, gently spread the cake batter evenly across the tray.
- Scatter over the flaked almonds and sprinkle on the demerara sugar. You can also add some thin slices of fresh pear to decorate if you wish, this is entirely optional.
- Place the baking tray into the middle of the hot oven and bake for 45 minutes, or until a skewer inserted into the centre of the cake comes out clean.
- Remove the tray from the oven and set aside on a wire cooling rack. Allow the cake to cool completely in the tray before slicing and serving.
Notes
• Please note that the nutrition information provided above is approximate and meant as a guideline only •


Chloe says
Easy to make and the texture was just wonderful!
Lesley says
Thank you Chloe, I'm glad you enjoyed the cake.
Linda Wells says
can this be made in advance. thanks
Lesley says
Hi Linda, yes this is a fairly moist cake so it stores well in an airtight container on the countertop for a couple of days.
Hazel says
I love the combination of pears and almonds. I enjoyed making this traybake and the whole family loved eating it.
Lesley says
Thank you Hazel I'm really glad you all enjoy this bake.